The Add Leads Under an Affiliate workflow action allows you to automatically assign leads to specific affiliates within chosen campaigns. This feature helps you streamline lead management, ensure accurate affiliate crediting, and enhance engagement by connecting leads with the right affiliate partners—saving time and reducing manual effort.
TABLE OF CONTENTS
- What is the “Add Leads Under an Affiliate” Action?
- Key Benefits of Using the Add Leads Under an Affiliate Action
- How to Configure the Workflow Action
- Frequently Asked Questions
What is the “Add Leads Under an Affiliate” Action?
This workflow action connects your lead generation process directly with your affiliate management system. When triggered, it automatically assigns new leads under selected affiliates and campaigns, ensuring every contact is tracked and attributed properly for performance reporting, commissions, or follow-ups.
The action can be used manually or automatically, depending on how you prefer to manage affiliate assignments.
Key Benefits of Using the Add Leads Under an Affiliate Action
Understanding how this feature enhances your affiliate workflow helps you maximize automation potential and minimize human error. Below are the key advantages of implementing this action.
- Automation: Automatically assign leads to the correct affiliate without manual input.
- Accuracy: Prevent errors in affiliate tracking by syncing directly with campaign data.
- Flexibility: Choose from multiple assignment methods — Manual, Auto-Track via Attribution, or Custom Mapping.
- Integration: Seamlessly connect workflow automations, forms, and affiliate tracking links.
- Scalability: Handle large affiliate networks efficiently by automating lead routing.
How to Configure the Workflow Action
Setting up the Add Leads Under an Affiliate workflow action allows you to assign leads to affiliates in your campaigns automatically or manually, depending on how your leads are captured.
The following steps walk you through setting up the workflow trigger, adding the action, choosing a configuration method, and publishing your workflow.
Access the Workflow Builder
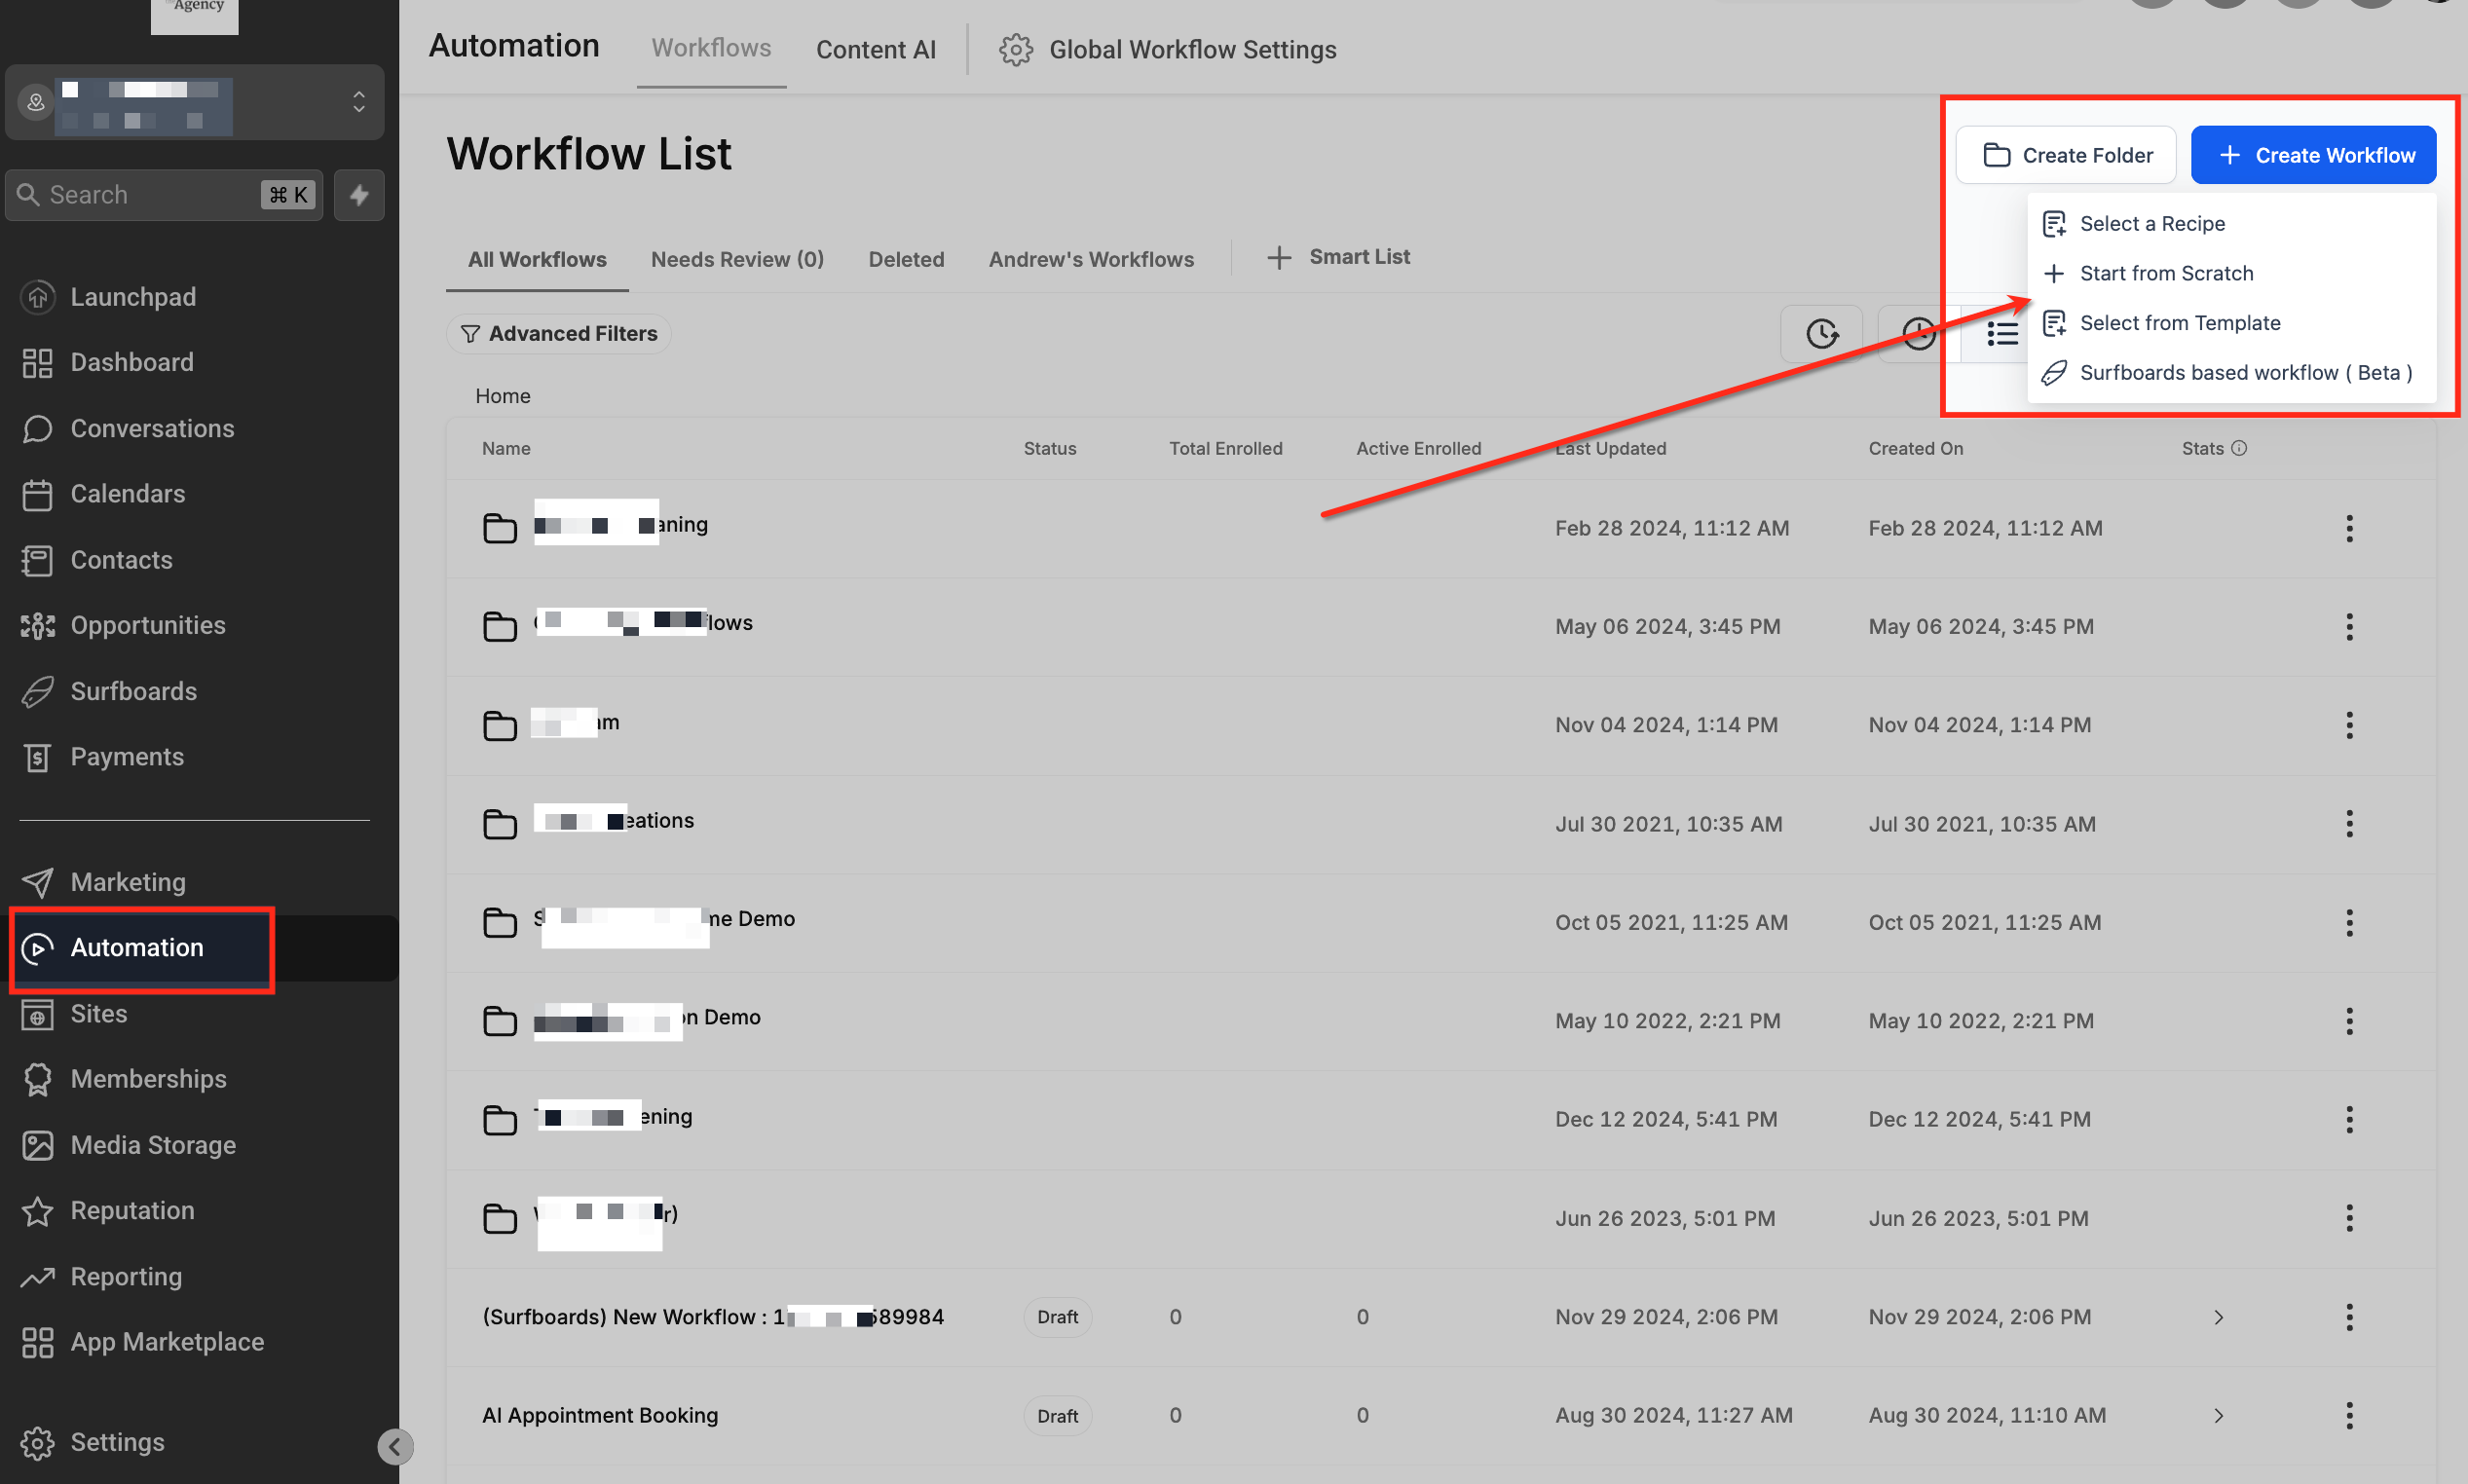
Navigate to the Automation section in the left-hand menu, then select Workflows. From the Workflow List, click Create Workflow in the upper-right corner.
You can choose to start from a recipe, template, or from scratch, depending on your workflow needs. This step opens the workflow builder, where you can begin setting up the structure of your automation.
Add a Workflow Trigger
Before adding the affiliate action, ensure your workflow has a trigger—this determines when a lead will be added under an affiliate.
Without a trigger, no leads will enter the workflow, and the action will not execute.
Common triggers include:
Form Submitted: When a contact completes a specific form.
Tag Added: When a tag is applied to a contact.
Add the Workflow Action
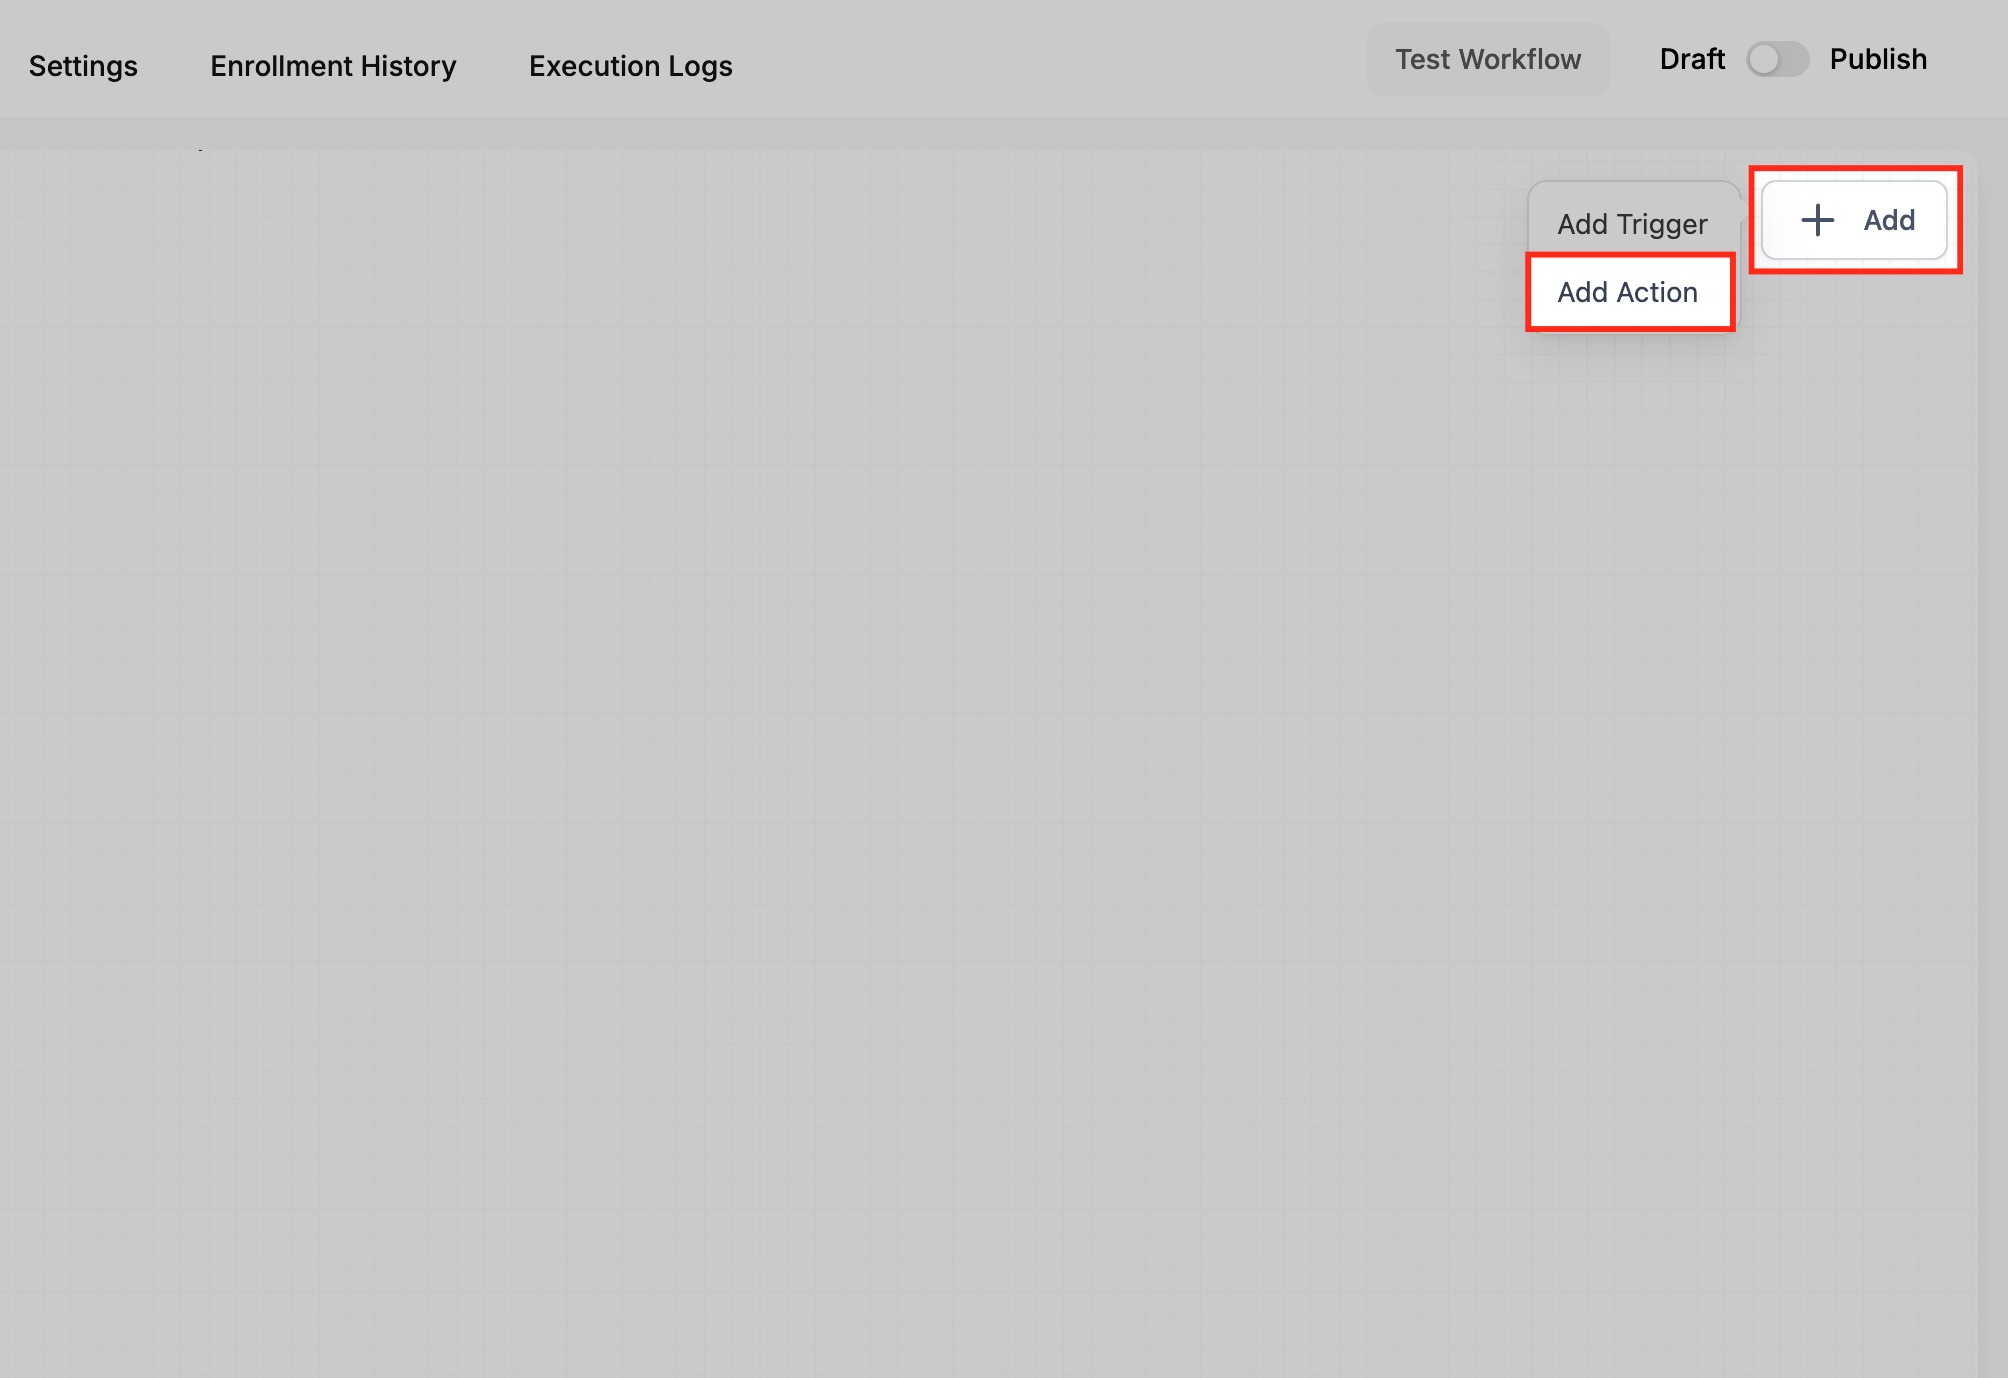
After setting up your trigger, add the Add Leads Under an Affiliate action to the workflow.
Click the + Add button, then select Add Action from the dropdown menu.
This opens the list of available workflow actions where you can choose the appropriate one for your automation setup. This step adds a new action block that will handle your affiliate lead assignment.
Select the Action Type
Once the action menu opens, scroll to the Affiliate section under Actions and select Add Leads Under an Affiliate.
This connects your workflow to the Affiliate Manager system, enabling leads to be added under a specific affiliate campaign and affiliate.
After selecting this action, it appears in your workflow builder, ready for configuration.

Choose Manual Assignment
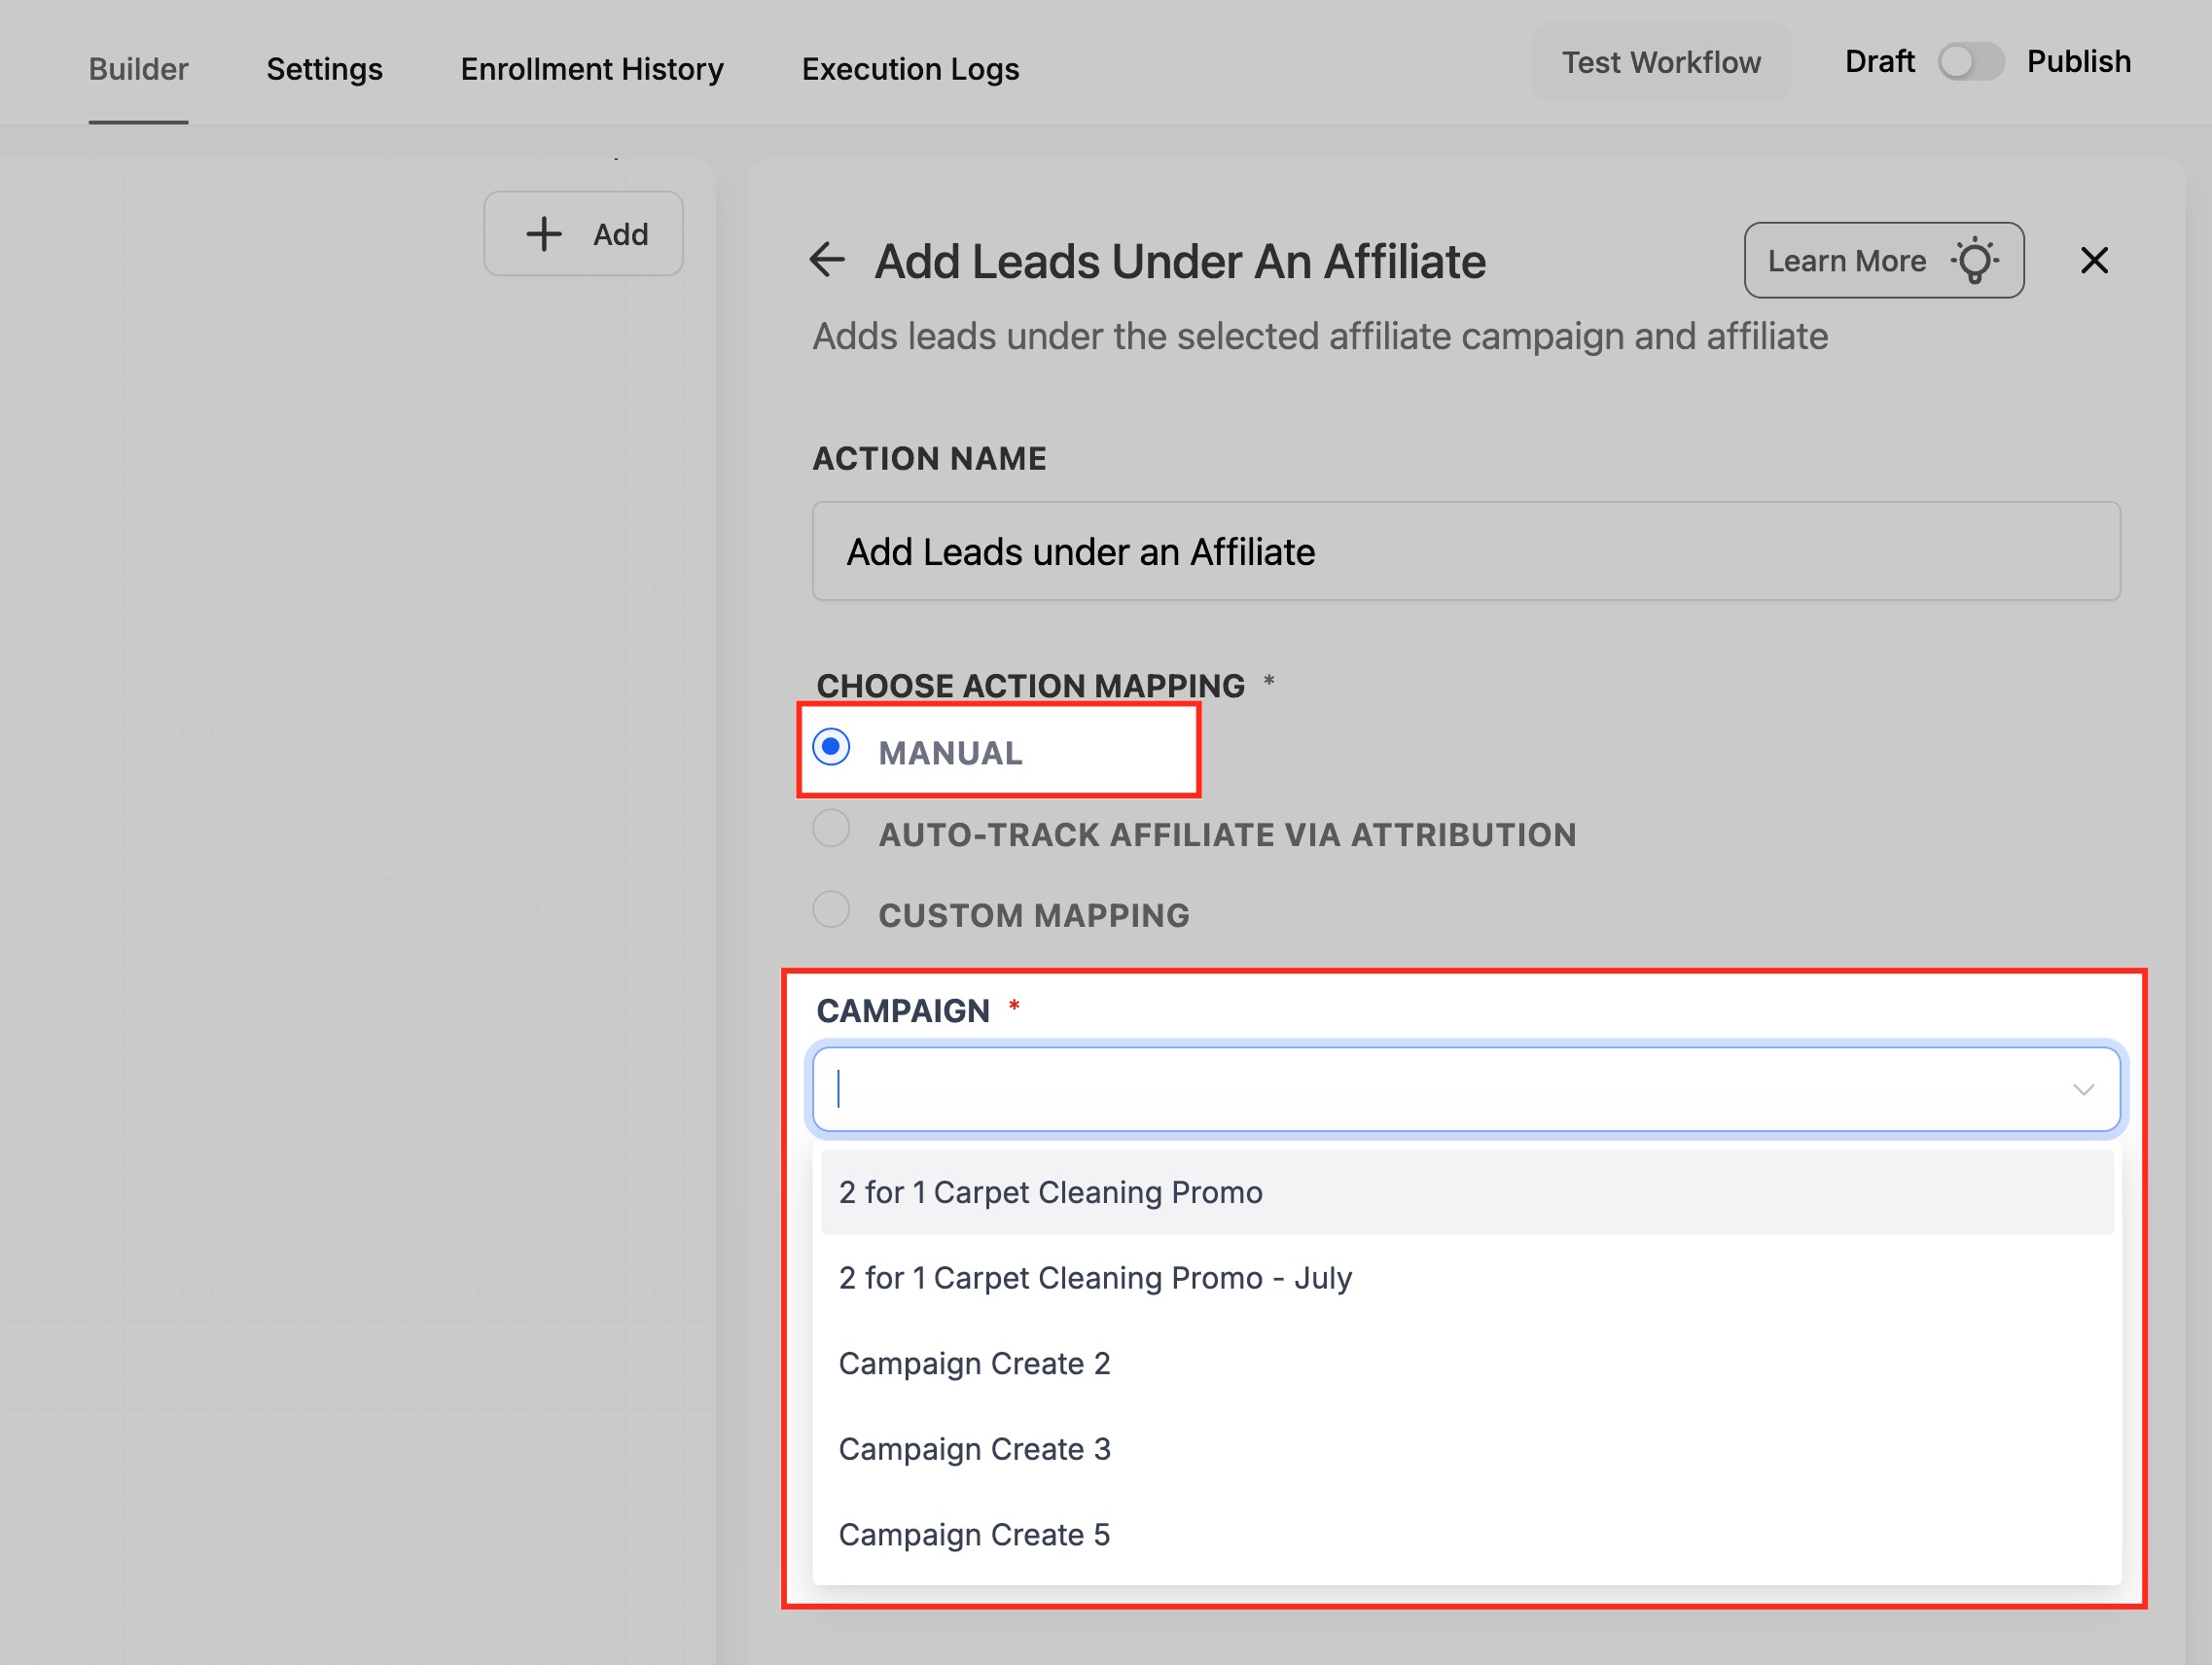
Choose Manual Assignment when you want to directly assign a lead to a specific affiliate and campaign.
This is ideal for fixed lead routing, internal workflows, or cases where affiliate assignments are predetermined.
In this configuration:
- Select Manual under Choose Action Mapping.
- Pick an affiliate Campaign from the dropdown list.
- Once a campaign is chosen, the system displays affiliates linked to that campaign.
- Select the desired Affiliate from the list.
- Save the configuration.
This ensures all new leads entering this workflow are automatically assigned to the chosen affiliate.
Configure Auto-Track via Attribution
The Auto-Track Affiliate via Attribution method automatically assigns leads to affiliates based on tracking links containing an affiliate ID (am_id).
This is best for automated setups where affiliate links are used to drive traffic.
Here’s how it works:
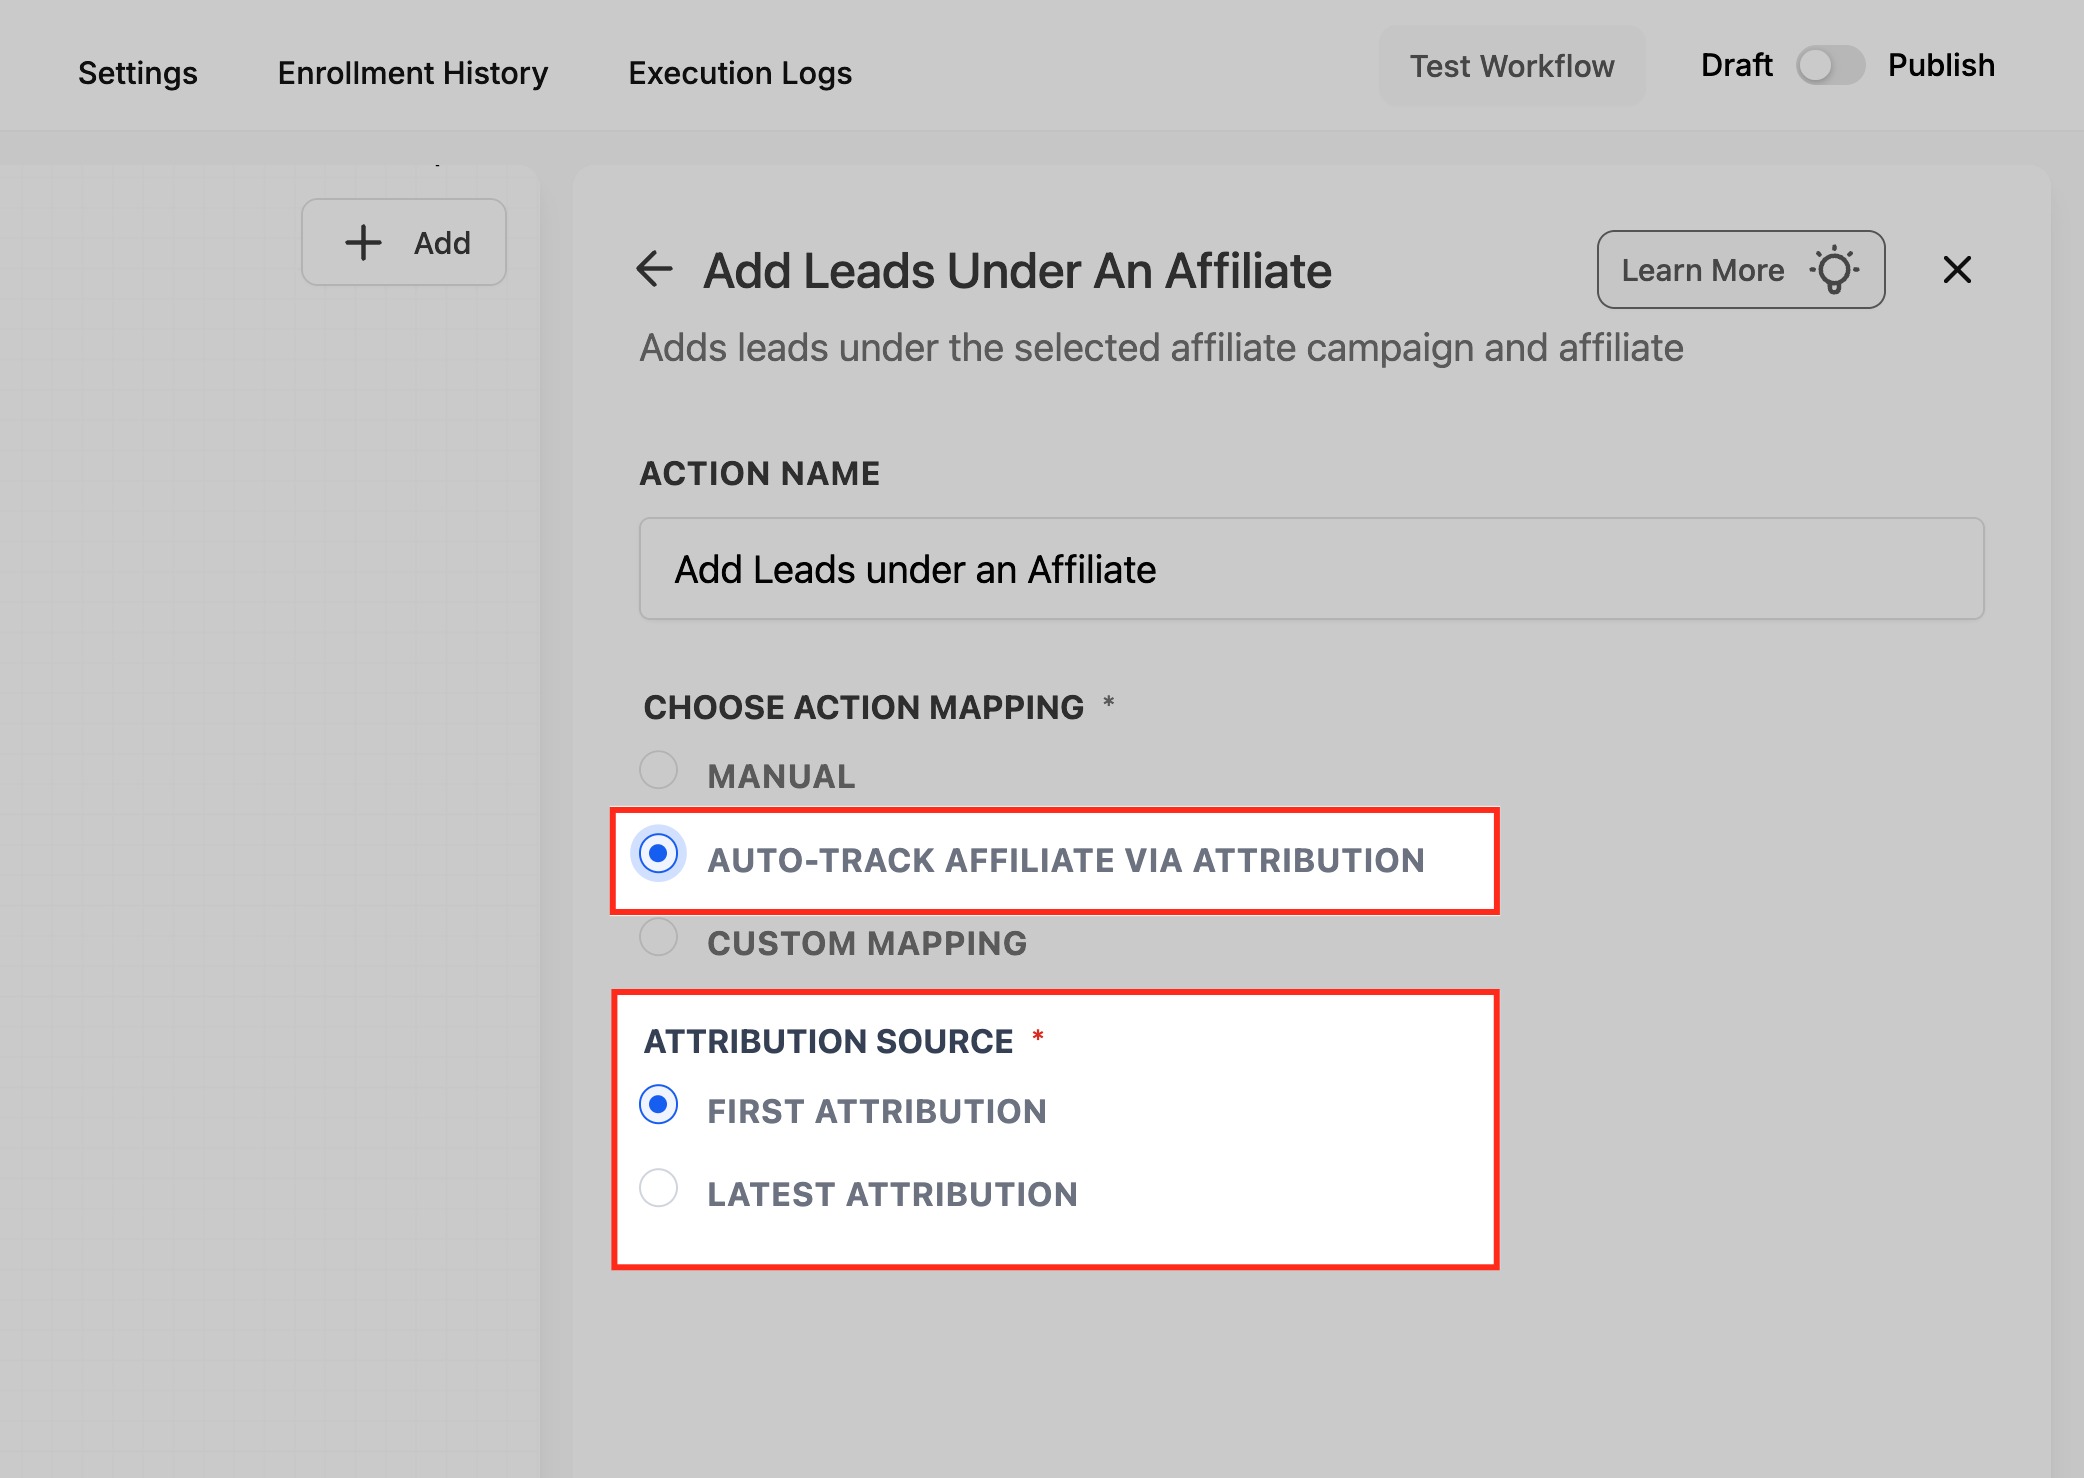
Select Auto-Track Affiliate via Attribution under Choose Action Mapping.
Choose the Attribution Source:
First Attribution: Credits the first affiliate who referred the contact.
Latest Attribution: Credits the most recent affiliate interaction.
Save your configuration.
When leads arrive through affiliate URLs (e.g., https://yourdomain.com/?am_id=1234), HighLevel captures that ID and automatically credits the correct affiliate.
Configure Custom Mapping
Use Custom Mapping to dynamically assign affiliates using data stored in custom fields or workflow variables.
This method is ideal for API integrations or external systems where affiliate data is passed dynamically rather than through tracking links.
To configure:
Choose Custom Mapping under Choose Action Mapping.
Enter the mapping source:
Use a custom field (e.g., {{contact.custom_field.am_id}})
Or a workflow variable (e.g., {{workflow.am_id}})
The system matches the affiliate ID to the correct affiliate record and assigns the lead automatically.
This setup gives you maximum flexibility for advanced routing or integrated affiliate data flows.

Test and Publish Your Workflow
Before activating, test your setup to ensure that affiliates are being assigned correctly. Testing confirms that your triggers, campaign selection, mapping logic, and attribution all function as intended.
Steps to finalize:
Click Test Workflow in the top-right corner to simulate lead entry.
Review the Execution Logs to verify successful affiliate assignment.
Once confirmed, toggle from Draft to Publish to activate your workflow.
Your workflow is now live and ready to automatically assign leads to affiliates using your chosen configuration method.
Frequently Asked Questions
Q: What happens if no matching affiliate is found for an am_id?
The workflow will complete without assigning the lead. Verify that the am_id corresponds to an existing affiliate in your campaign.
Q: Can I manually override an automatically assigned affiliate?
Yes. You can manually reassign affiliates from within the Affiliate Manager if a correction is needed.
Q: Does this action require a sale or reward to work?
No. You can assign a lead under an affiliate even if no reward or dollar amount is involved. Rewards or commissions are only applied when a qualifying purchase or conversion is made through the affiliate’s link.
Q: How is “First Attribution” different from “Latest Attribution”?
“First Attribution” credits the initial referrer, while “Latest Attribution” credits the most recent one before conversion.
Q: Can I assign multiple affiliates to one lead?
No. A lead can be assigned to only one affiliate per campaign to maintain accurate tracking.
Q: How can I test this workflow before activating it?
Use the Test Workflow feature with sample data to ensure correct assignment before publishing.
Was this article helpful?
That’s Great!
Thank you for your feedback
Sorry! We couldn't be helpful
Thank you for your feedback
Feedback sent
We appreciate your effort and will try to fix the article