The Go To workflow action in HighLevel allows you to redirect contacts to another action within the same workflow. It helps connect different workflow branches, reuse existing actions, and control where contacts continue in an automation.
This article explains how Go To works, how to configure or disconnect it, and how to use it in a workflow.
TABLE OF CONTENTS
- What is the Go To Workflow Action?
- Key Benefits of the Go To Action
- How the Go To Action Works
- How to Set Up the Go To Action
- Example
- Frequently Asked Questions
- Related Articles
What is the Go To Workflow Action?
The Go To action redirects a contact from its current position to another action within the same workflow. It is useful when multiple branches need to connect to an existing action or when a contact needs to return to an earlier step.
The Go To action must be placed at the end of a workflow or branch. It cannot be inserted between existing actions.
Key Benefits of the Go To Action
The Go To action helps simplify workflow paths by connecting actions without requiring you to recreate the same steps in multiple branches.
Flexible Workflow Navigation: Redirect contacts to an earlier or later action within the same workflow.
Reduced Duplication: Connect multiple branches to existing actions instead of recreating them.
Simplified Workflow Structure: Keep related automation paths connected and organized.
Conditional Routing: Use Go To with If/Else branches to direct contacts to the appropriate next action.
How the Go To Action Works
The Go To action creates a connection between its position in the workflow and another action you select. When a contact reaches Go To, the contact proceeds to the connected action.
Go To can redirect contacts to another action within the same workflow.
It can connect different branches of a workflow.
It must be the last action in a workflow or branch.
A Go To connection can be disconnected and reassigned to a different action.
Note: Go To does not transfer contacts to a separate workflow. To add contacts to another workflow, use the Add to Workflow action.
How to Set Up the Go To Action
Configuring Go To requires adding the action at the end of a workflow path and selecting the destination action. The connection determines where contacts continue when they reach Go To.
Navigate to Automation → Workflows in your HighLevel sub-account.
Open the workflow you want to edit.
At the end of a workflow or branch, click the + icon to add an action.
Search for and select Go To from the available workflow actions.
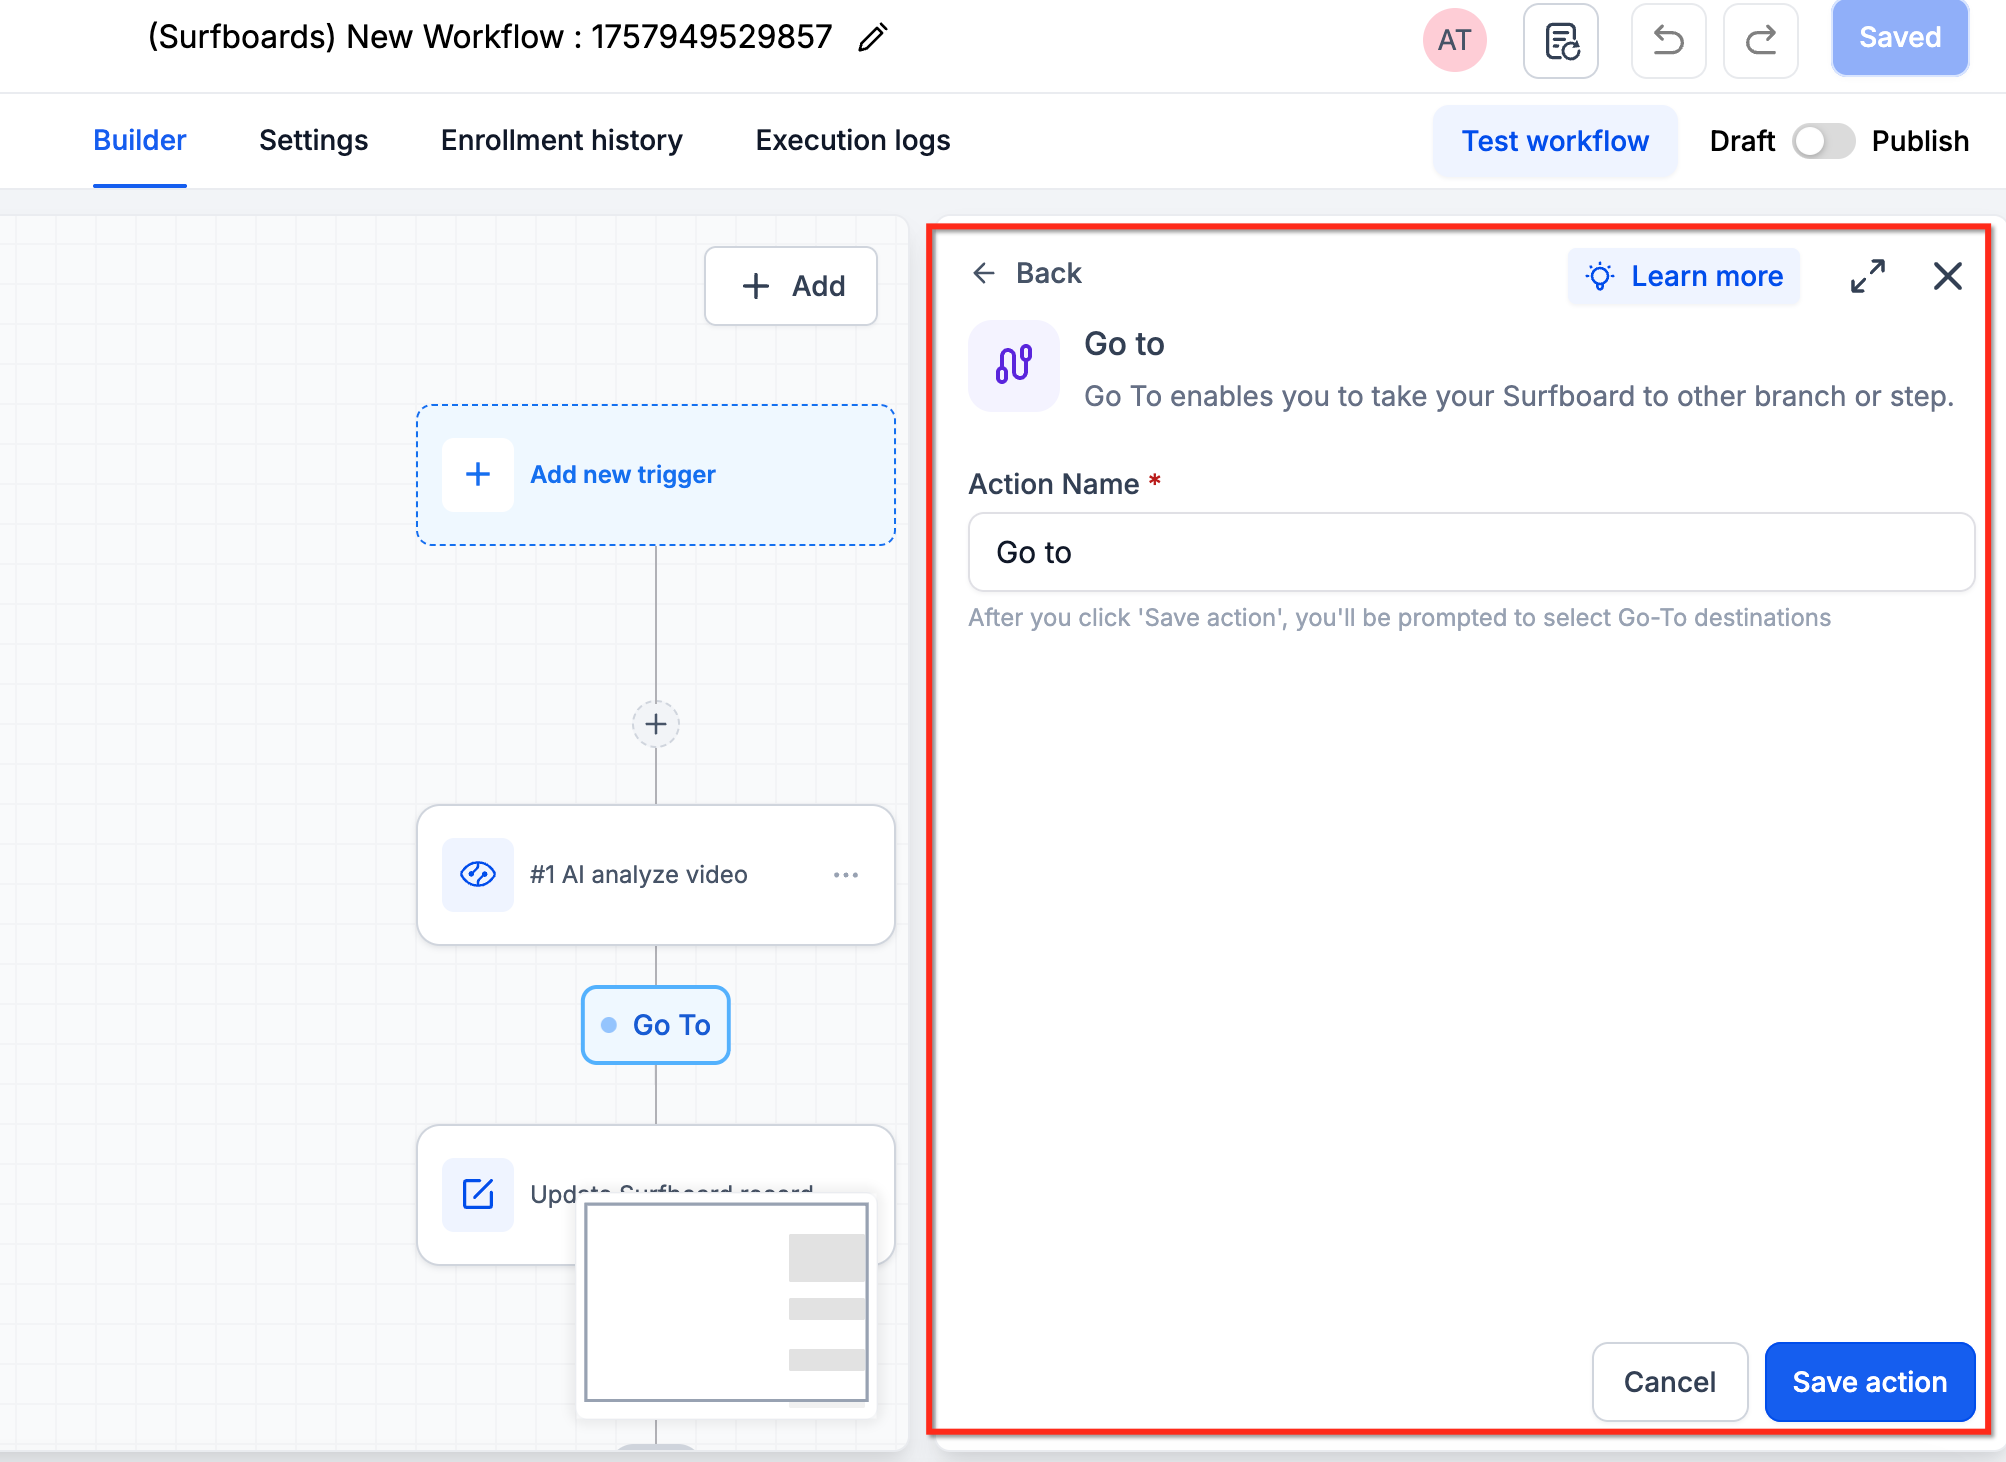
Enter a descriptive name for the action, such as "Go to Wait Action."
Click Save Action to save the configuration.
The available workflow actions will be highlighted. Click the action where you want the contact to continue.
Save your workflow changes.
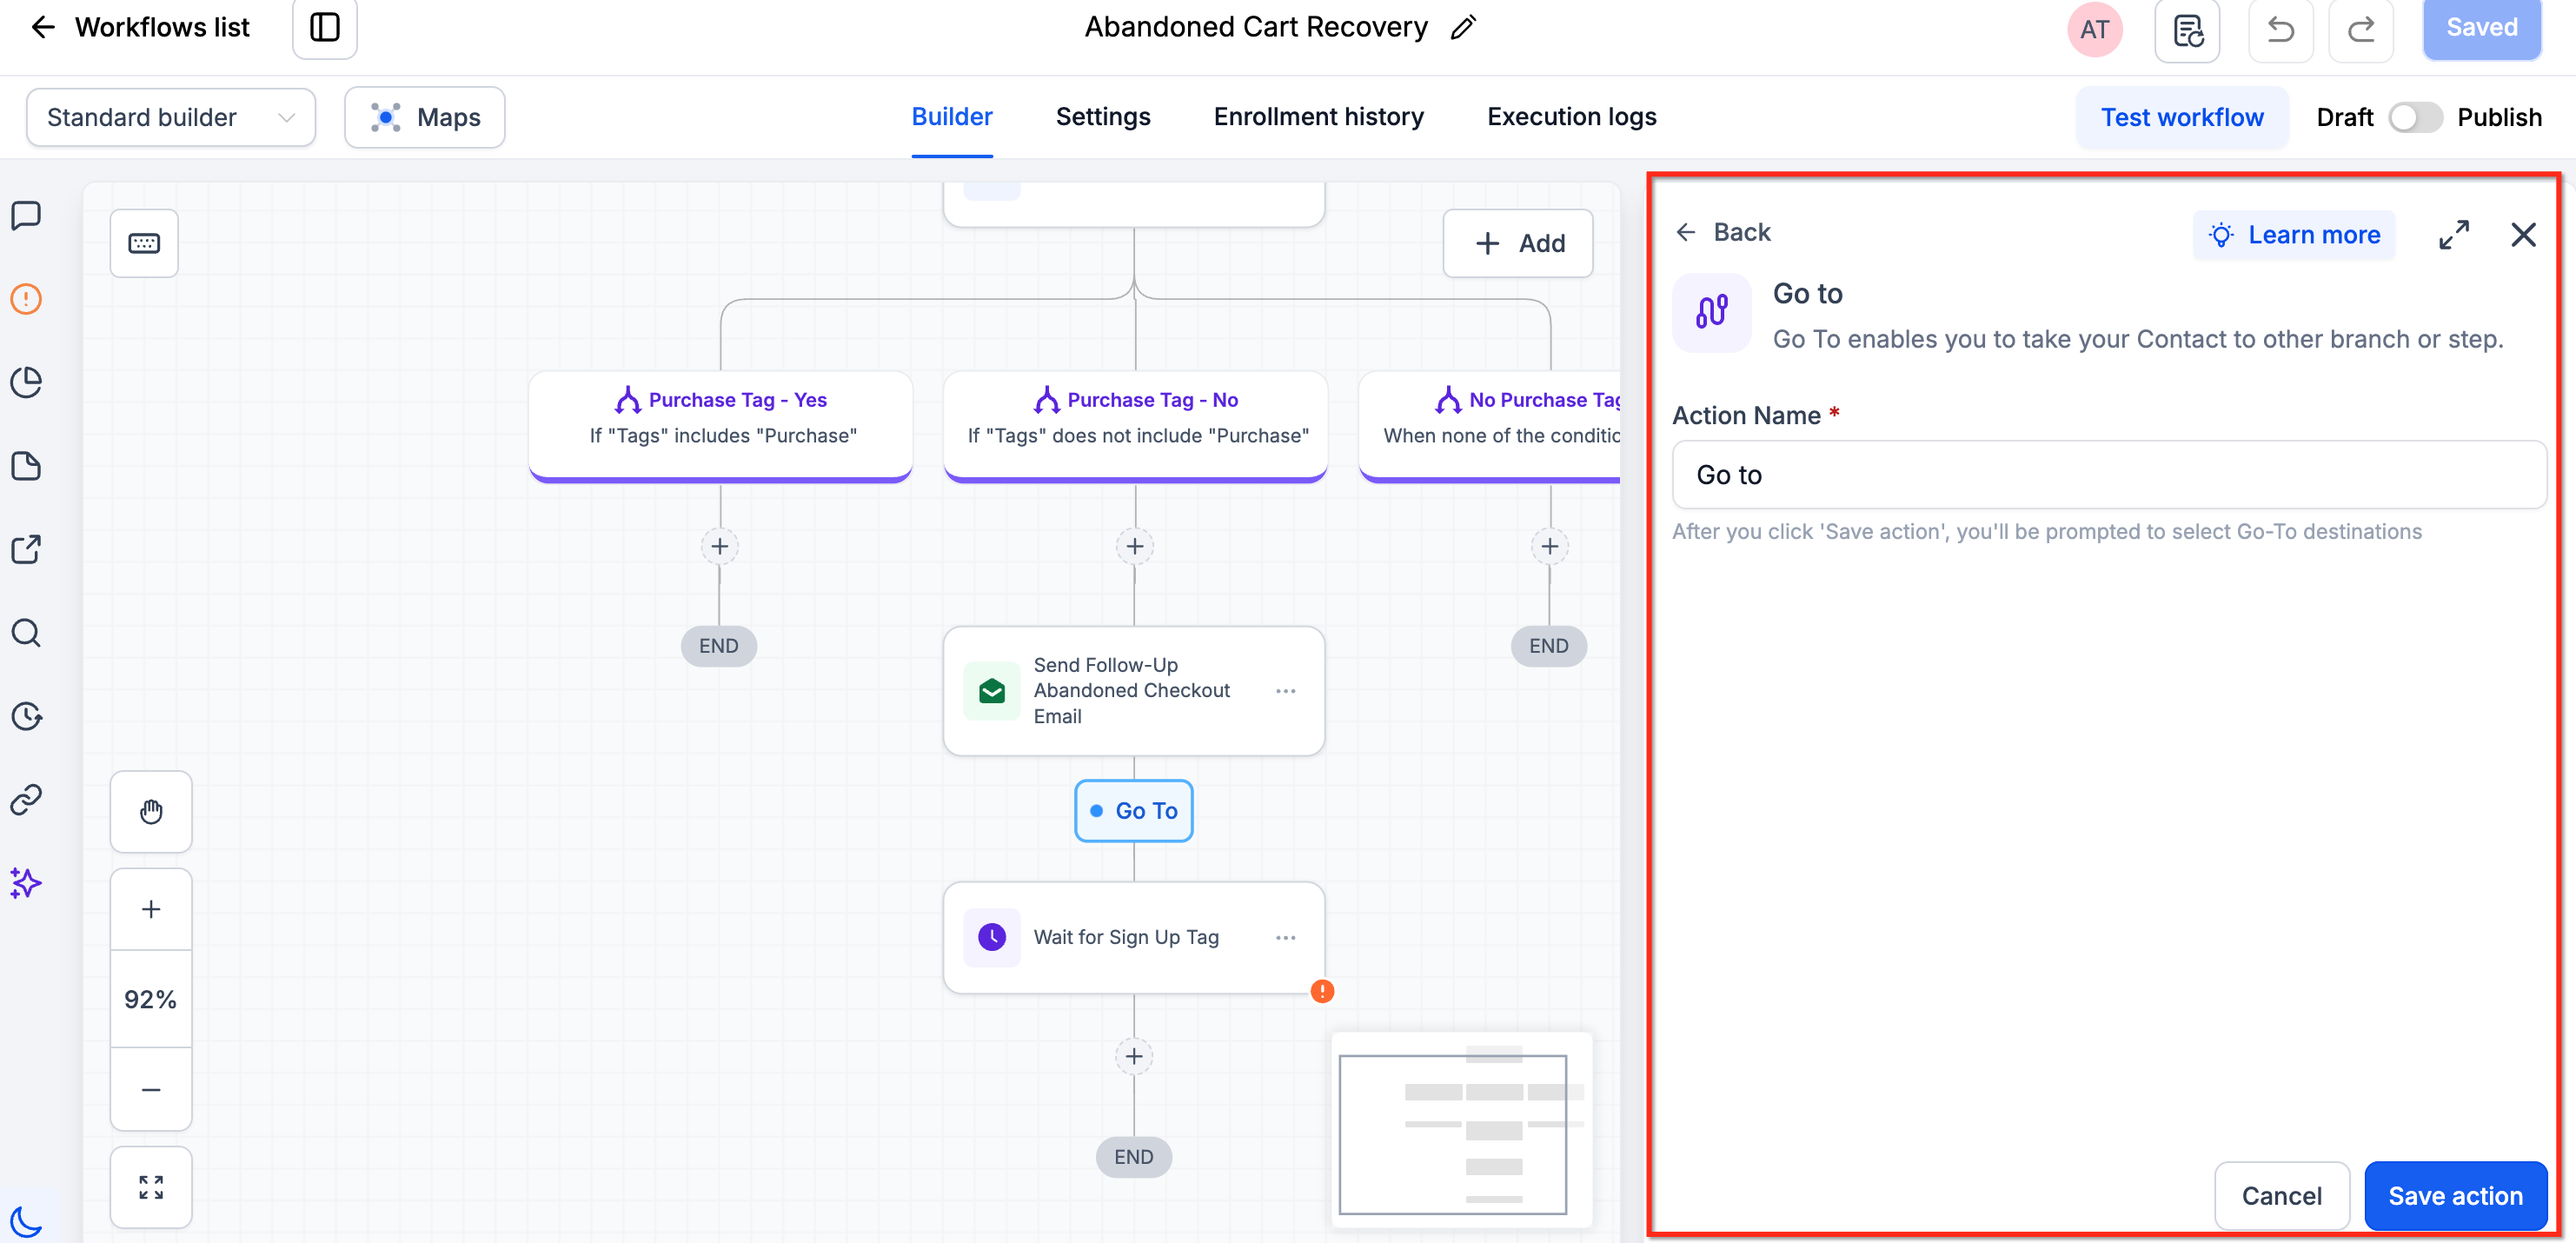
IMPORTANT: We cannot add Goto in between actions. Please add at the end of the branchExample
Sending Emails to customers who have purchased the items
Scenario: An online retailer wants to re-engage customers who have not purchased the items and don't want to send an email to the customers who have already bought.
Trigger Setup:
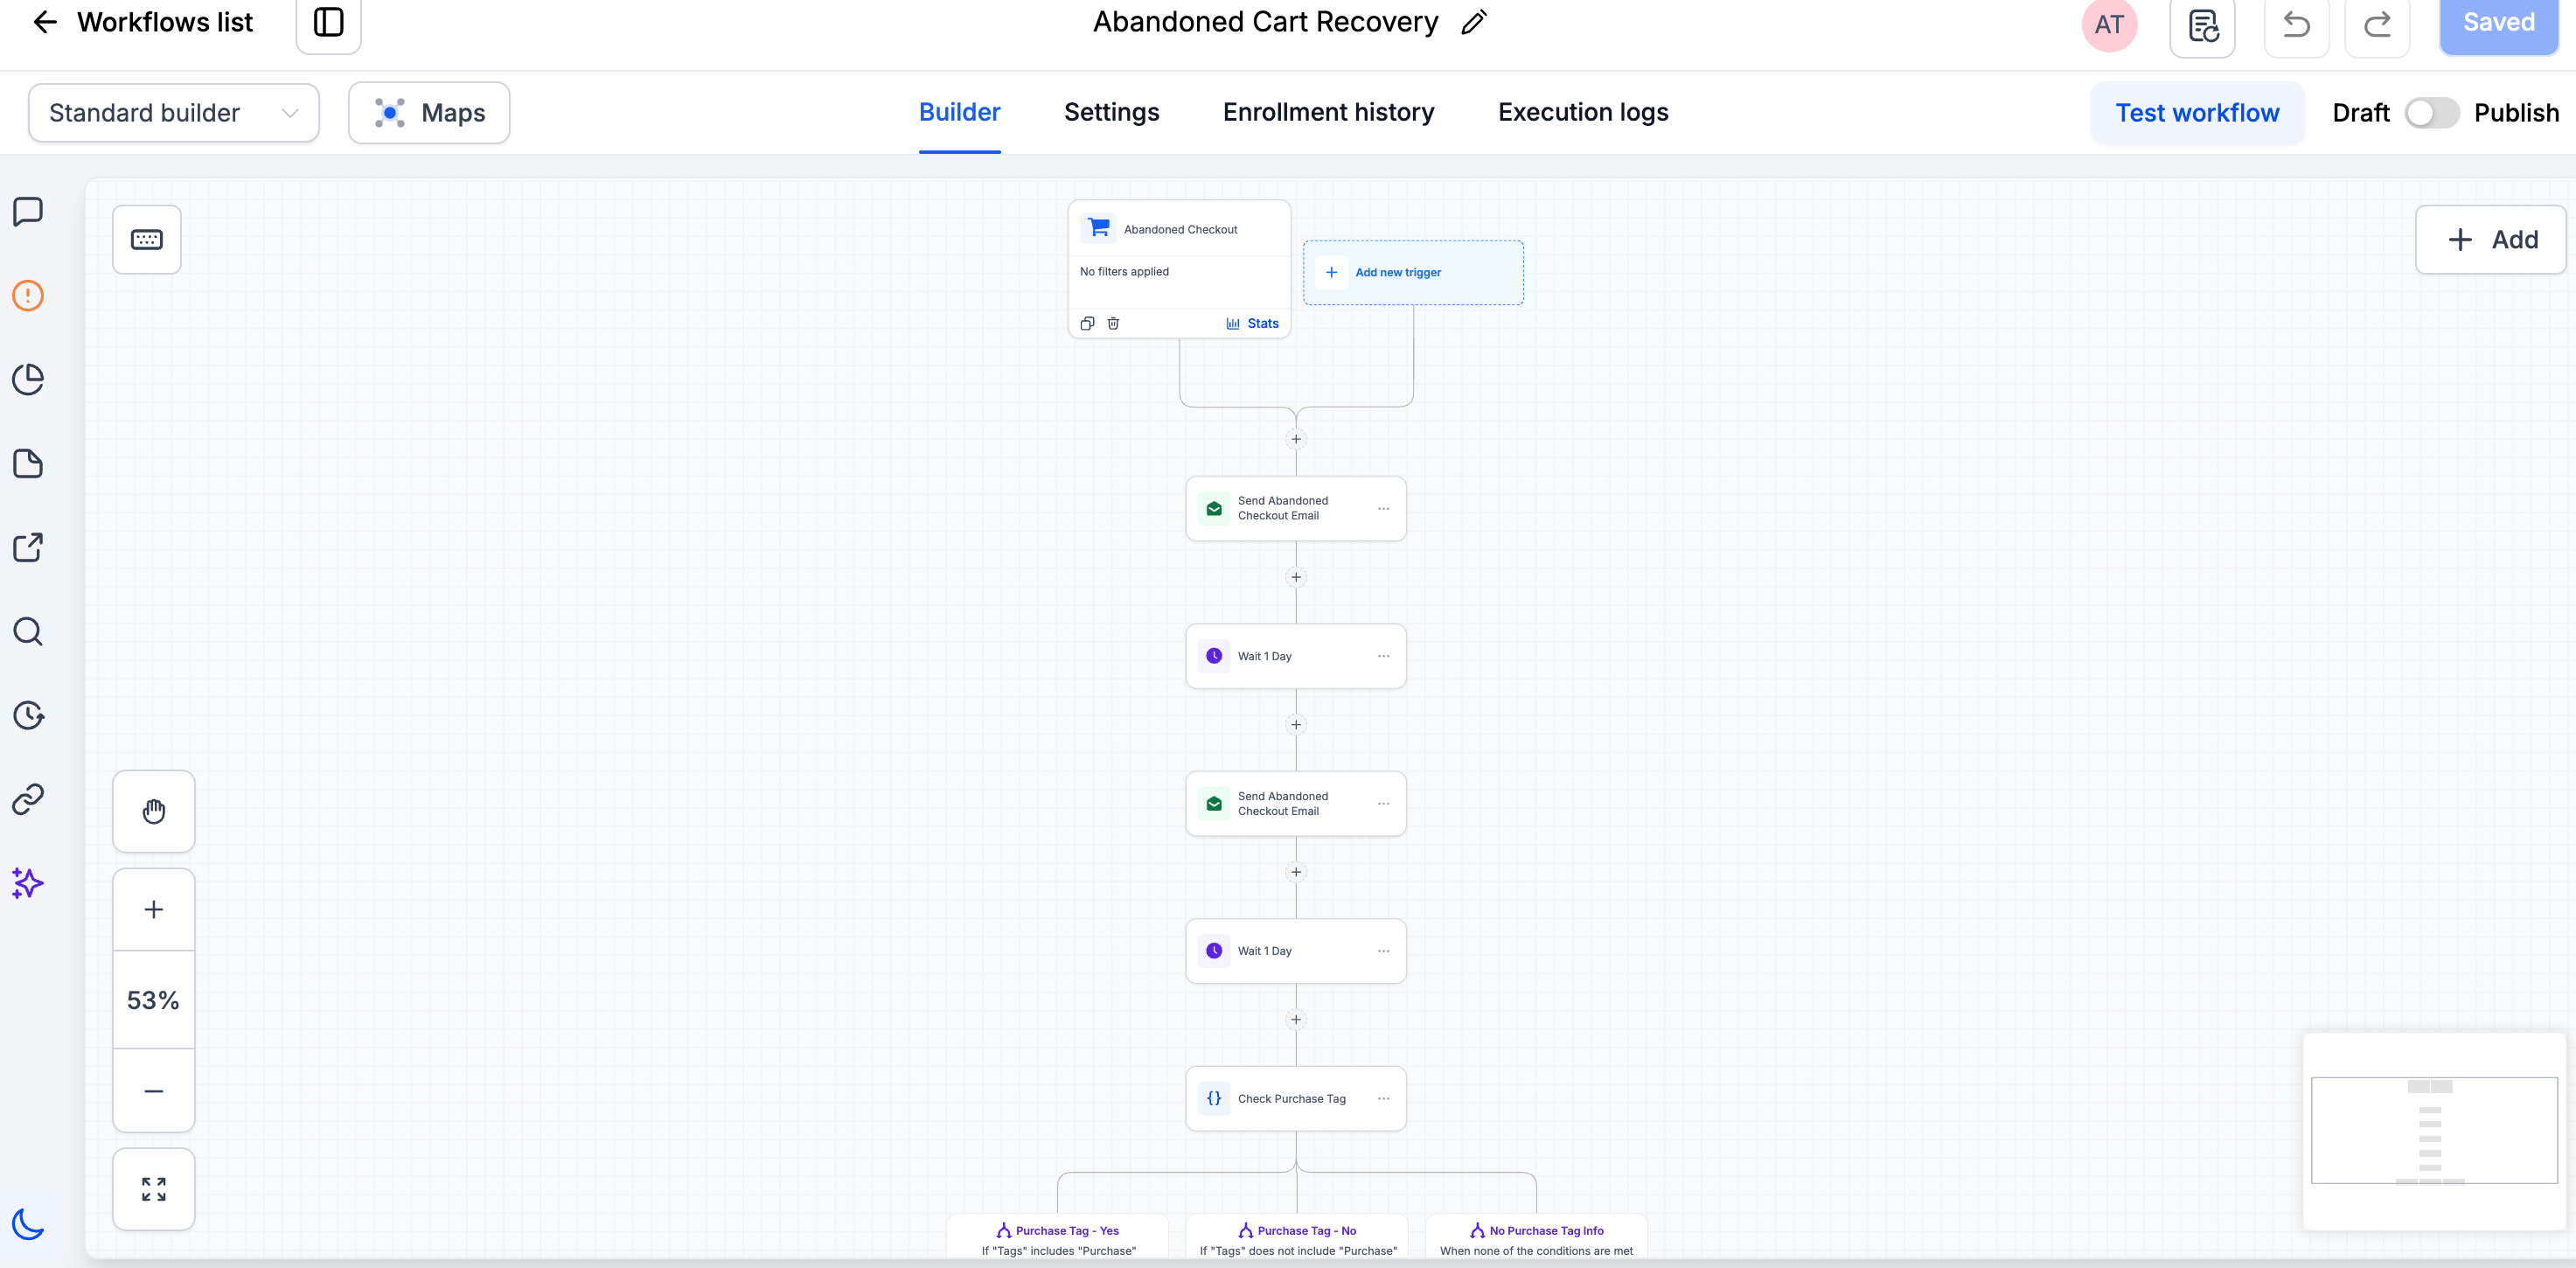
- Trigger: Abandoned Checkout
- Name: Abandoned Checkout
- Filters:
- Duration (minutes): 10 (trigger the workflow if the cart is abandoned for more than 10 minutes)
- Cart Value: Greater than 50 (trigger the workflow only if the cart value exceeds $50)
- Duration (minutes): 10 (trigger the workflow if the cart is abandoned for more than 10 minutes)
Workflow Actions:
- Email Notification: Send a personalized email to the customer, reminding them of the items left in their cart and offering an incentive (e.g., discount).
- Wait: Wait for 1 day
- If/Else: Add if else condition to check if the user has "Purchased" tag. The contact will go through the first branch if the tag is present and the None branch if tag is not present.
- Email (Branch 2): Send another email to the contact reminding them of the abandoned cart.
- Wait (Branch 2): Add a wait step with a condition if tag added is "Purchased"
- Go To (Branch 1): Add a Go to action that will take the contact directly to the wait step in the second branch
Outcome: This automation helps recover potentially lost sales by re-engaging customers who abandoned their carts and do not send an email to the customers who have already purchased the items.
Frequently Asked Questions
Q: Can I use Go To to move contacts into another workflow?
No. Go To redirects contacts between actions within the same workflow. Use the Add to Workflow action to enroll contacts in another workflow.
Q: Why can't I add Go To between two existing actions?
Go To can only be placed at the end of a workflow or branch. It cannot be inserted between actions.
Q: Can Go To redirect contacts to an earlier action?
Yes. You can connect Go To to an earlier action in the same workflow. Make sure the workflow includes appropriate conditions to prevent unintended repeated execution.
Q: Can multiple branches connect to the same action?
Yes. Go To allows different workflow branches to direct contacts to an existing action.
Q: Do I need to recreate the Go To action to change its destination?
No. Use Disconnect GoTo to remove the existing connection, then select a new destination action.
Q: What should I do if I encounter a Loop Lock issue with the Go To action?
A Loop Lock issue may occur when a Go To connection repeatedly sends a contact through the same workflow actions. Review the Go To destination and any conditions that return the contact to an earlier step. Ensure the workflow has an appropriate exit condition to prevent unintended repetition. You can also review the workflow's Execution Logs to troubleshoot the contact's path.
Related Articles
Was this article helpful?
That’s Great!
Thank you for your feedback
Sorry! We couldn't be helpful
Thank you for your feedback
Feedback sent
We appreciate your effort and will try to fix the article