We're thrilled to introduce a powerful new update to our Social Planner!
You can now kickstart your posts using the Template Library—a collection of professionally designed, ready-to-use social media templates.
And that’s not all—Agency Owners can now add their favorite posts directly to the Template Library, making it easier than ever to reuse top-performing content!
Access Control:
1. Only the Agency admin can view the admin panel and can have access to upload templates to the Template Library
2. Only $497 plan provides access to admin panel and the access to upload templates
3. Every user would have the access to start with predefined templates in the template library
Access granted to different roles -
Why do we need it?
Here’s why this new upload capability is essential:
- Boost creativity: By sharing templates, users can inspire each other with fresh ideas and unique designs.
- Expand options: More user-generated templates mean a wider variety of styles and formats for everyone to choose from.
- Save time: Accessing templates from others can help users plan and create content faster.
- Build community: Encourage collaboration and engagement within the user base through shared resources.
- Stay updated: Keep the library dynamic and relevant with continuously updated user contributions.
Steps to Use Template Library in Social Planner
Click on "New Posts"
Navigate to the Social Planner dashboard.
Click the "New Posts" button to start creating a new social media post.

Choose "Social Planner Templates"
In the options presented, select "Social Planner Templates" to browse through the available post templates.

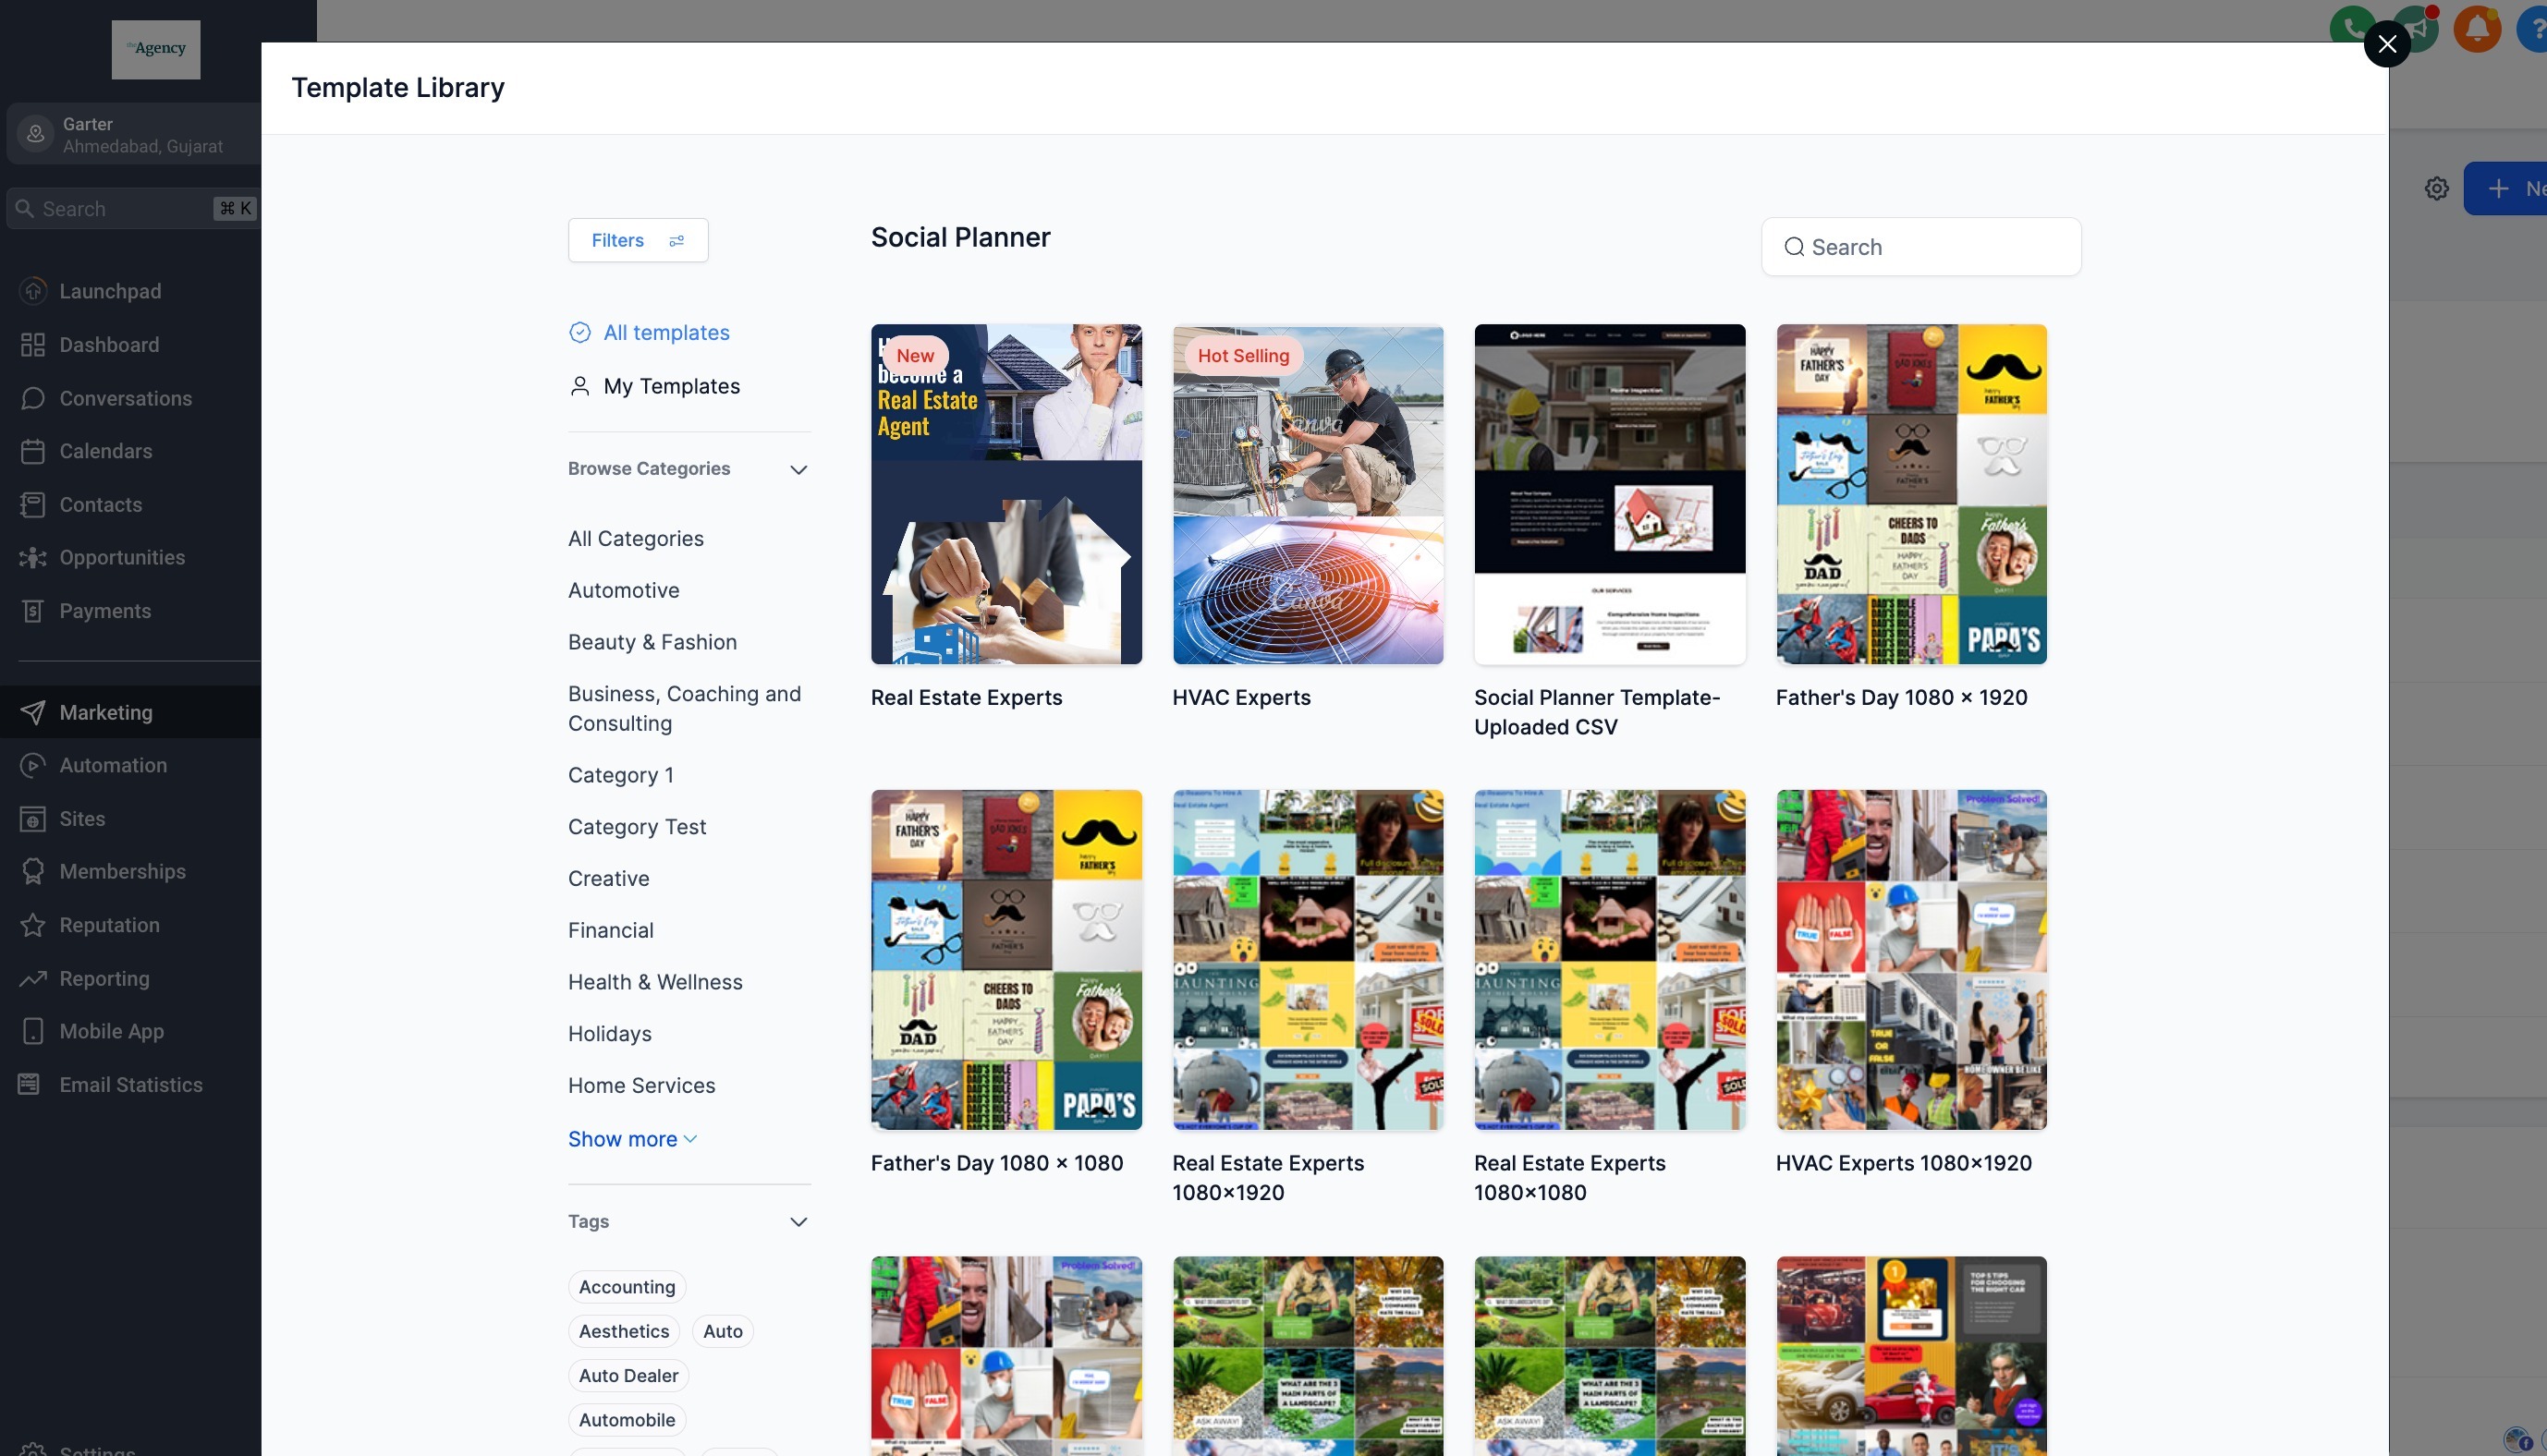
Select a Template
Browse the template library and choose a template that suits your needs.

Click "Continue"
After selecting a template, click the "Continue" button to move to the next step.

Click on "Select Socials"
Click on "Review & Schedule" to proceed with scheduling your post.

Add Schedule Details & Click "Schedule"
Set the date, time, and channels where you want the post to be published.
Click on the "Schedule" button to save your scheduling preferences.

Click on "Review & Schedule"
After a brief moment, the interface will refresh and show the "Review & Schedule" button.

Click it to review the entire post details one more time.

Make Any Final Edits
You can edit text, media, or settings as needed in this final review.
Click on "Import" to Proceed
Once satisfied with all details, click "Import" to finalize and add the post to your planner.

Filter Social Planner templates by Type


Social Planner templates include a Type to help you find the right format faster.


Available Types

Post (1080×1080)
Story/Reel (1080×1920)


View a template’s Type in the template details:

1. Open a Social Planner template.
2. In the Template Info Drawer, check the Type label.
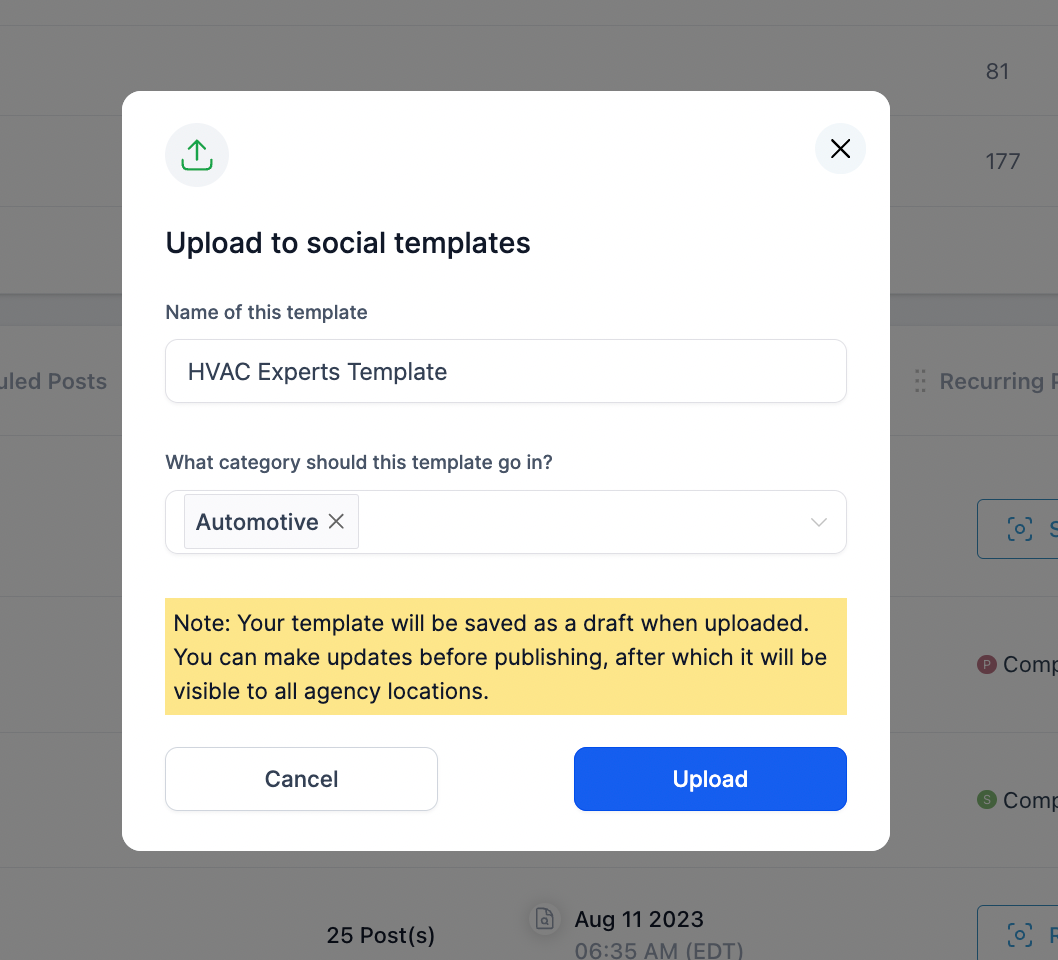
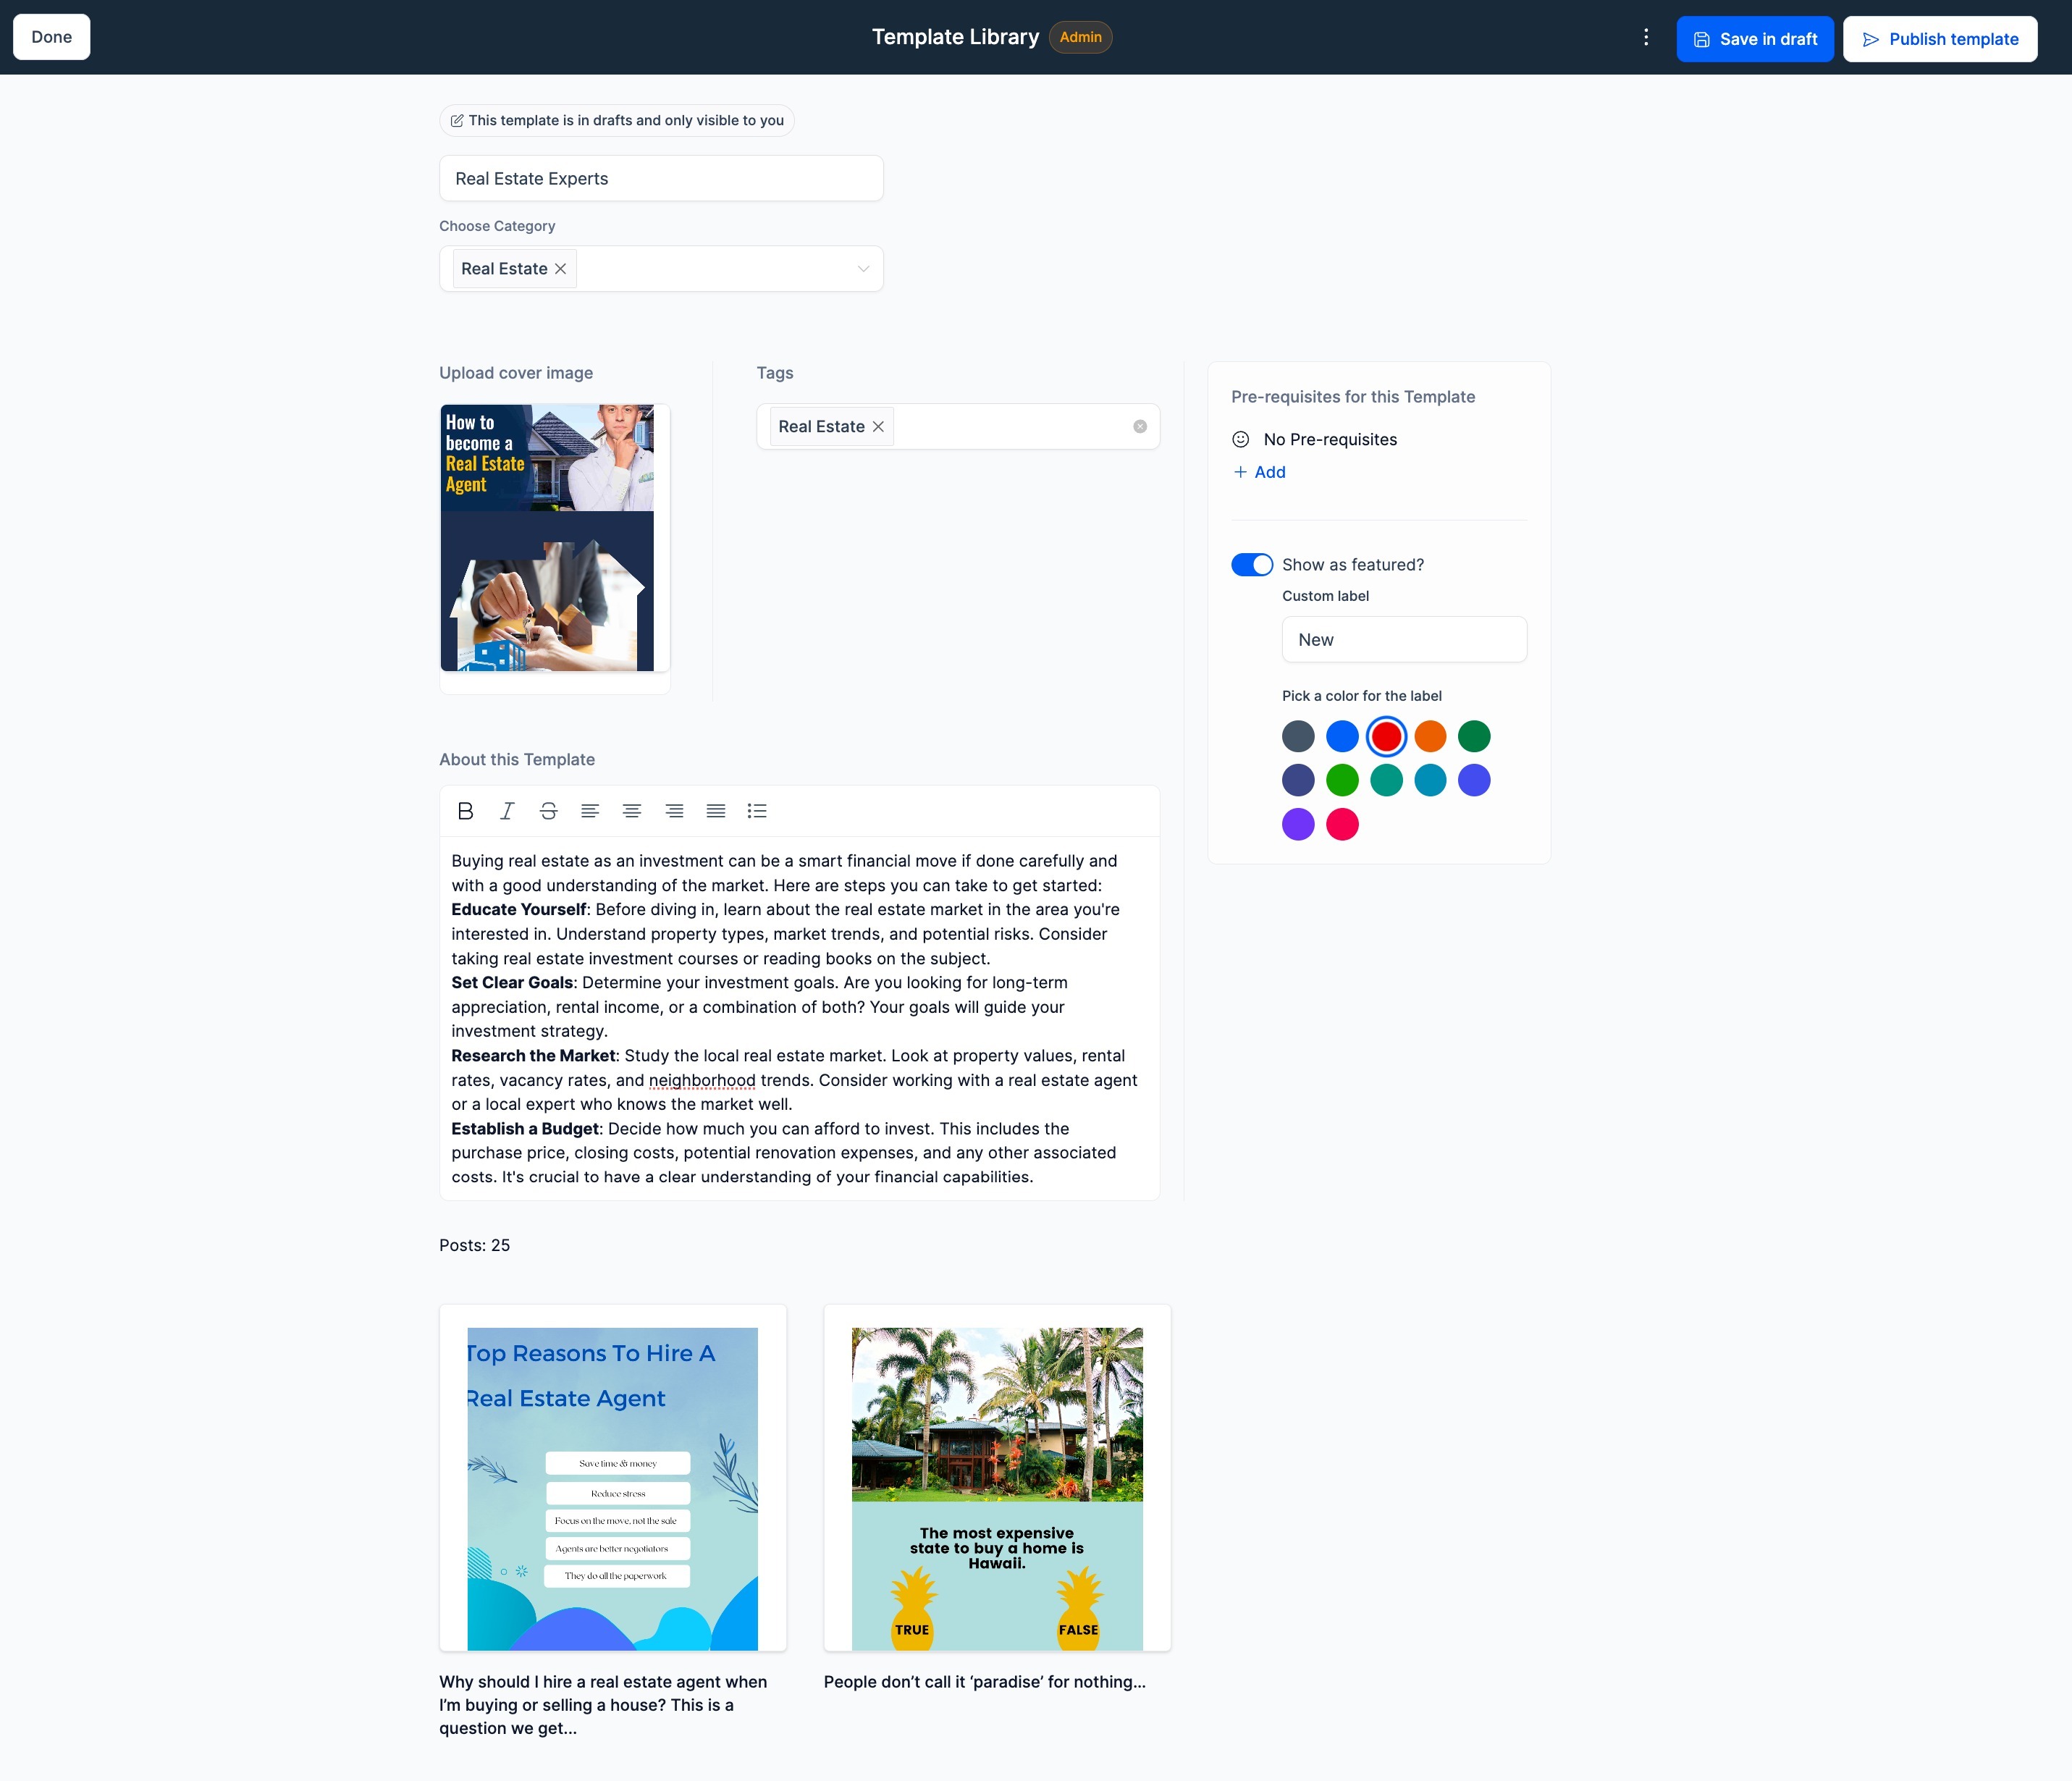
Steps to upload templates -


Was this article helpful?
That’s Great!
Thank you for your feedback
Sorry! We couldn't be helpful
Thank you for your feedback
Feedback sent
We appreciate your effort and will try to fix the article