TABLE OF CONTENTS
Overview
This article outlines how to configure your system to automatically include essential Business Tax ID under your business details section and the client's Tax ID under the contact section on every client invoice, ensuring compliance and clarity.

The process is broken into two main stages:
- Data Setup: You must first use Custom Fields to store your clients' individual Tax IDs and Custom Values to store your agency's Tax ID. This creates the required data points in your system.
- Layout Implementation: The final step involves customizing the default Invoice Layout in your payment settings. You map the stored data—placing your Business Tax ID under the business details section and the client's Tax ID under the contact section.
By following this setup, your invoices will automatically pull and display both required identification numbers whenever they are present against the contact and in your custom values.
Create Custom Fields and Values
1. Creating custom field called Tax ID which will be available to fill against every contact.
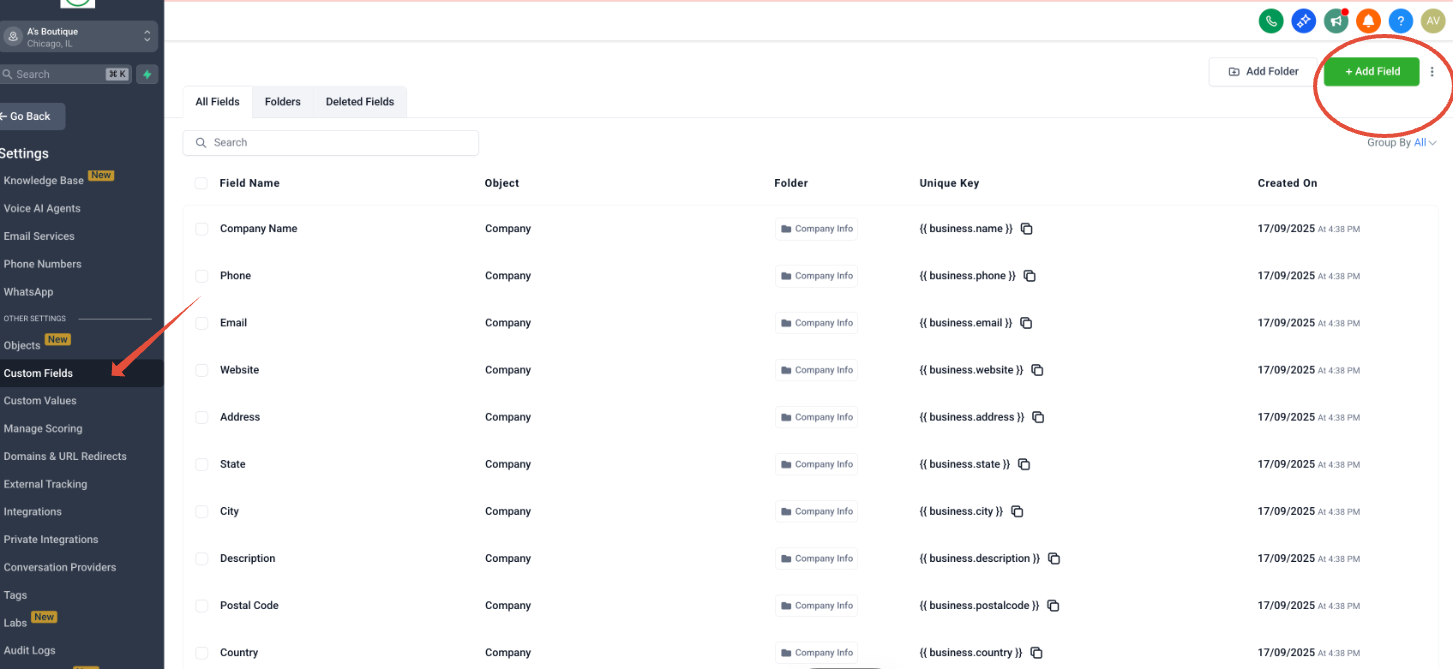
- Go to Settings in the Left Pane.
- Under "Other Settings," click on Custom Fields and select +Add Field.
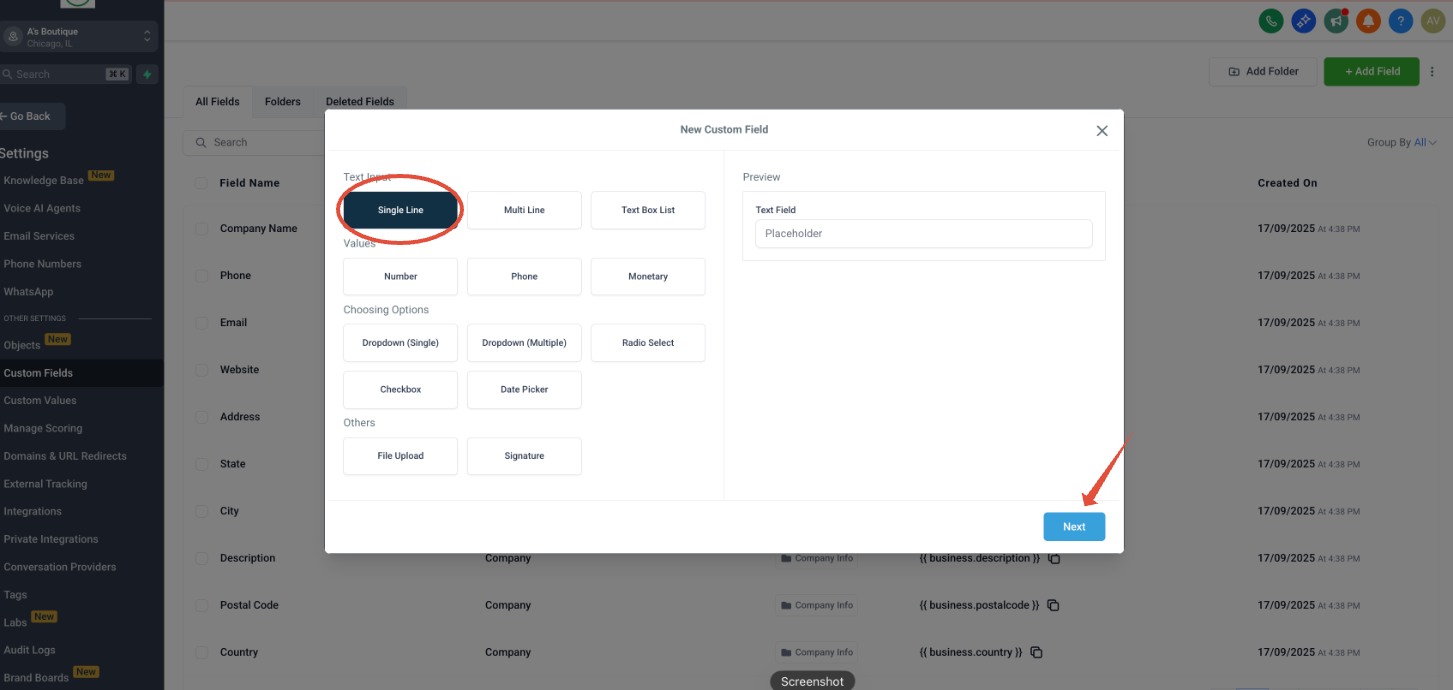
- Under "Text Input," select Single Line and click Next.
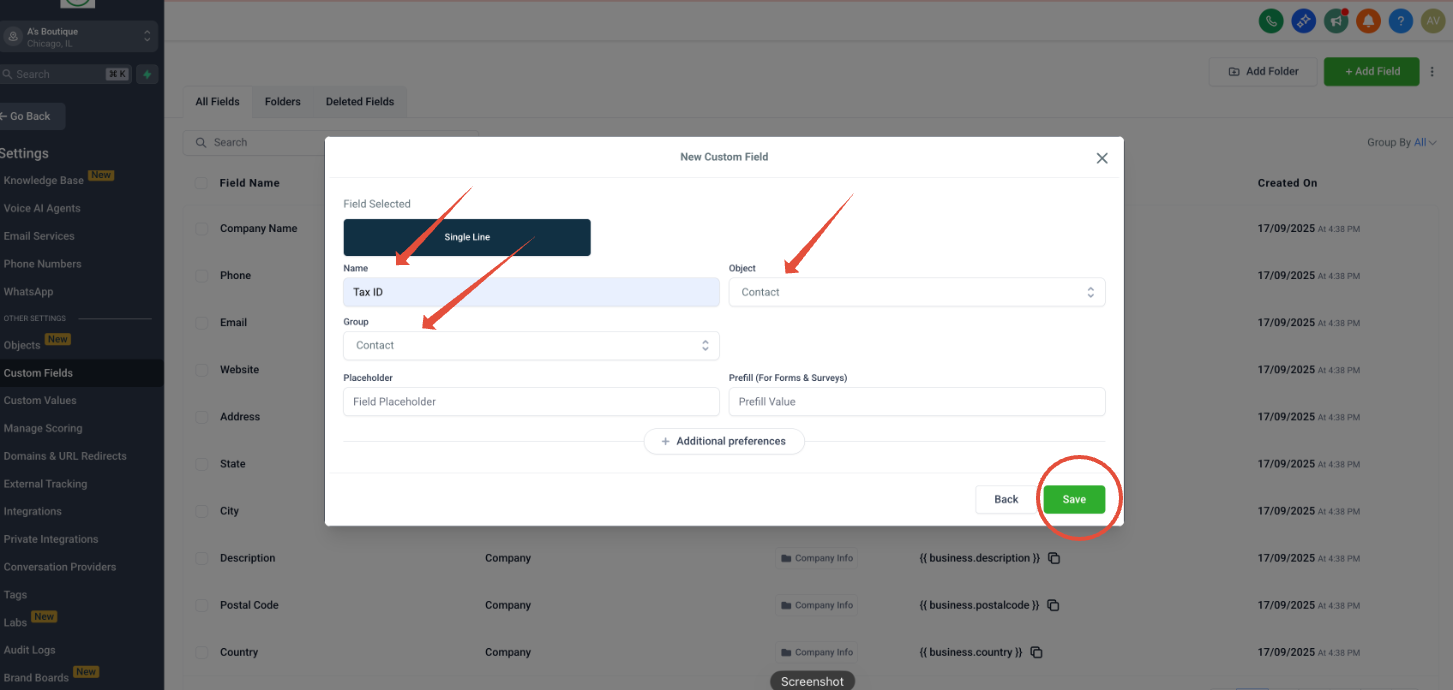
- Input the Name as "Tax ID" or anything that you want to refer it as, and select "Contact" from both the Object and Group dropdowns. Click Save.
2. Creating custom value called VAT ID which will be a fixed text/number that can be filled within business details of the invoice
- Go back to Settings. Under "Other Settings," click on Custom Values and select +Custom Value.
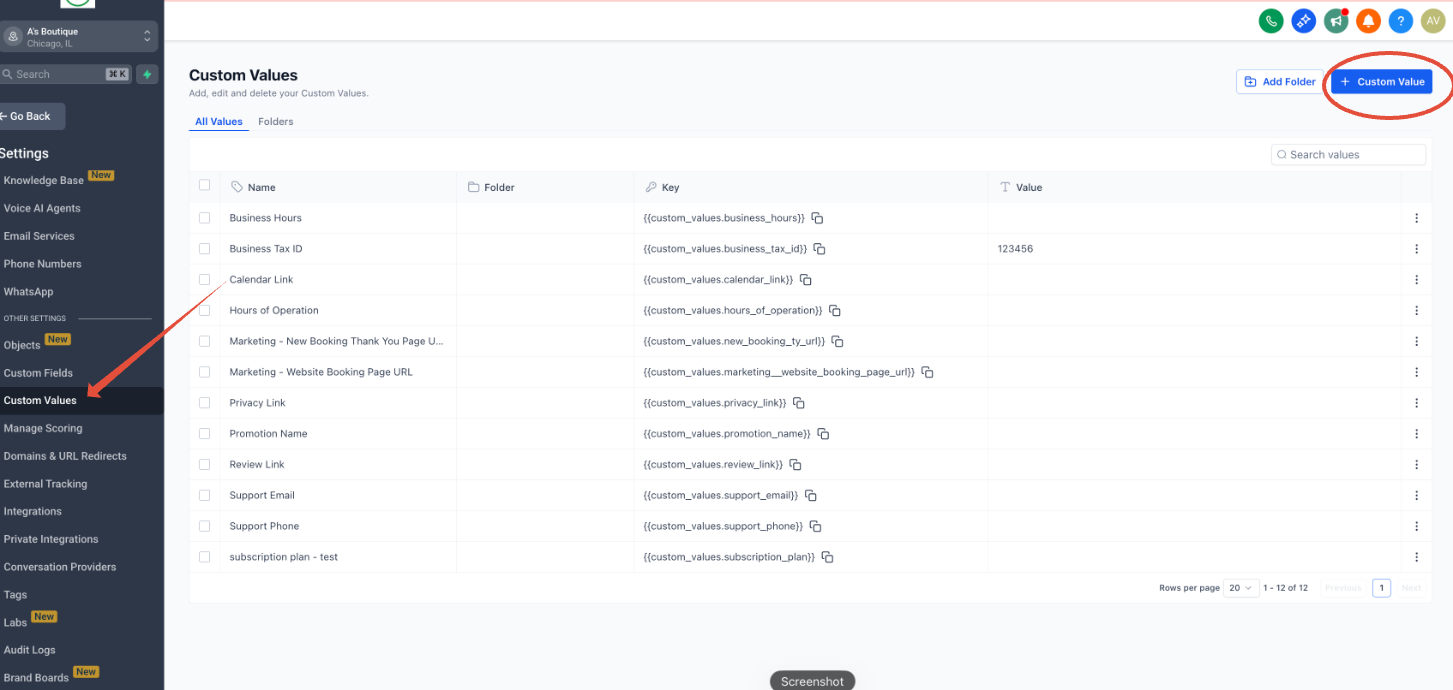
- Enter the Name and Value for your Tax ID and click Create.
In this case, VAT ID: 1234

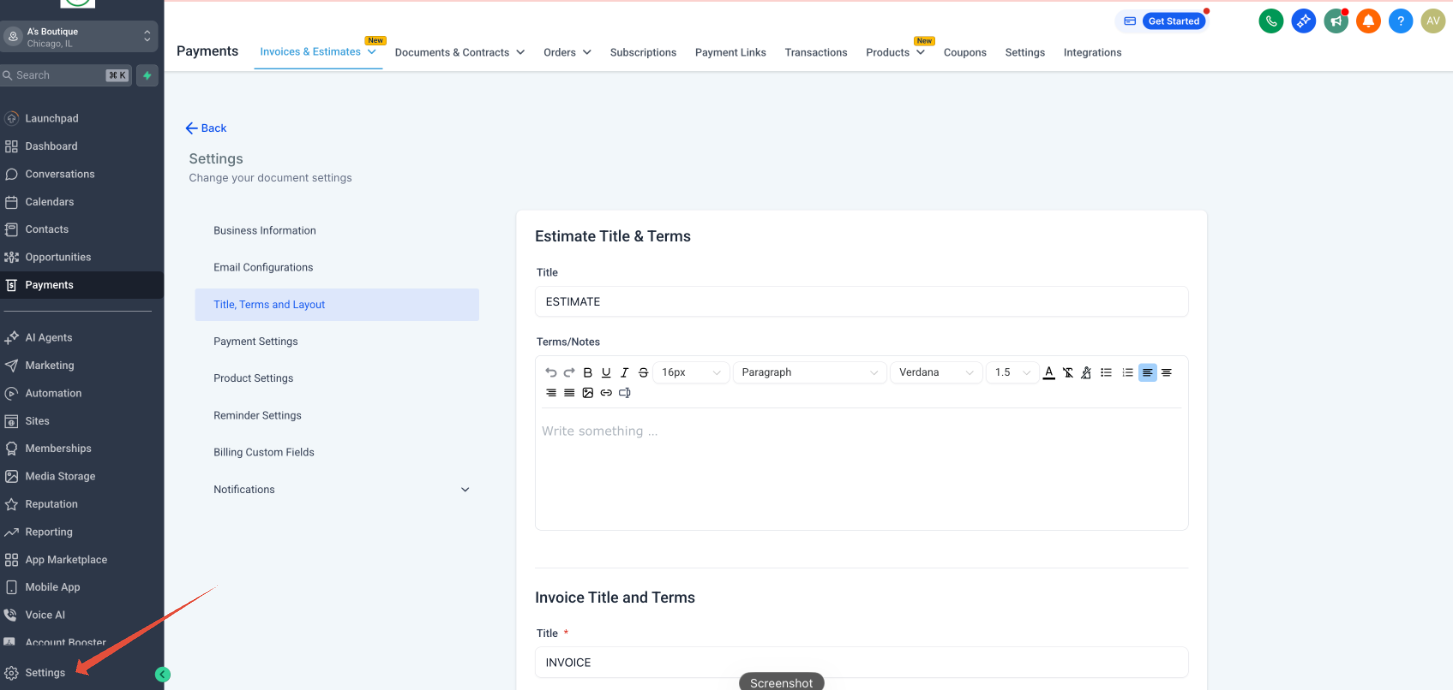
Customize the Invoice Layout
- Go back to Payments and select Settings under "Invoices & Estimates."
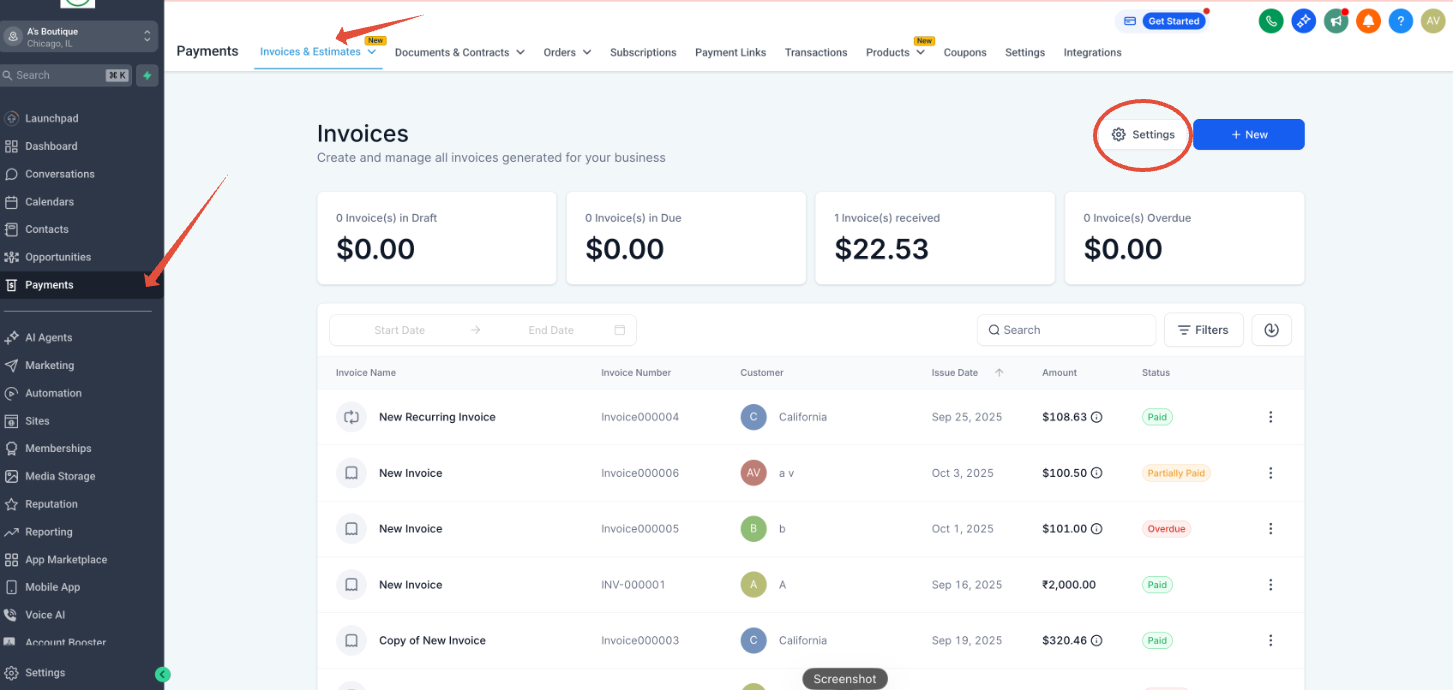
- Under "Title, Terms and Layout," scroll down to Invoice Layout and click on Customize Layout.

- For Business Tax ID:
- In the Layout tab, under Business Information, click on +Add Custom Value.
- Select "Business Tax ID" from the dropdown menu.

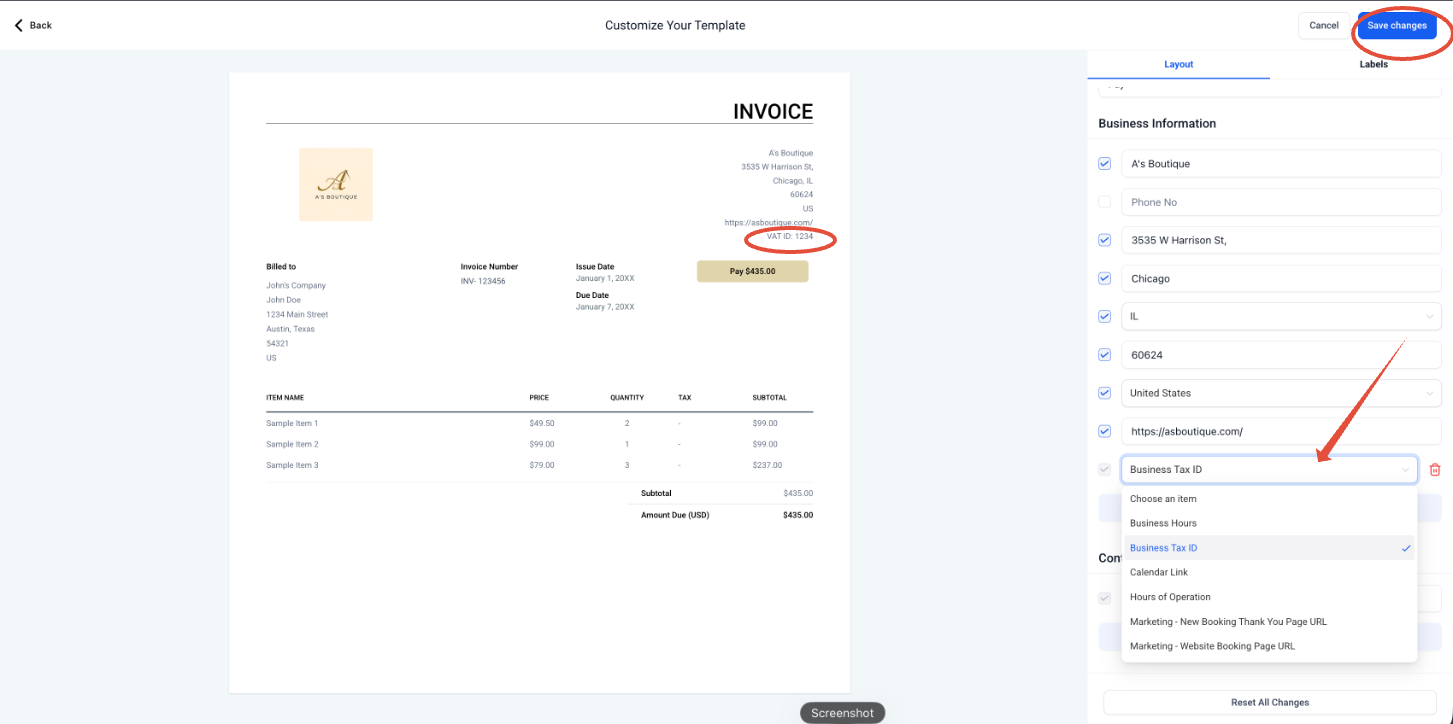
- For Contact Tax ID:
- In the Layout tab, under Contact Information, click on +Add Custom Field.
- Select "Tax ID" from the dropdown menu.

- Check the preview to confirm the details are visible and click Save changes.
Once done, Add the Tax ID for the Invoice Recipient
- Go to Contacts, click on Additional info tab.

- Click on TAX ID and enter the contact's TAX ID and save it.

- Click on Actions drop down, select Create Invoice within the Payments tab of contacts or you can go to Payments -> Create Invoice directly.

- Now you can find the TAX ID (particular to the contact) and Business Tax ID (VAT ID: 1234) present in your Invoice.

Was this article helpful?
That’s Great!
Thank you for your feedback
Sorry! We couldn't be helpful
Thank you for your feedback
Feedback sent
We appreciate your effort and will try to fix the article