Ad Manager helps you launch and manage Meta ad campaigns directly from HighLevel. Before creating campaigns, you’ll need to activate Ad Manager and connect the Meta assets your ads will use, including a Meta ads account and Facebook page.
This article walks you through the first-time setup steps required to activate Ad Manager, connect your Meta assets, and access the Ad Manager workspace from HighLevel.
TABLE OF CONTENTS
- How to Activate Ad Manager?
- Key Benefits of Ad Manager
- Prerequisites Before Activating Ad Manager
- How To Set Up Ad Manager and Connect Facebook
- Troubleshooting Ad Manager Activation
- Frequently Asked Questions
How to Activate Ad Manager?
Ad Manager activation is the first-time setup process that gives a HighLevel sub-account access to Ad Manager. After activation, users connect the required Meta assets so they can create and manage ads directly from HighLevel.
Ad Manager requires a connected Meta ads account and Facebook page before users can begin managing Meta campaigns. This setup connects HighLevel to the advertising assets needed for campaign creation, page selection, and ad management.
Key Benefits of Ad Manager
Ad Manager gives users a centralized place to begin managing ad campaigns inside HighLevel. Connecting the correct Meta assets during onboarding helps prevent setup issues later when creating and launching campaigns.
- Centralized ad management: Manage Meta campaigns from Marketing > Ad Manager in HighLevel.
- Faster onboarding: Connect a Meta ads account and Facebook page from one guided setup flow.
- Campaign readiness: Prepare the required Meta assets before creating your first campaign.
- Connected Facebook page: Choose the Facebook page that will be used for Meta ad campaign setup.
- Clear setup path: Use the Get started flow to confirm the required account connections before entering Ad Manager.
- Reduced setup errors: Confirm the correct Meta ads account and Facebook page before building campaigns.
Prerequisites Before Activating Ad Manager
A few account and permission requirements should be in place before starting the setup flow. Confirming these details first helps avoid missing Meta ad accounts, missing Facebook pages, or disabled connection buttons during onboarding.
Before you begin, make sure:
- You have access to the correct HighLevel sub-account.
- Ad Manager is enabled or available for the sub-account.
- You are logged into the correct Facebook profile in your browser.
- Your Facebook profile has access to the Meta Business Manager, Meta ads account, and Facebook page you want to connect.
- The Meta ads account is active and ready to run ads.
- The Meta ads account has a payment method configured in Meta, if required.
- You have the required Facebook permissions to connect the page and ad account.
Important: The Ad Manager subscription or activation flow is separate from Meta ad spend. Meta ad spend is billed by Meta through the payment method connected to the selected Meta ads account.
How To Set Up Ad Manager and Connect Facebook
Activating Ad Manager connects the selected HighLevel sub-account to the Facebook and Meta assets required for campaign creation. Complete this setup to allow HighLevel to access available Meta ad accounts, connect the correct Facebook page, and unlock the Ad Manager workspace.
Open Ad Manager in HighLevel
Open Ad Manager from the correct sub-account to begin the activation process. Ad Manager is located inside the Marketing area, and first-time users will see a welcome screen before completing setup.
From the left navigation menu, click Marketing. In the top Marketing navigation bar, click Ad Manager.
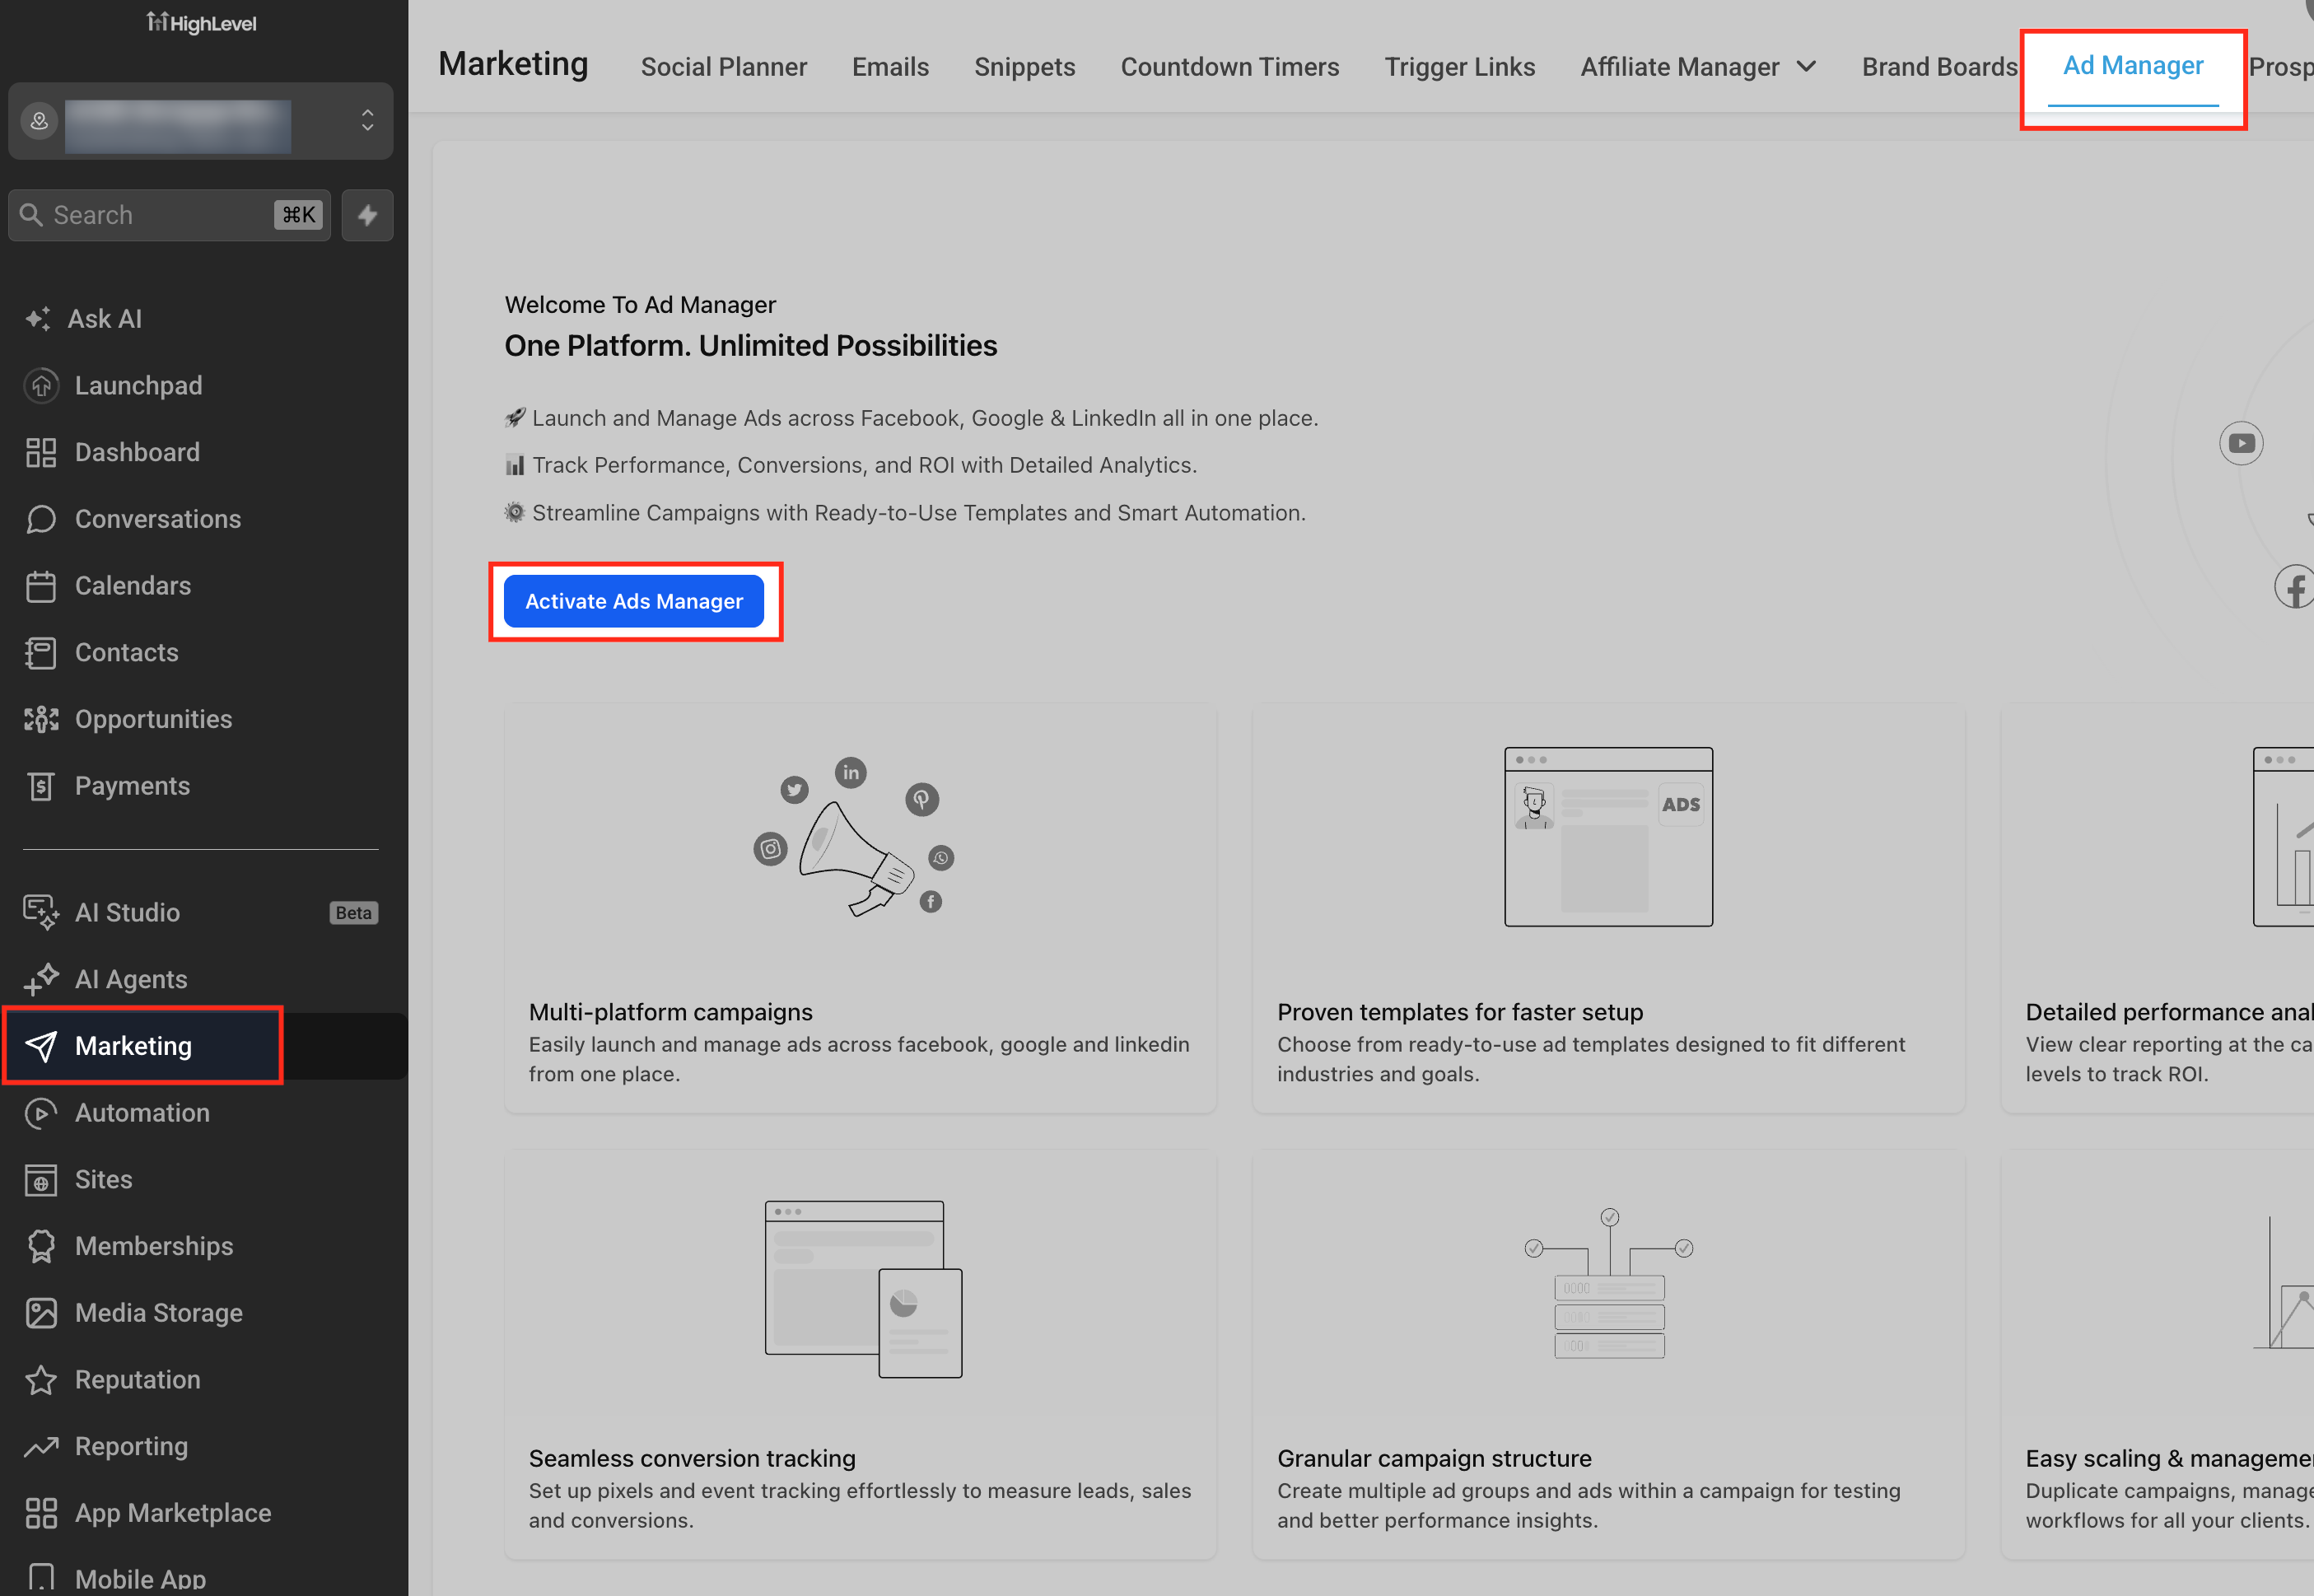
Activate Ads Manager
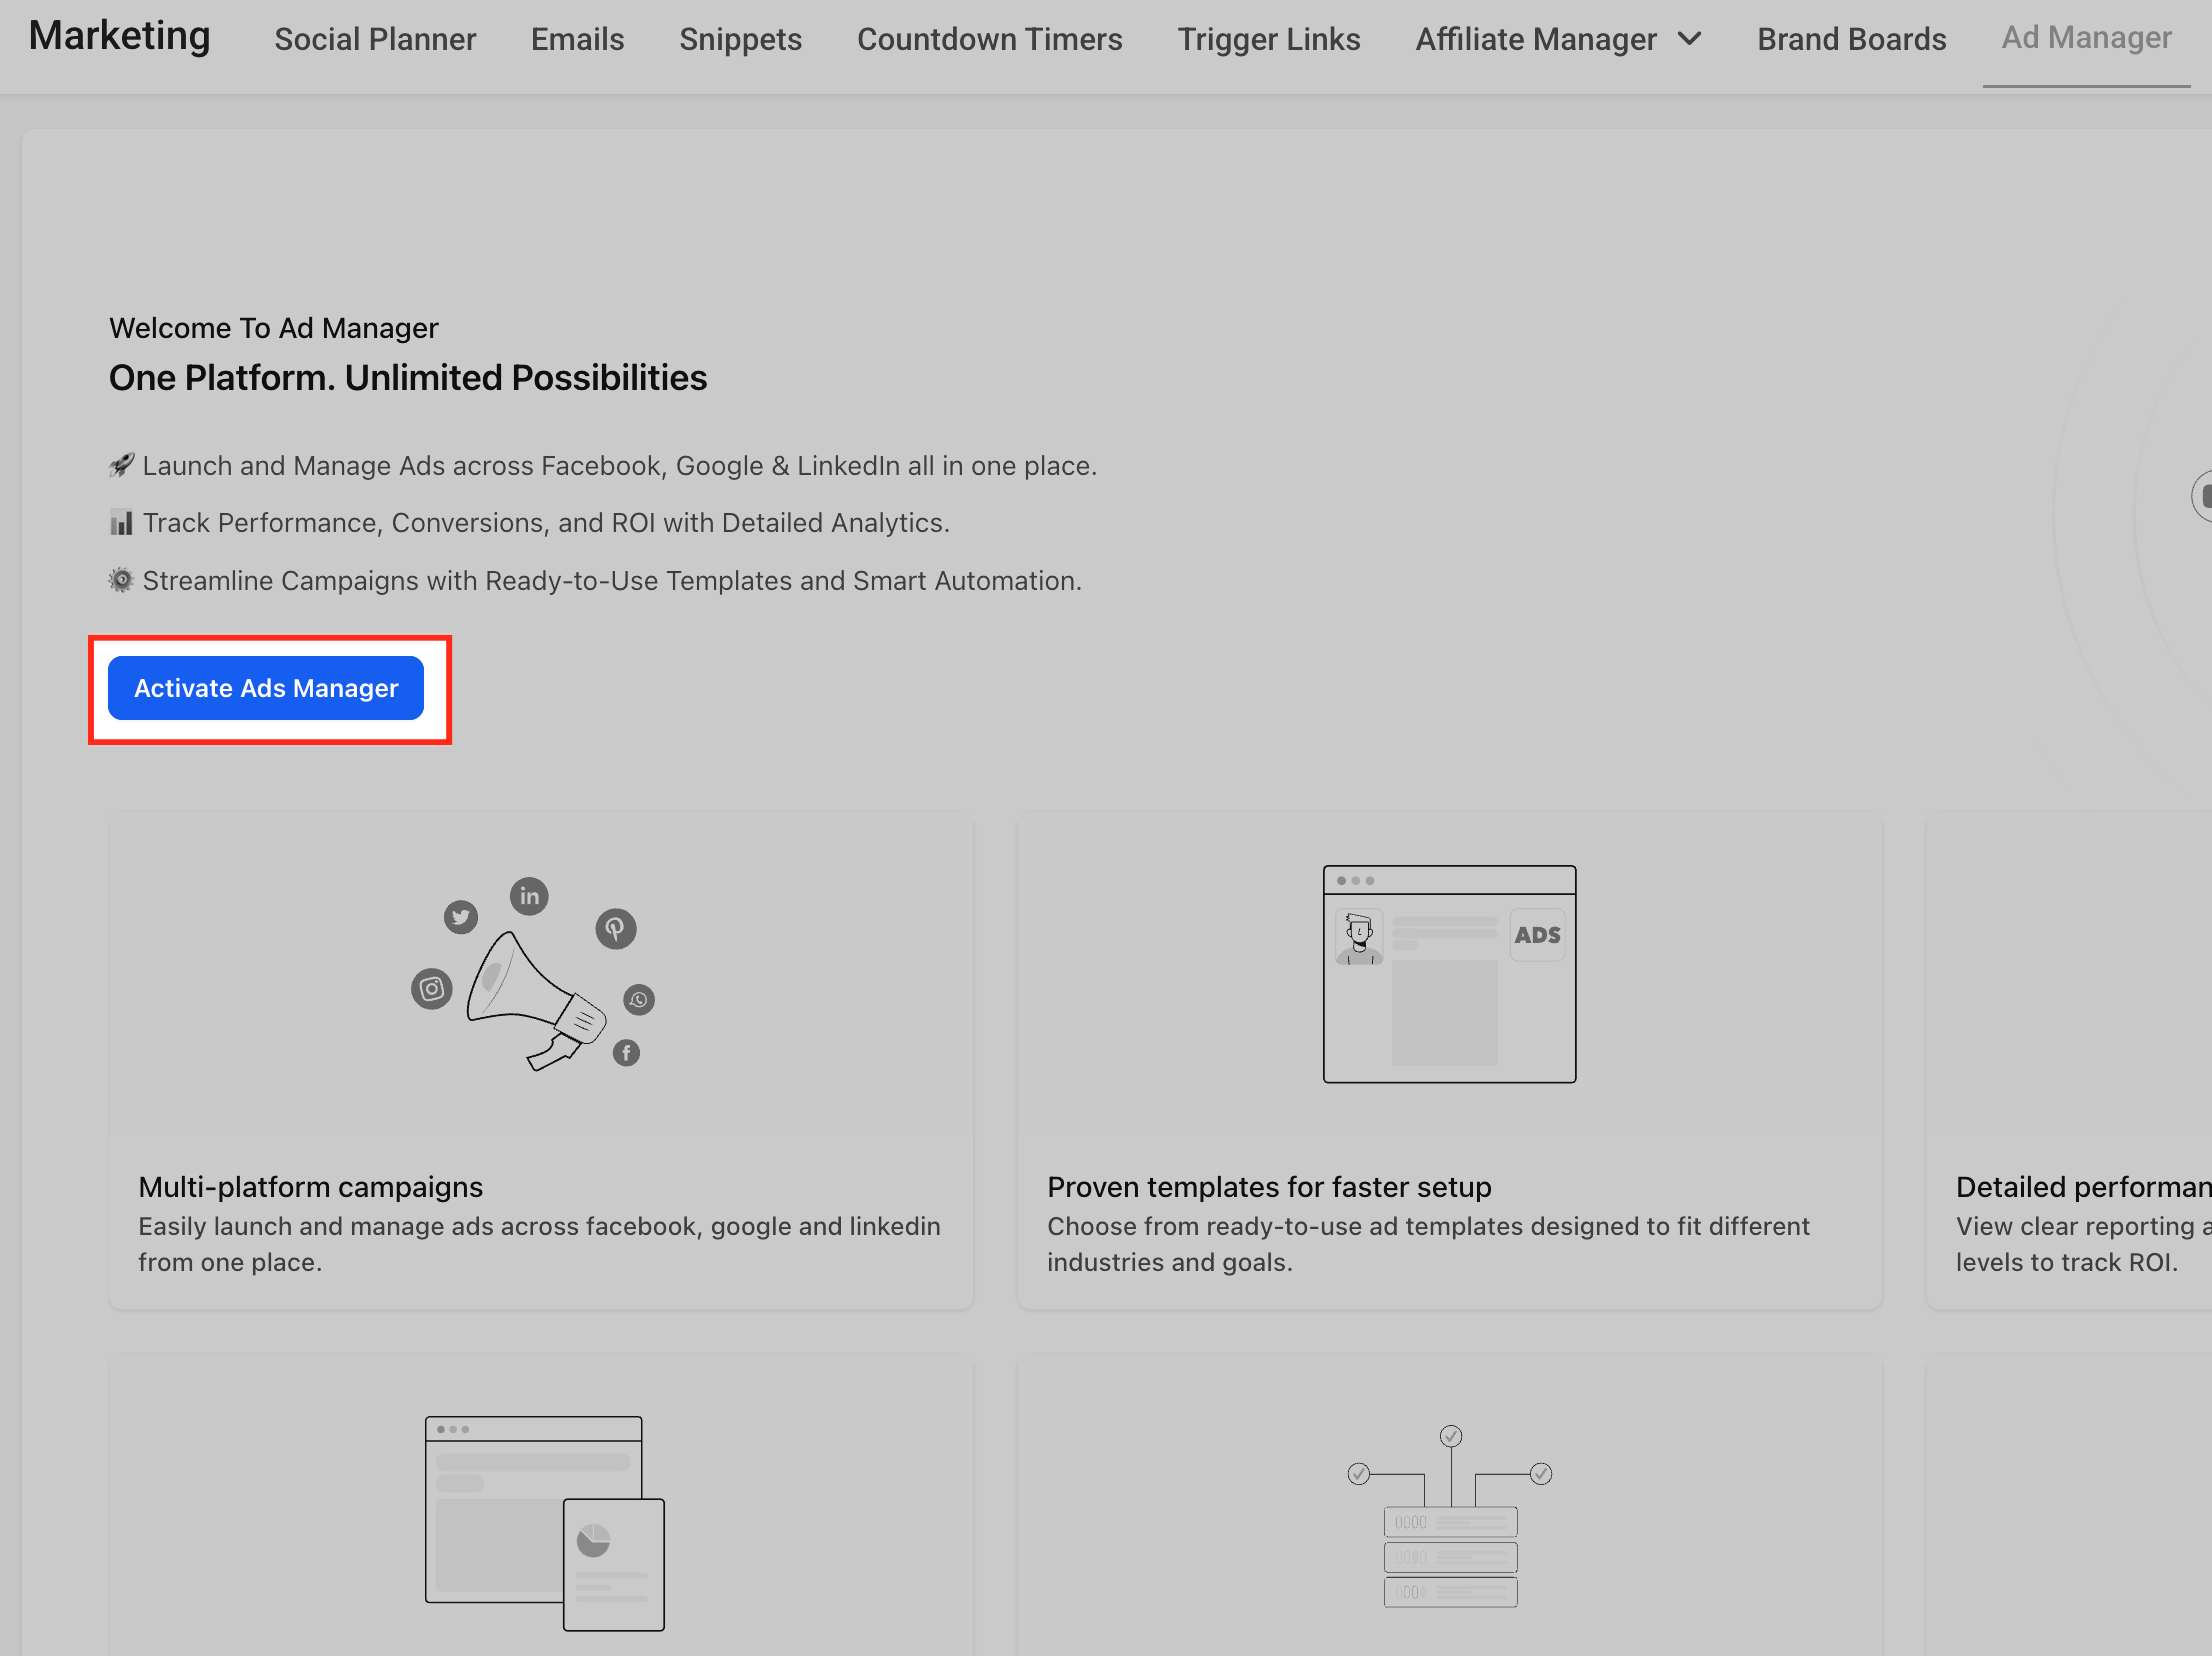
Activation starts the first-time setup flow for Ad Manager in the selected sub-account. This step must be completed before connecting Facebook, selecting a Meta ads account, or managing campaigns.
On the Welcome To Ad Manager screen, click Activate Ads Manager.
Connect Facebook
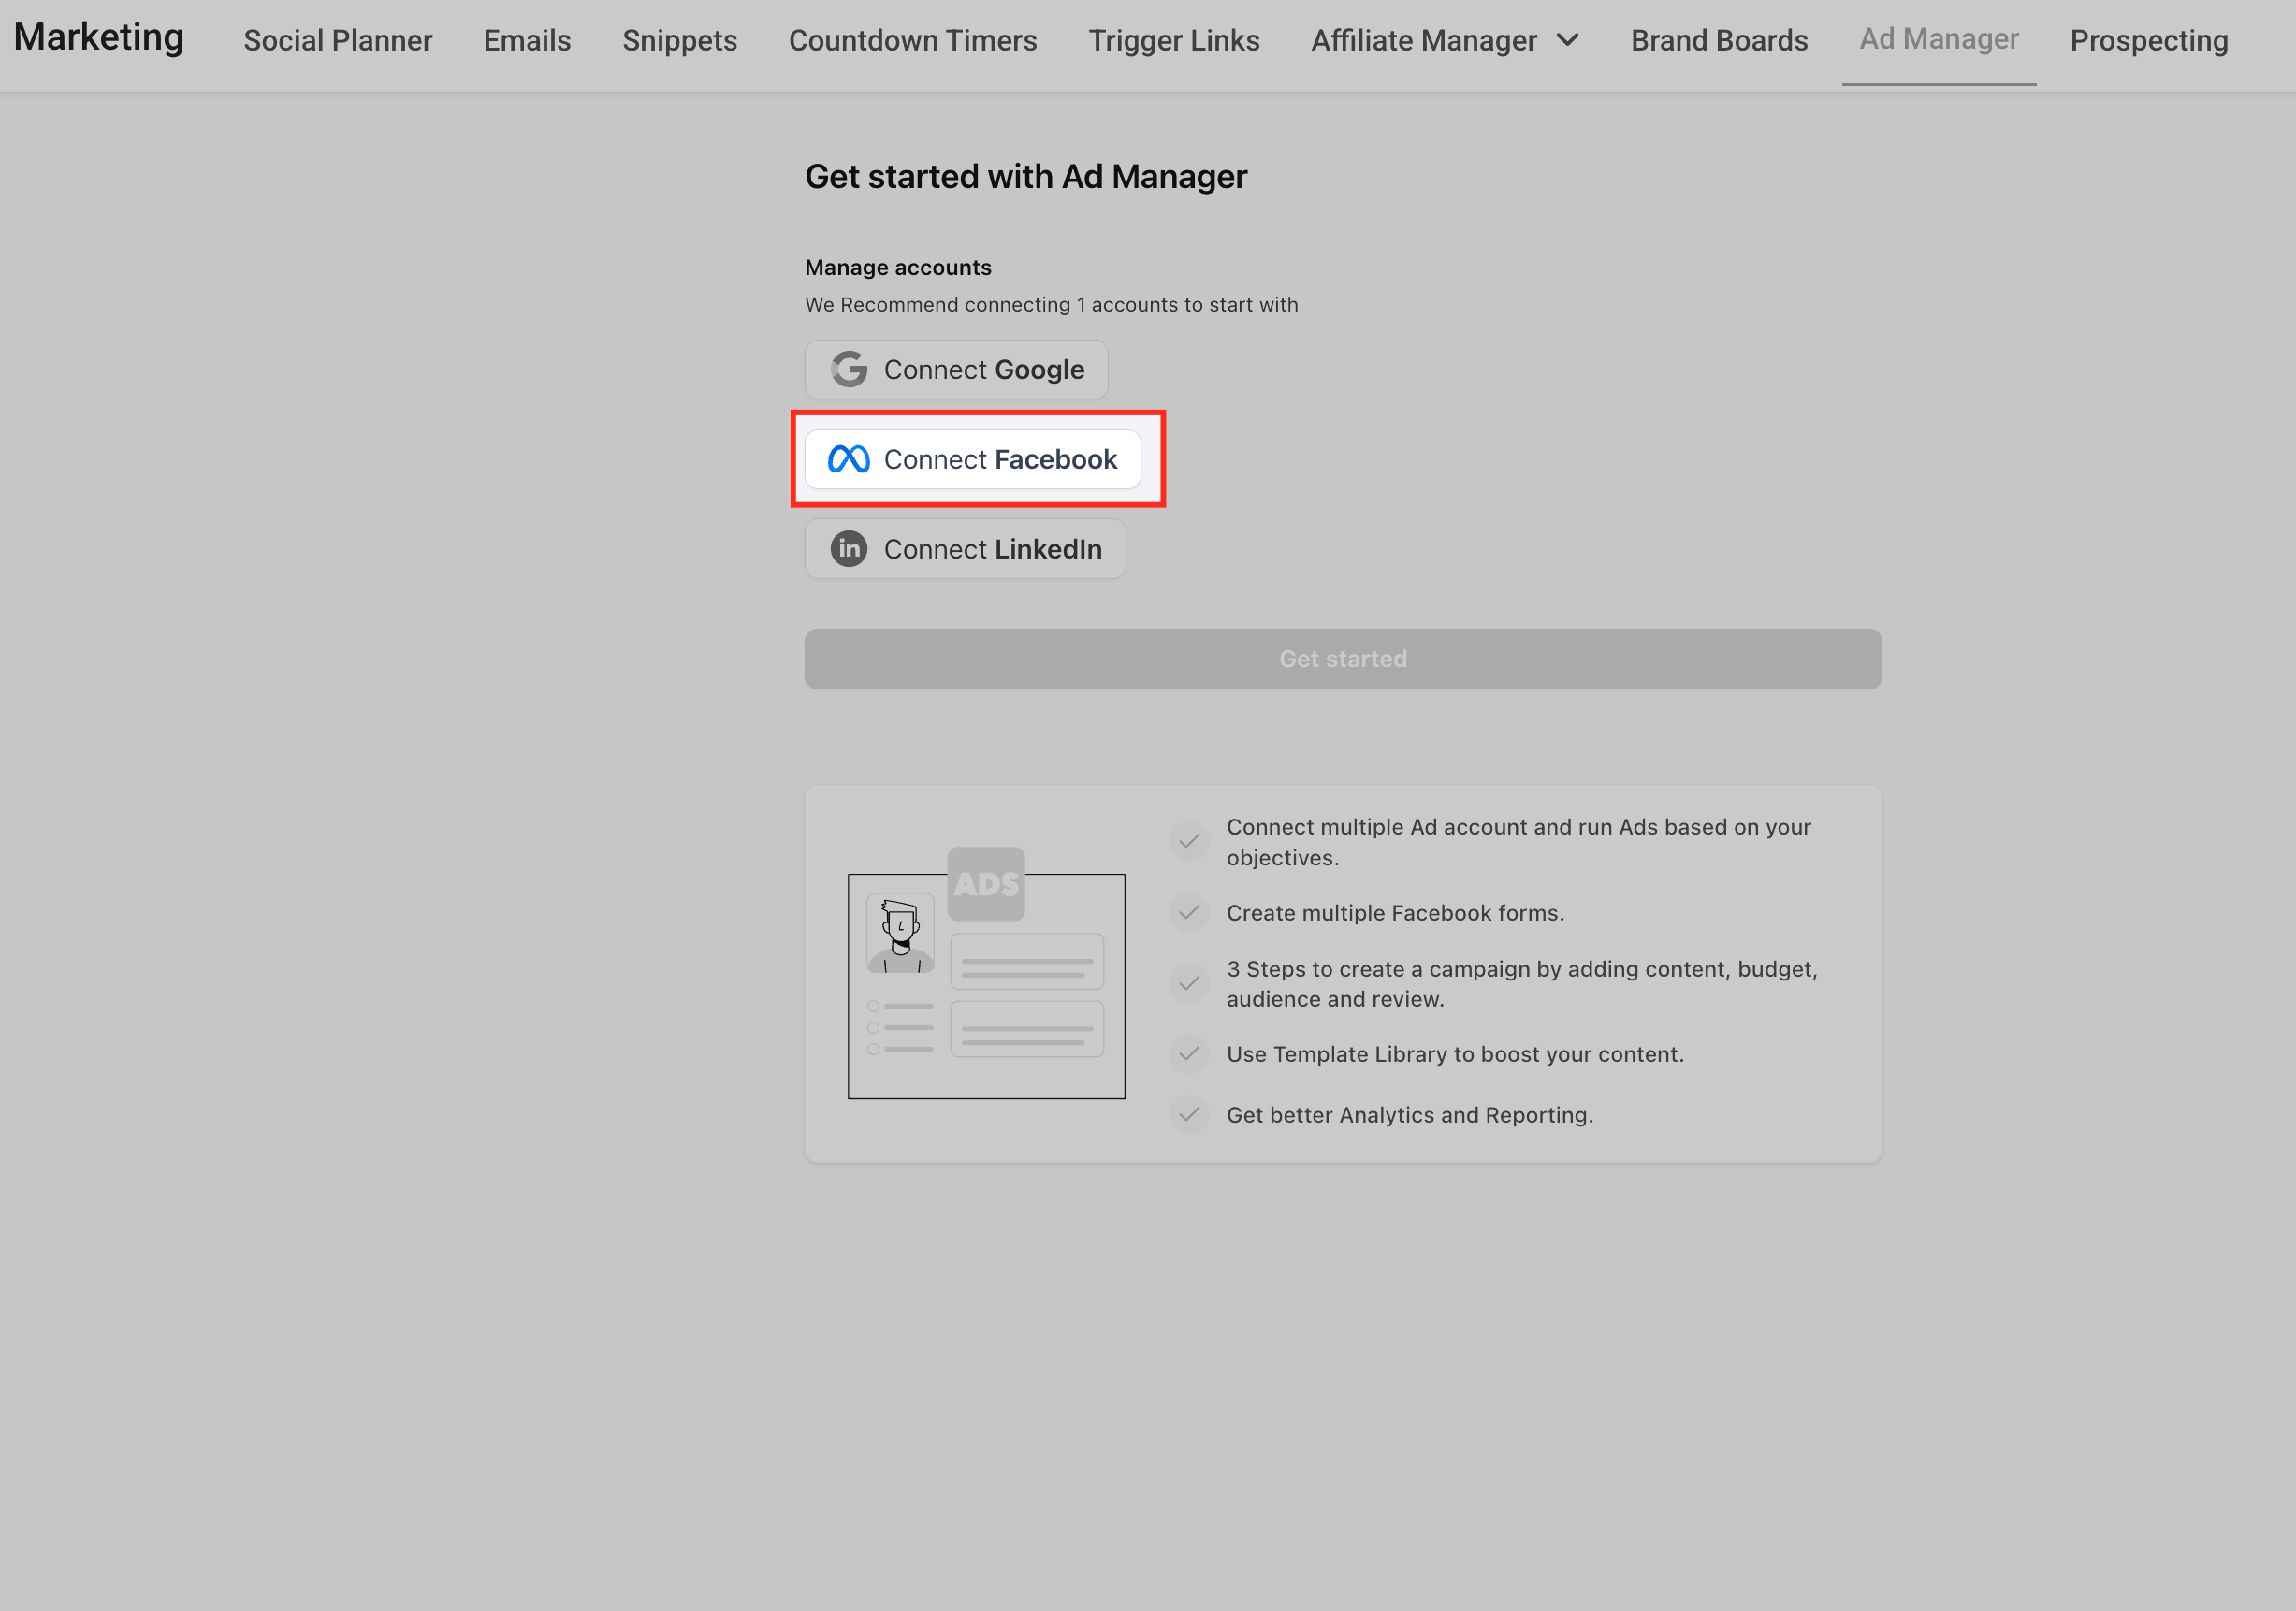
Facebook must be connected before HighLevel can display the available Meta ad accounts and Facebook pages associated with the connected Facebook profile. Granting the requested permissions allows HighLevel to access the Facebook and Meta account details needed for Ad Manager setup.
On the Get started with Ad Manager screen, go to Manage accounts and click Connect Facebook. Complete the Facebook authorization flow and grant the requested permissions.
Select a Meta Ads Account
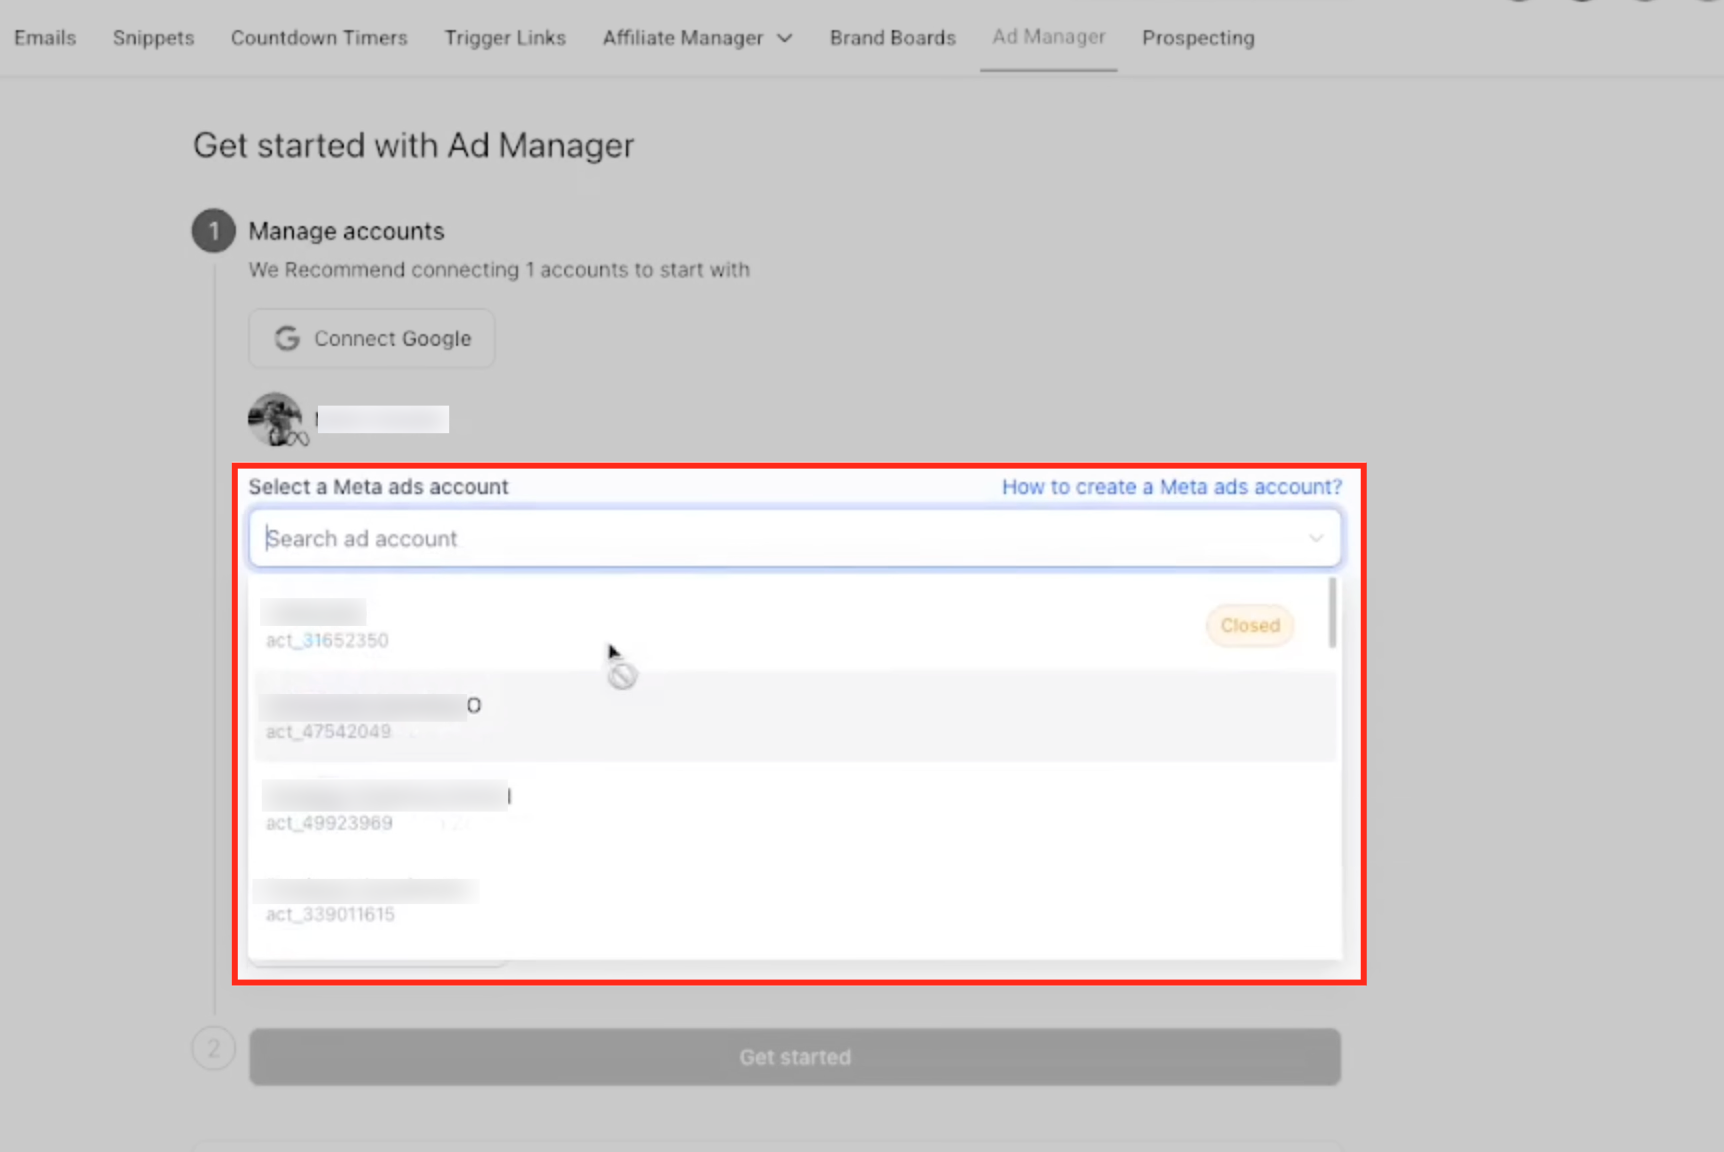
The Meta ads account determines which ad account HighLevel will use for creating and managing Meta campaigns. Select the ad account that should be associated with campaigns created from this sub-account.
After returning to HighLevel, go to Select a Meta ads account. Click the dropdown or search field, then select the Meta ads account you want to use.
Connect a Facebook Page
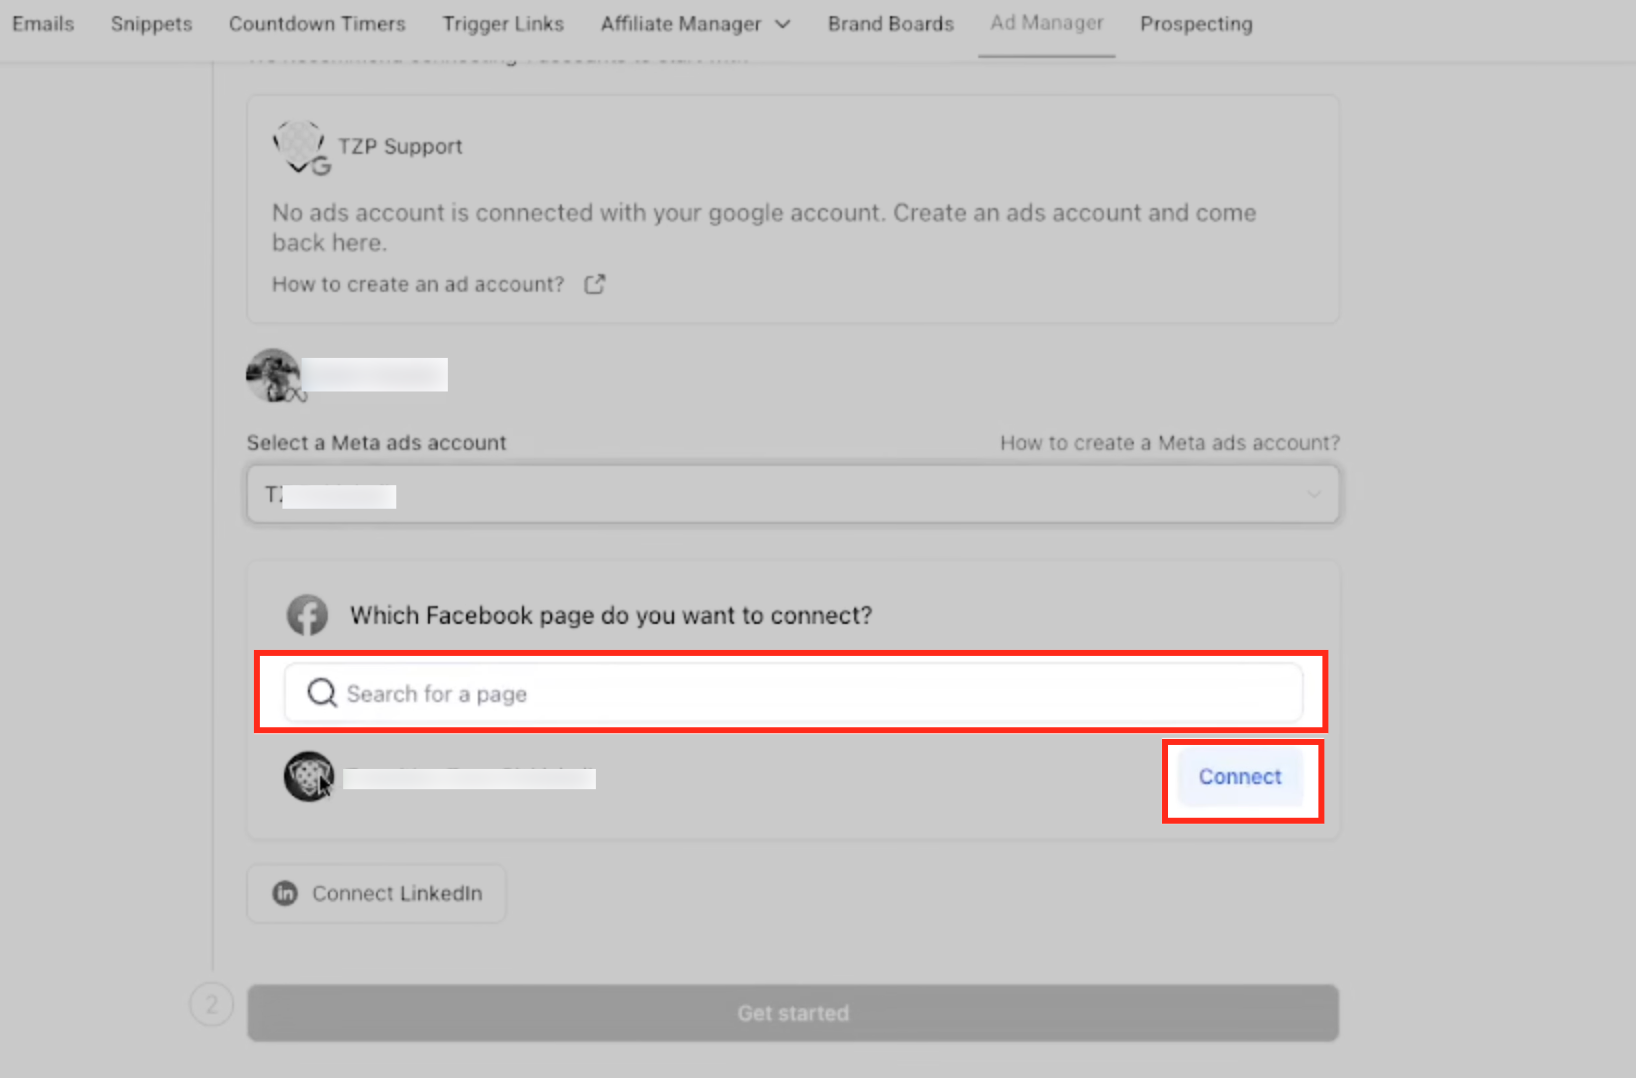
A Facebook page is required before the setup flow can be completed. This page is used during Meta campaign creation and helps HighLevel connect campaigns to the correct Facebook business asset.
Under Which Facebook page do you want to connect?, search for the Facebook page you want to use. Locate the correct page in the list and click Connect.
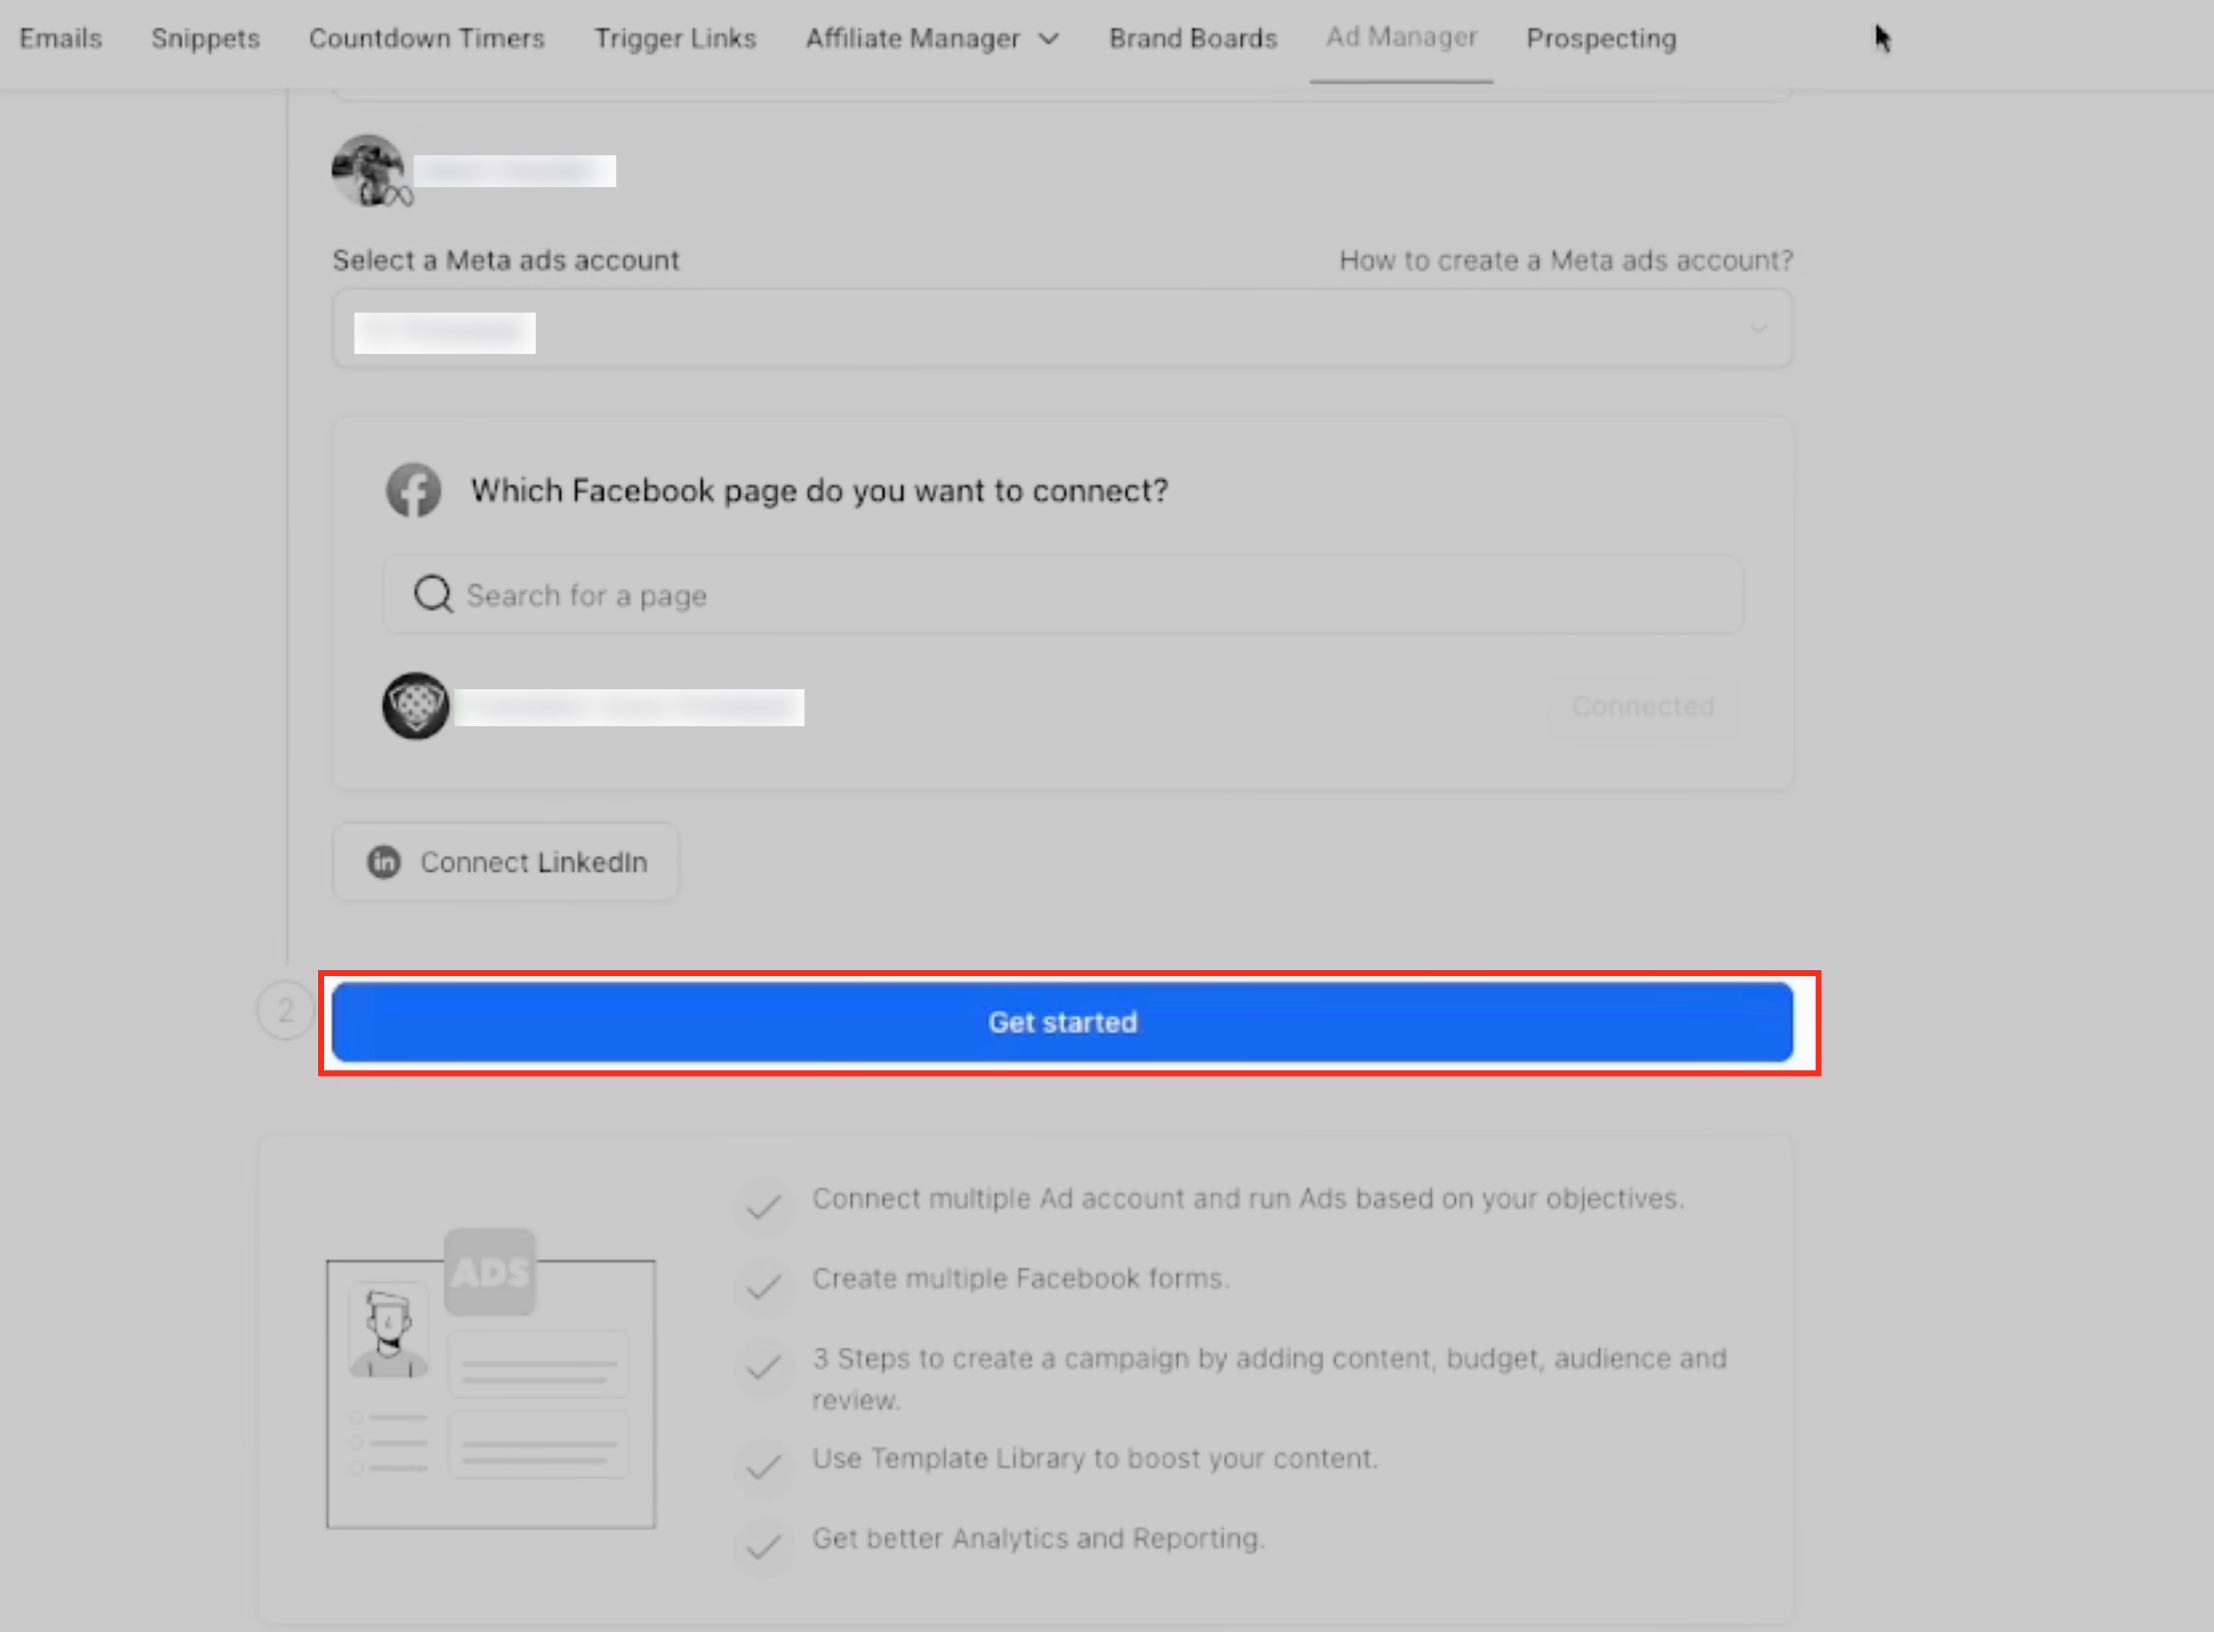
Complete Setup
Once the Facebook page is connected, the onboarding flow is ready to finish. The Get started button becomes available only after the required account and page connections are complete.
Confirm the Facebook page status shows as connected, then click Get started to enter Ad Manager.
Add More Facebook Pages Later
Additional Facebook pages can be connected after the initial Ad Manager setup is complete. Use Platform settings when you need to add another page to the connected Meta ads account without repeating the first-time activation flow.
Go to Marketing > Ad Manager > Settings > Platform settings. Open the Facebook pages area and use the " + Connect Facebook Page(s)" option to add or connect another Facebook page.
Troubleshooting Ad Manager Activation
Most setup issues happen when the connected Facebook profile does not have access to the required Meta assets or when the required account/page selections are incomplete. Use the checks below to resolve common onboarding blockers before contacting support.
Meta ads account does not appear
Confirm that you are logged into the correct Facebook profile and that the profile has access to the Meta Business Manager and ad account. Also confirm that the Meta ads account exists and is available for use.
Facebook page does not appear
Confirm that the Facebook profile has the required access to the Facebook page. If the page is still missing, review the Facebook Business Account connection and permissions article for deeper troubleshooting.
Connect button is unavailable
Make sure a valid Meta ads account has been selected and that the page is available to connect. Missing permissions or incomplete Facebook authorization can prevent the button from becoming available.
Get started button is disabled
The Get started button becomes available only after the required account connection steps are complete. Confirm that a Meta ads account is selected and the Facebook page shows as connected.
Wrong Facebook profile was connected
Log out of the incorrect Facebook profile in your browser, log in with the correct profile, and repeat the connection flow. Confirm that the correct profile has access to the Meta ads account and Facebook page.
Frequently Asked Questions
Q: Do I need to connect a Meta ads account before using Ad Manager?
Yes. A Meta ads account is required before you can complete the onboarding flow and begin managing Meta campaigns in Ad Manager.
Q: Do I need to connect a Facebook page?
Yes. A Facebook page must be connected during onboarding before the Get started button becomes available.
Q: Why can’t I see my Meta ads account?
The Meta ads account may not appear if your Facebook profile does not have access to it, if you are logged into the wrong Facebook profile, or if the account is not available in the connected Meta Business Manager.
Q: Why can’t I see my Facebook page?
The Facebook page may not appear if your Facebook profile does not have the required page access or if LeadConnector permissions were not fully granted during authorization.
Q: Why is the Get started button disabled?
The Get started button remains disabled until the required setup steps are complete. Select a Meta ads account and connect a Facebook page to continue.
Q: Is the Ad Manager subscription the same as Meta ad spend?
No. Ad Manager activation or subscription access is separate from Meta ad spend. Meta ad spend is billed by Meta through the payment method connected to the selected Meta ads account.
Q: Can I change the connected Facebook page later?
Yes, Facebook page settings can be managed after setup. If a default page is already connected, review the related default Facebook page article for more details.
Q: What should I do if I connected the wrong Facebook profile?
Log out of the incorrect Facebook profile, log in with the correct Facebook profile, and reconnect the required Meta assets.
Related Articles
Was this article helpful?
That’s Great!
Thank you for your feedback
Sorry! We couldn't be helpful
Thank you for your feedback
Feedback sent
We appreciate your effort and will try to fix the article