This article explains how HighLevel's WordPress Hosting Setup Guide helps you create a site, import content, connect your domain with SSL, enable security logs, manage users, and view reports.
Use this guided checklist to complete the essentials faster and with confidence. It is perfect for new accounts or anyone standardizing onboarding across locations.
? TABLE OF CONTENTS
? What is the Setup Guide?
The Setup Guide is a built-in checklist that appears after you subscribe to WordPress Hosting. It provides step-by-step tasks, clear CTAs, helpful tooltips, and a progress indicator so you always know what is done and what to do next.
Optional tasks can be skipped. Once all tasks are finished, the guide automatically hides itself to keep your dashboard clean.
✨ Key Benefits
Consistency: Helps teams adopt consistent workflows and achieve faster time-to-value.
Clarity: Track progress easily and reduce guesswork for users.
Faster Starts: Get publishing and measuring sooner.
Custom Experience: Build trust with a firm, guided experience.
Safe Migrations: Move an existing site smoothly and securely.
?️ Setup Guide Flow
The guide walks you through seven essential steps to get your site fully operational:
Step 1: Create Site
Whether you choose to start from a template, clone an existing setup, or do a blank install, this first decision sets your foundation and structure.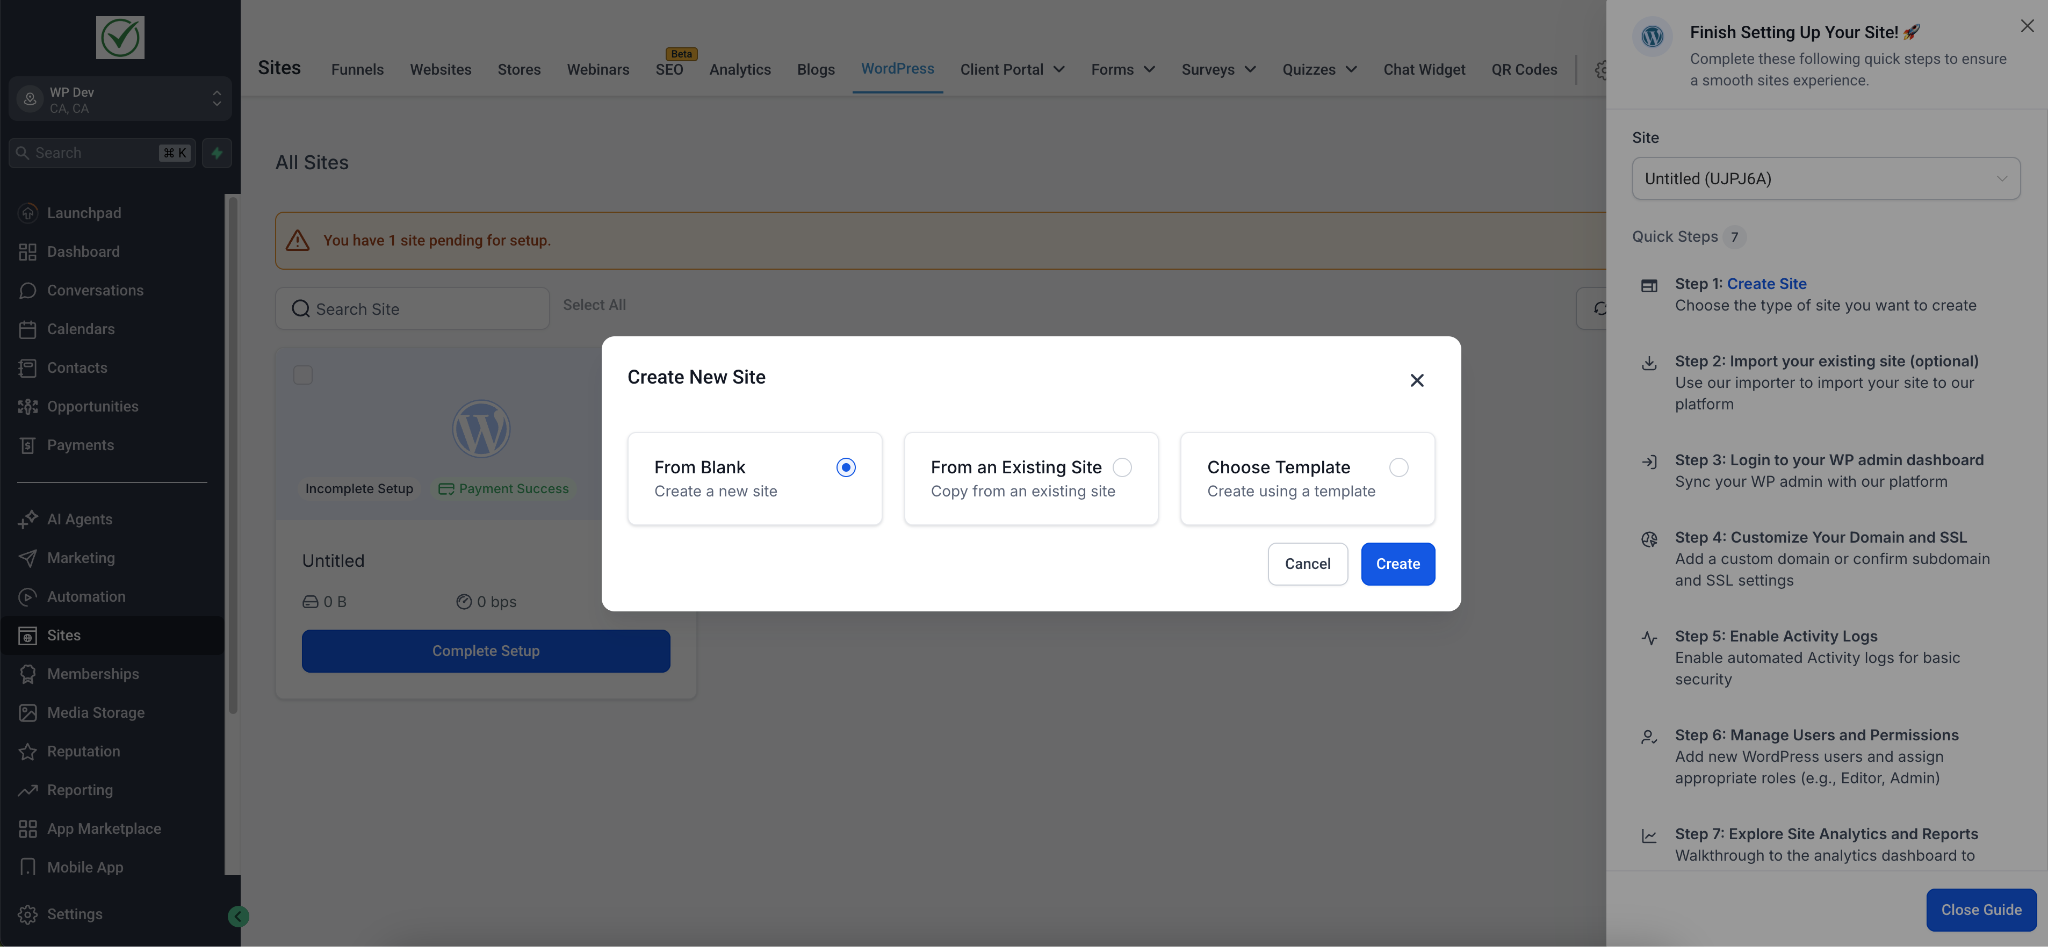
Step 2: Import Content (Site Migration)
If you already have a WordPress site, you can import your existing content, media, and plugins.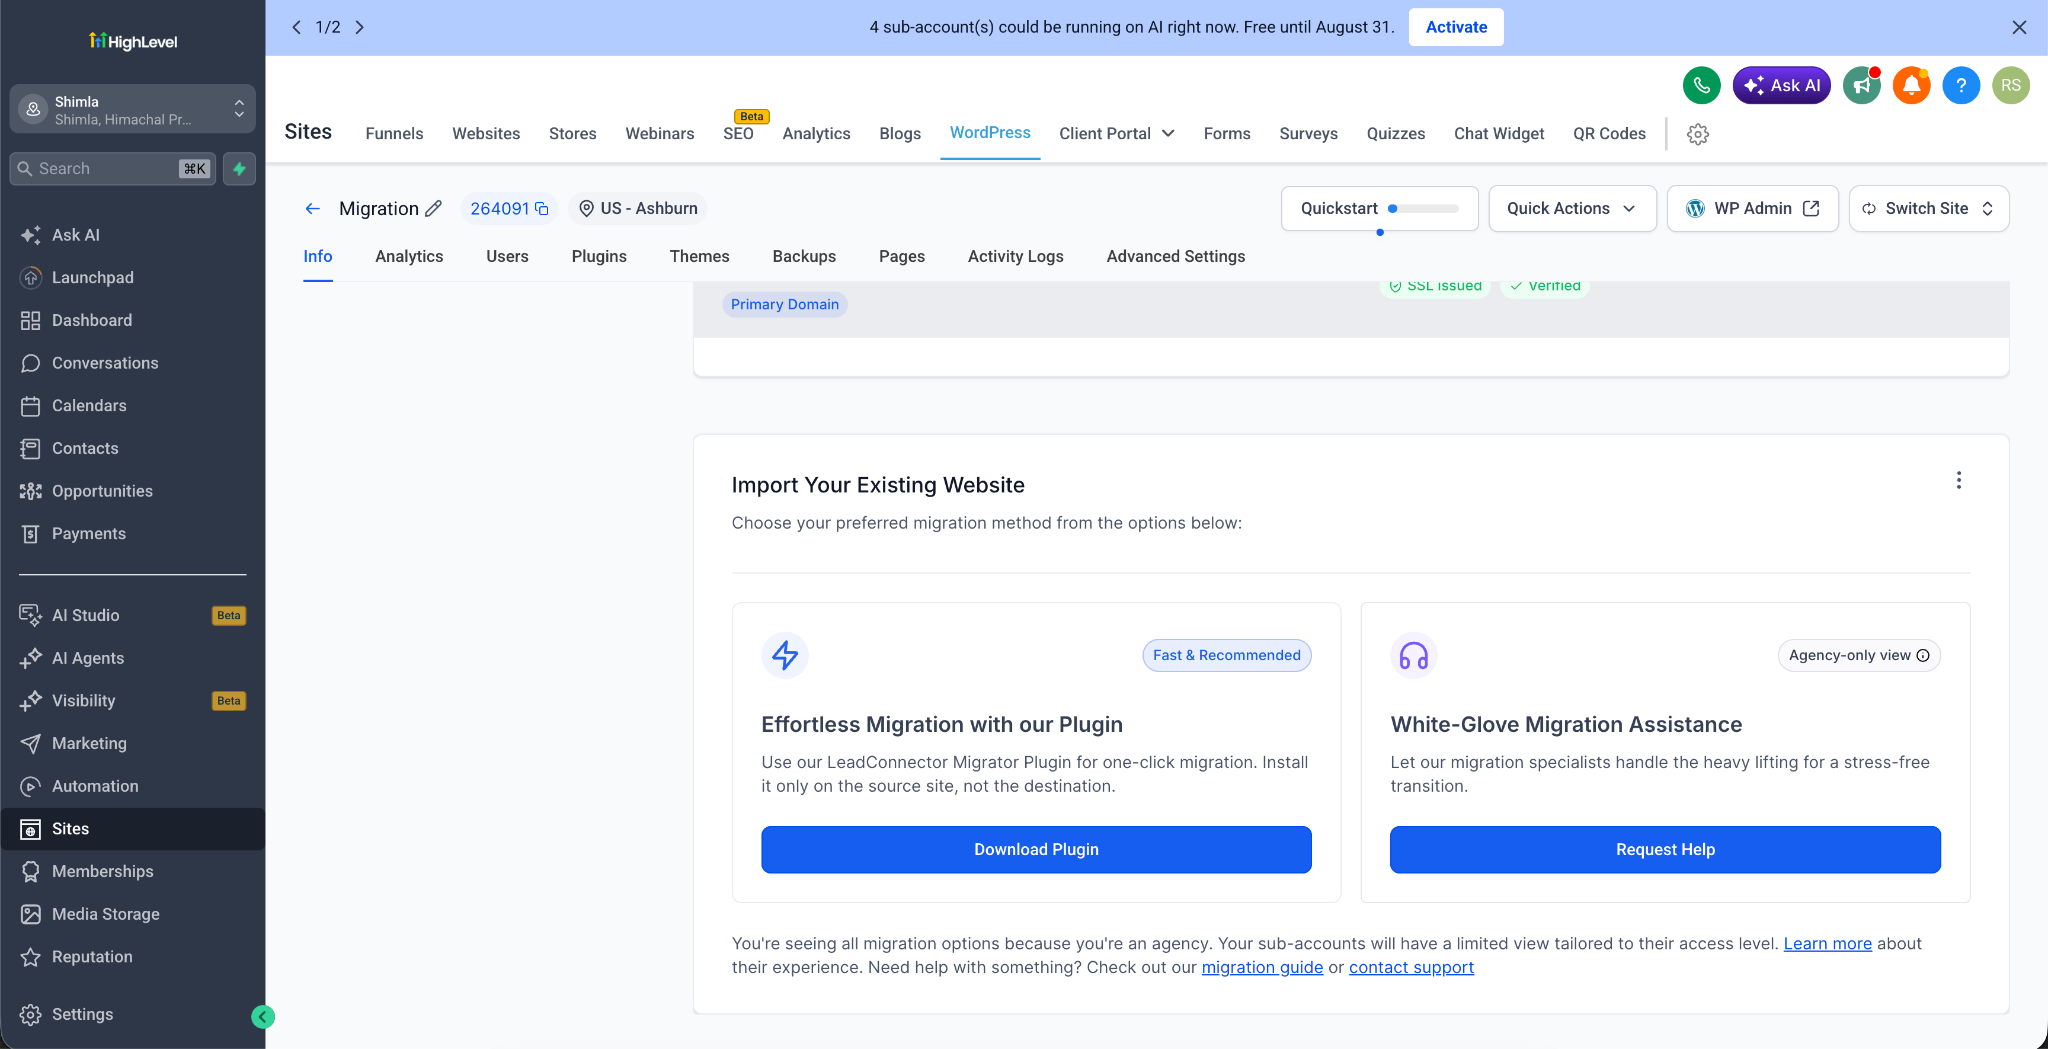
Step 3: One-Click WP Admin Access
Log in to your WordPress backend directly from the HighLevel dashboard. This streamlines your entry point and speeds up management without needing separate credentials.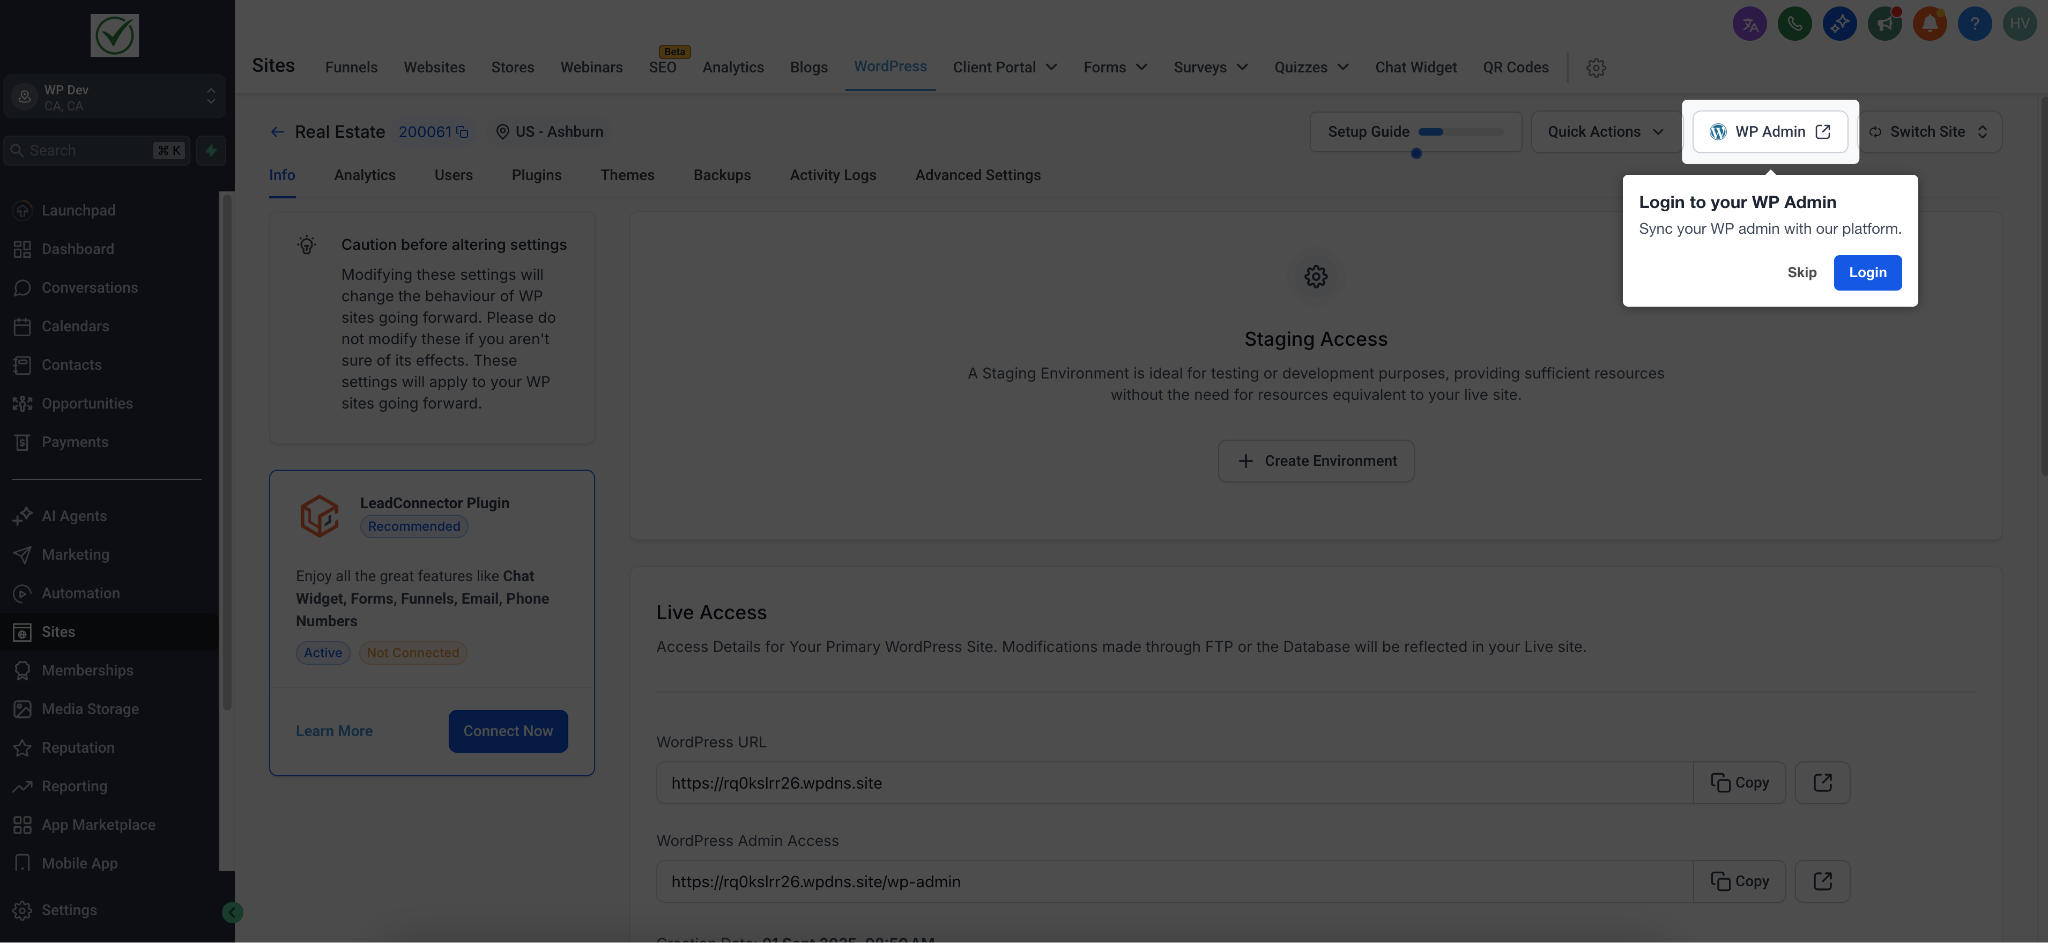
Step 4: Connect Domain & SSL
Establish your primary domain. This step ensures enterprise-grade encryption and security for your visitors via Cloudflare.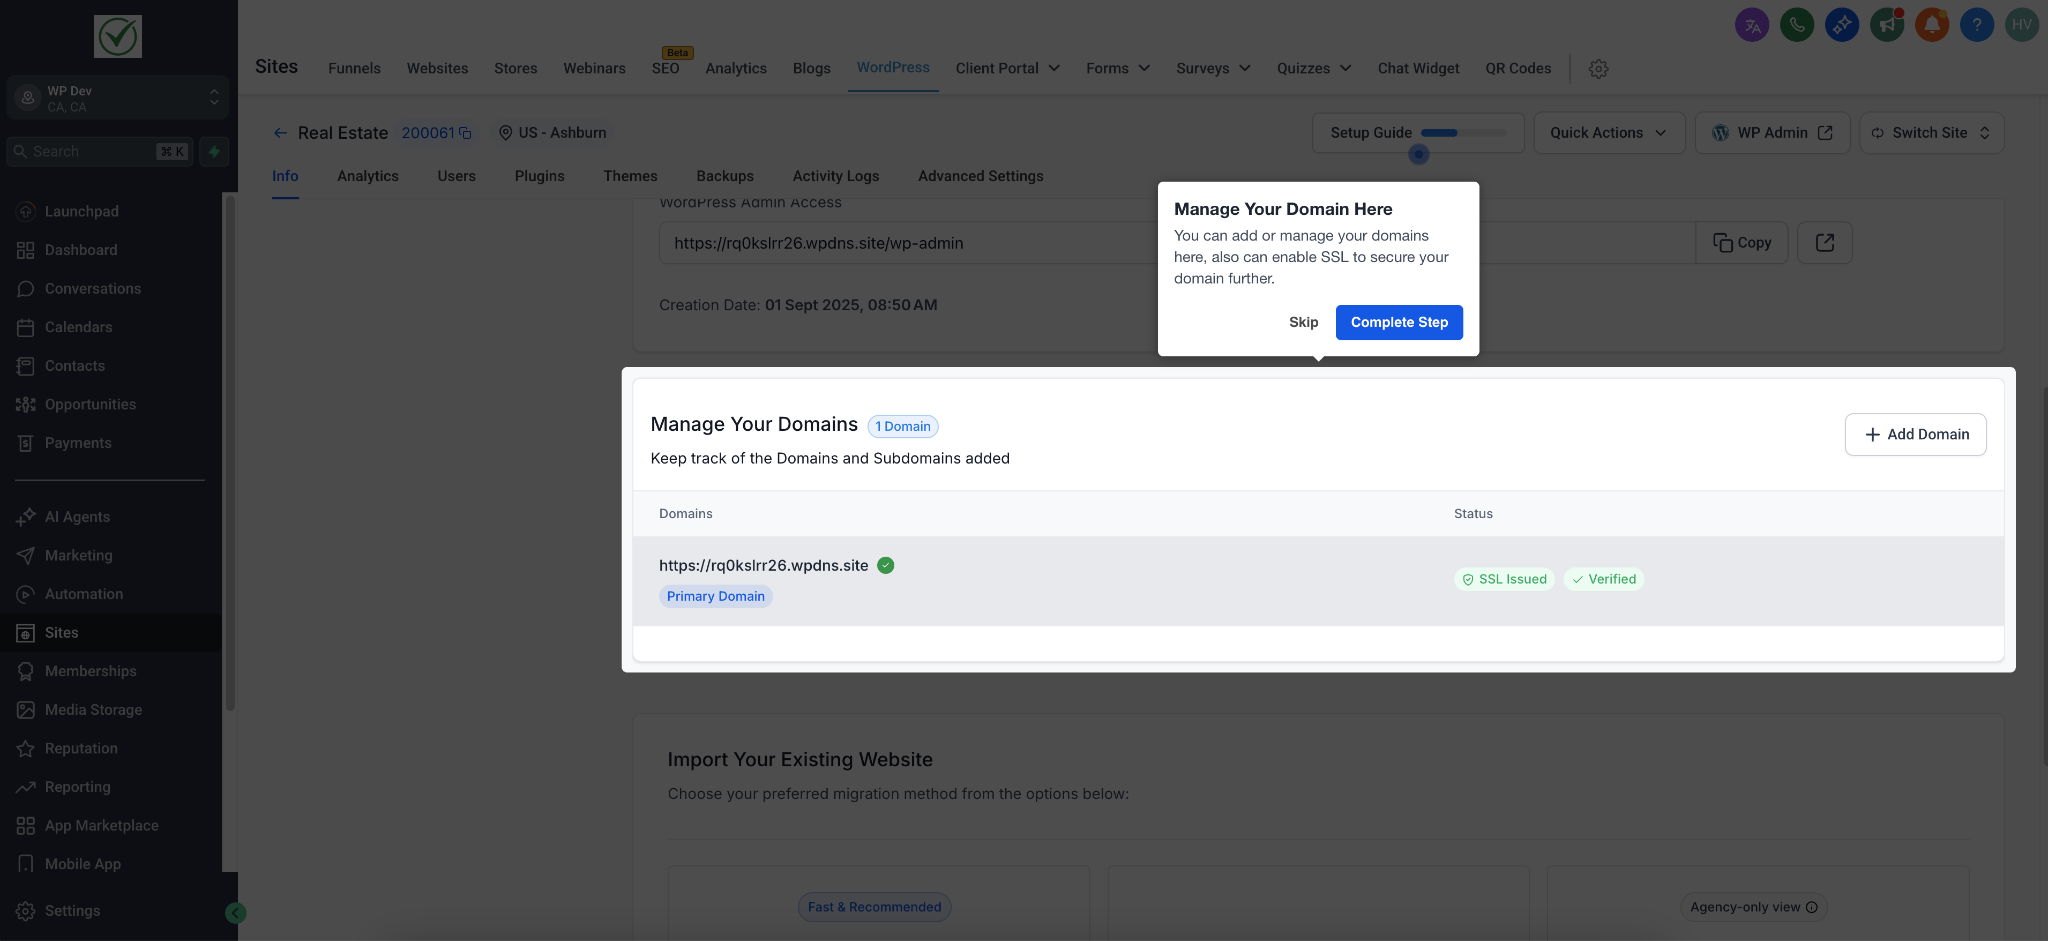
Step 5: Enable Security Logs
Turn on and view logs to get a reliable audit of your site's history of changes. This helps you troubleshoot issues early and keep your site safe.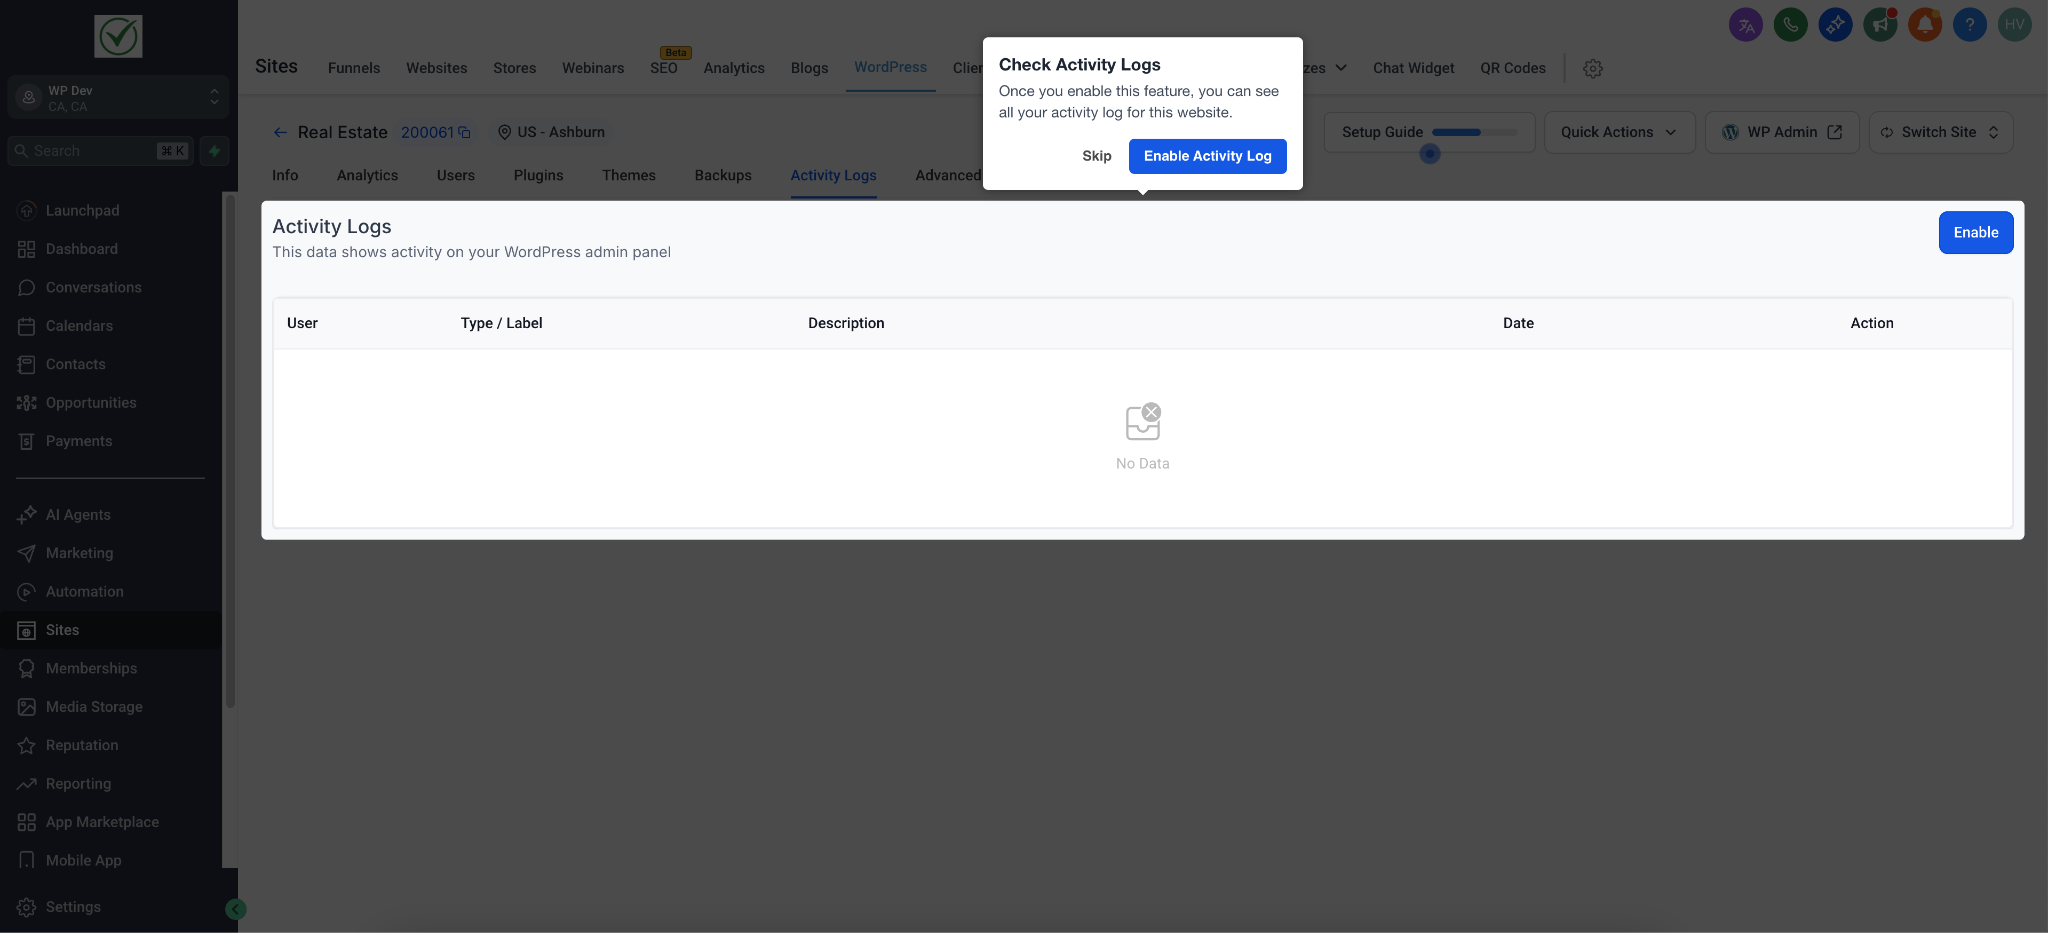
Step 6: Manage User Permissions
Maintain security based on roles and responsibilities. Reserve full admin access only for those who truly need full control over the site.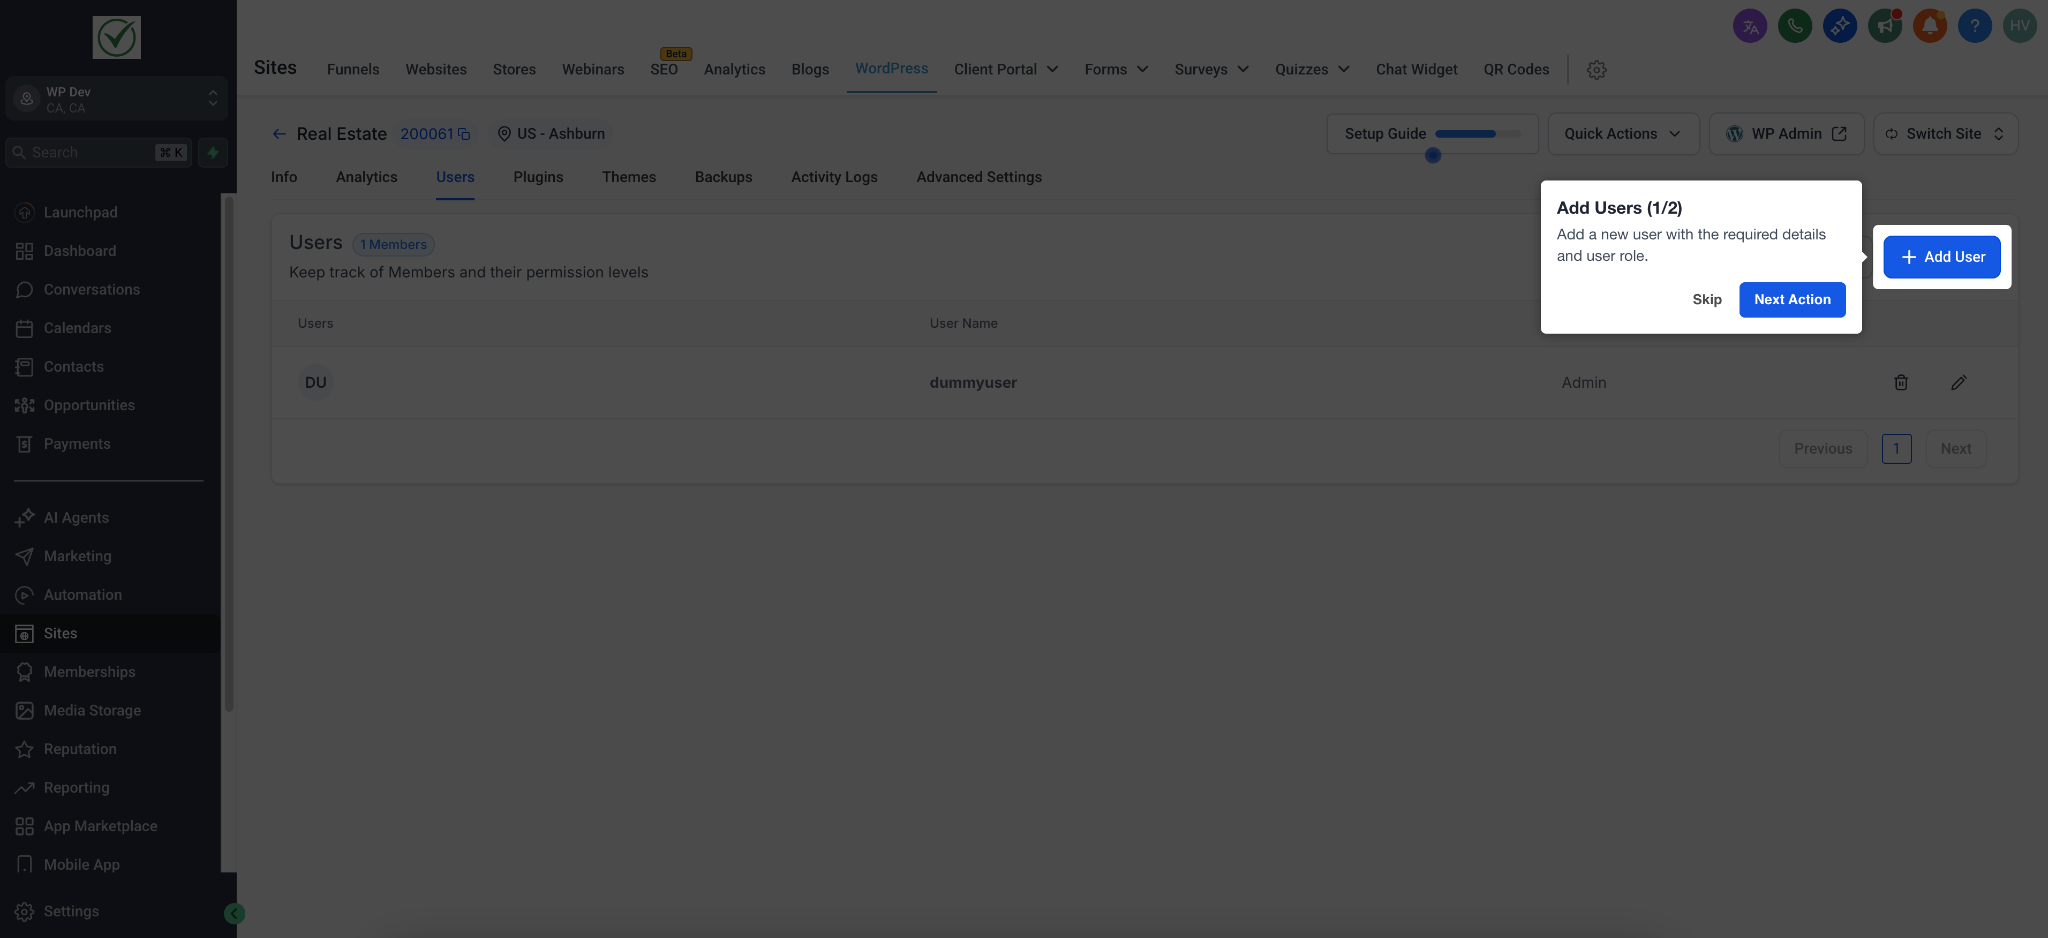
Step 7: View Analytics
Once you launch, view traffic and engagement analytics by enabling the Uptime Monitoring under Analytics > Visitors Report. This surfaces priority data so you can see clear paths to optimizing your site.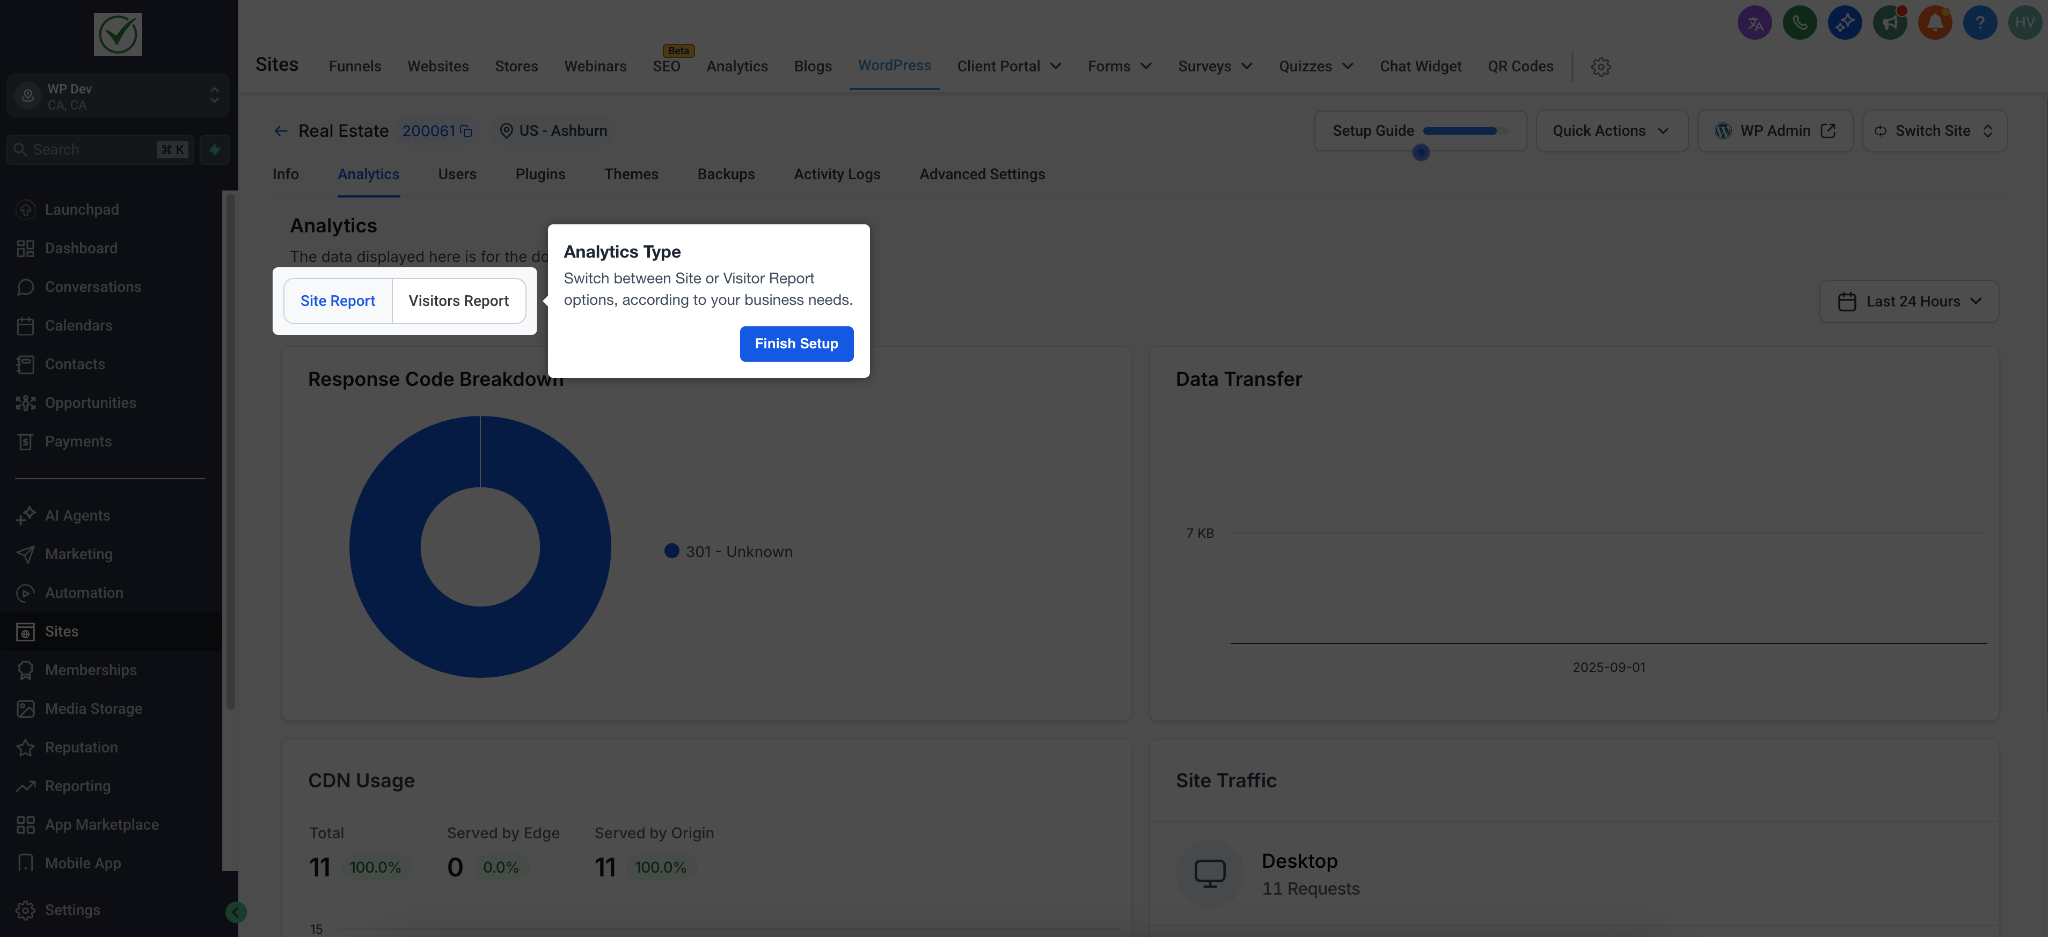
?️ How To Use the Setup Guide
Go to your newly provisioned WordPress site dashboard.
The guide will automatically surface priority tasks in the proper order.
Click Continue on the active prompt to proceed through the remaining steps until completion.
❓ Frequently Asked Questions
Q: Who can see the setup guide?
A: Agency admins and authorized users with WordPress management permissions can view and interact with the guide.
Q: Can I bring the setup guide back once it's finished or skipped?
A: Yes! You can easily toggle or re-open the guide from your dashboard if you need to review the steps again.
Q: What should I do during DNS propagation?
A: DNS changes can take a few hours to propagate globally. Simply wait for the propagation to complete before attempting to verify your SSL and domain connection.
Q: Does the migration process use my plan's resources (storage, bandwidth, etc.)?
A: Yes, the imported content will count toward your plan's allocated storage limits. However, unmetered bandwidth ensures your site stays fast and available once live.
Was this article helpful?
That’s Great!
Thank you for your feedback
Sorry! We couldn't be helpful
Thank you for your feedback
Feedback sent
We appreciate your effort and will try to fix the article