Recognizing the significance of Service Calendars becomes imperative when dealing with a range of services that necessitate diverse availabilities and resources. For Dog Groomers offering different services, creating Service Calendars ensures effective scheduling and resource allocation.
TABLE OF CONTENTS
- What is a Service Calendar?
- Key Benefits of Service Calendars
- Adding Staff Members and Availability
- Creating Groups for MedSpa Services
- Creating Service Calendar
- Edit Existing Service Calendars
- Creating Service Menu
- Frequently Asked Questions
What is a Service Calendar?
Service Calendars are scheduling tools that let you define specific services, assign staff, and allocate resources like rooms and equipment. For a dog grooming business, this means you can create calendars for services such as full grooms, bath & brush, and nail trims—each linked to the right groomer, grooming station/tub, and tools. This ensures customers can book easily while your team avoids scheduling conflicts.
Key Benefits of Service Calendars
Service Calendars help dog groomers streamline scheduling, improve efficiency, and enhance customer experience.
- Automated Scheduling: Customers book appointments without calling the salon.
- Resource Management: Assign grooming stations/tubs and tools (clippers, shears, dryers) to prevent double bookings.
- Staff Scheduling: Define groomers’ working hours for accurate availability.
- Service Grouping: Organize offerings into groups like “Bath & Brush” or “Full Grooming.”
- Flexible Menus: Offer multiple services in one booking (e.g., bath + nail trim).
- Professional Branding: Add images and custom colors for a polished booking page.
Adding Staff Members and Availability
Adding staff is the foundation of service calendars since no service can be assigned without groomers set up.
1. Click Add User
From your subaccount dashboard, Navigate to Settings → My Staff → Add User.

2. User Info and Permissions
Enter the groomer’s name, email, extension. Set user permissions (limit access if needed). Define availability (e.g., Mark works Mon, Wed, Fri, 9am–5pm; Henry works Tue–Sat, 11am–7pm). Click Save.
to learn more about user access you can click here

Creating Groups for Dog Grooming Services
Groups act as categories to organize services. Each group has its own booking link.
1. Open Calendar Settings
From the Calendars menu, click on Calendar Settings at the top-right corner. This is where you access all configuration options for groups, services, and preferences.

2. Enable Service Menu
Go to Preferences → Account Preference and toggle the Service Menu option on. This activates the service-based booking system so you can create service calendars and menus.

3. Start Group Creation
In the Calendars tab, click + New Group on the left sidebar. Groups help you organize related services such as full grooms, bath & brush, or nail trims.

4. Add Group Details
Enter the Group Name, Description, and URL (slug) in the pop-up form. Select a template type (Classic or Neo) and click Create to save the group.

Creating Service Calendar
1. Create Service Calendar
Select a group from the left sidebar and click Create Calendar. This begins the setup of a new service calendar for a specific dog grooming service like a full groom or bath & brush.

2. Select Service Booking
Navigate to Calendars → Service Menu → Create Service Menu. From the list of calendar types, click Service Booking. This option is designed for service-based businesses like dog groomers, allowing clients to book specific services such as full grooms or nail trims.

3. Enter Service Basics
Fill out the service details including Service Name, Assigned Staff, Custom URL, Service Duration, and Availability. This step ensures the calendar is tailored to the specific dog grooming service being offered. Click Advanced Settings for further customization.
Clicking Advanced Settings expands additional configuration panels like Service Details, Availability, Forms & Payment, Notifications, Customizations, and Rooms & Equipment. These options let you fine-tune the booking flow, add branding, manage payments, and assign resources such as grooming stations/tubs or equipment.

4. Service Details Setup
In the Service Details tab, you define the information that customers will see when booking this service. Start by uploading a Service Logo to give the booking page a professional look. Enter a clear Service Name (e.g., Full Groom, Bath & Brush, Nail Trim) and add a Description that explains what the service includes, such as “60-minute full groom including bath, haircut, and blow-dry.”
Next, assign the service to the right Group (e.g., Full Grooming) so it stays organized with related services. Finally, create a Custom URL — this becomes part of the booking link you’ll share with customers, making it easier to recognize and share (e.g., /full-groom-booking).

5. Appointment & Staff Setup
In this section, you configure how the booking will appear to customers and staff. Set the Appointment Invite Title, which will show up on both customer and staff calendar invites (you can use placeholders like {{contact.name}} to personalize it). Under Team Members, assign one or more groomers who are qualified to perform this service - customers will only see time slots for those staff members.
Then, define a Meeting Location: this could be the grooming salon itself, a specific grooming station or even a custom video link if needed. Lastly, choose a Meeting Color to visually distinguish this service on the internal calendar view, making it easier for staff to quickly identify the type of appointment.

6. Assign Room
In the Rooms tab, you connect a physical space in your dog grooming salon to the service. A room can represent a grooming station, bathing area, or drying station where the service is performed. For example, you might assign “Grooming Station 1” for full grooms and “Bathing Tub” for bath & brush services. Assigning a room ensures that once a customer books the service, that specific space is reserved and cannot be double-booked.This is especially useful for clinics with limited shoot spaces, as it prevents multiple appointments from being scheduled in the same spot at the same time.

7. Assign Equipment
In the Equipment tab, you link the tools or resources needed to complete the service. Equipment can represent items like clippers, high-velocity dryers, or grooming tool kits, and you can specify the available quantity. For example, you may assign “High-Velocity Dryer” to a bath & brush service or “Clipper Kit” to a full groom. When a customer books the service, the system automatically reserves the necessary equipment, making sure it isn’t overbooked across multiple appointments. This helps maintain smooth operations by guaranteeing that all required tools are available for every appointment.

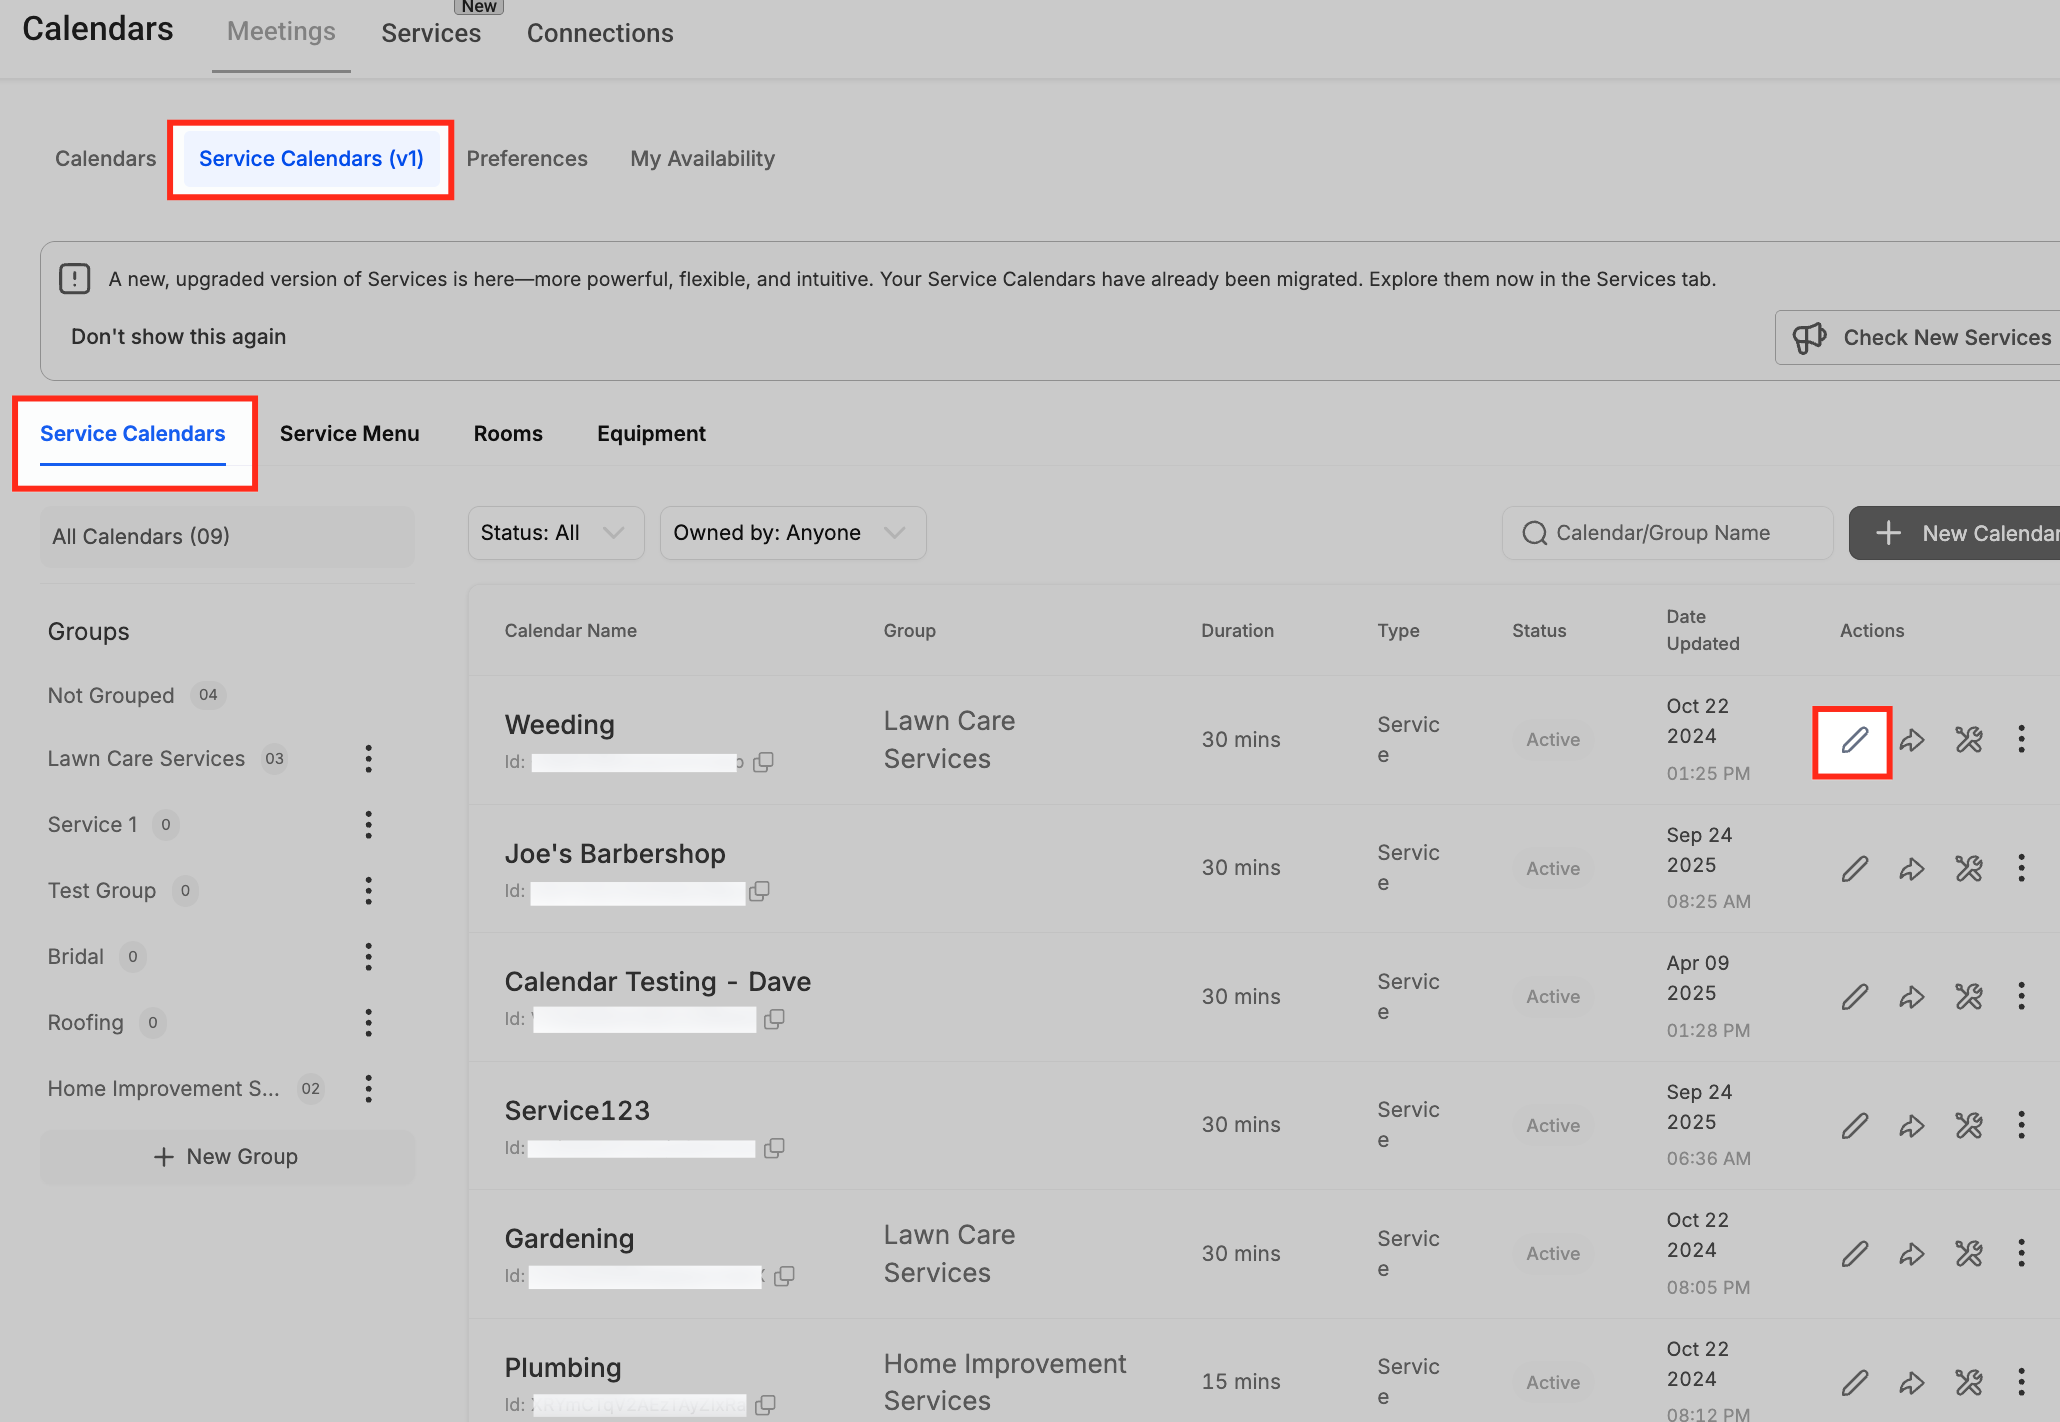
Edit Existing Service Calendars
To update an existing service calendar, go to Service Calendars (v1) under the Meetings tab. Find the calendar you want to edit from the list and click the pencil icon under the Actions column. This will reopen the calendar settings, allowing you to adjust details such as service name, assigned staff, availability, notifications, or resources without having to recreate the calendar.
Creating Service Menu
The Service Menu lets you display multiple services or groups in a single booking page.
1. Open Service Menu
Go to Meetings ➜ Service Calendars (v1) ➜ Service Menu. This brings you to the Service Menu area where customer-facing menus are created and managed.

2. Create Service Menu
Click + Create Service Menu in the top-right. This starts a new, customer-facing menu that will display your dog grooming services.

3. Menu Details
Complete Service Menu name, Description, and the Service URL slug; choose the Form and toggle the Consent checkbox if needed. These settings define what customers see at the top of the menu and the link you’ll share.

4. Enable Options
Under Additional Options, toggle Enable Add Guests, Enable Multiple Service Selection, and Enable Staff Selection. These controls let customers book for guests, select multiple services (e.g., bath + nail trim), and pick a preferred groomer.

5. Select Services
Click Select Services and choose the groups/calendars to include in this menu. Only services you’ve already created and assigned to groups will appear; expand a group to check specific services.

6. Arrange Order
Open Arrange your services, then drag the handles to reorder how groups/services appear. Place your most popular items (e.g., Full Groom, Bath & Brush) at the top to improve conversions.

Now, when you give your customers the link to your Service Menu, it should look like this.

Mastery of service calendars within High Level is crucial for businesses offering a diverse range of services. This detailed guide ensures that users can adeptly create, customize, and present their Service Calendars, providing a streamlined experience for both businesses and clients. Armed with this knowledge, businesses can optimize their scheduling processes and elevate customer satisfaction.
Frequently Asked Questions
Q: Why can’t I save a service calendar?
You must assign at least one staff member before saving.
Q: Why are no time slots showing for a service?
Check staff availability, assigned rooms, and equipment.
Q: Can clients book multiple services at once?
Yes, enable multiple services in the Service Menu settings.
Q: Can I take deposits for services?
Yes, connect Stripe or PayPal under Forms & Payment.
Q: How do I prevent double-booking grooming station/tub or equipment?
Assign rooms and equipment to each service.
Q: Can clients pick their preferred groomer?
Yes, enable Staff Selection in the Service Menu.
Q: How do I list all services on one page?
Use the Service Menu to combine multiple calendars.
Was this article helpful?
That’s Great!
Thank you for your feedback
Sorry! We couldn't be helpful
Thank you for your feedback
Feedback sent
We appreciate your effort and will try to fix the article